

You know the moment. The car looks clean enough from the driveway, then the sun hits the windscreen at the first light on the Gardiner or heading west in the evening, and suddenly every smear, haze line, and mystery fingerprint lights up like it's been waiting to embarrass you in traffic.
That often leads to searches for how to clean car windows. Not because the glass is filthy in an obvious way, but because it's almost clean. Almost is the problem. On automotive glass, a tiny bit of residue is all it takes to turn a clear view into glare and distraction.
Around the GTA, windows also deal with a rough mix of road film, winter salt, slush spray, construction dust, and interior haze from dash plastics. So if your usual spray-and-wipe routine keeps leaving streaks, that doesn't mean you're cursed. It usually means the method is fighting the conditions.
A proper streak-free finish isn't magic. It's tools, towel control, product choice, and doing things in the right order. After years of seeing what works on daily drivers, ride-hail cars, family SUVs, and winter-beaten commuters, the pattern is always the same. Good glass cleaning is less about scrubbing harder and more about avoiding the mistakes that create the smear in the first place.
Table of Contents
- The Frustrating Truth About Streaky Windows
- Your Essential Window Cleaning Toolkit
- The Professional Exterior Window Method
- Conquering the Awkward Interior Glass
- Troubleshooting and Tips for Ontario Drivers
- When Your Windows Need the Professional Touch
The Frustrating Truth About Streaky Windows
You finish wiping the glass in the driveway, step back, and it looks fine. Then the sun hits the windscreen on the Gardiner or the 401, and every smear shows up at once. GTA drivers run into this all year, but winter makes it worse because salt spray, road film, and slush residue cling to the glass and keep spreading if they are not removed properly first.
Streaks usually come from a few repeat offenders. Too much cleaner. A towel that is already loaded with grime or fabric softener. Warm glass that flashes the product dry before you can level it out. On tinted windows, the wrong cleaner can leave residue and create problems you do not want to discover later.
That is why a quick wipe at the gas station rarely fixes the issue for long. It can improve the look in the shade, then fall apart the moment bright light hits the glass.
Clean glass should disappear. If you can see the glass in sunlight, there is still film on it.
A clear finish at home is very realistic. The job just needs the right method for the season and the right products for tint from the start, not as an afterthought. If your car has aftermarket film and you want a simple product breakdown, this guide on how to clean tinted windows is a useful reference.
Here is the trade-off I see all the time at Nanak Car Wash:
| Approach | What happens |
|---|---|
| Fast spray with one towel | Residue and grit get spread across the glass, leaving haze |
| Household cleaner and paper towel | Lint, smearing, and added risk on tinted glass |
| Proper glass method | Built-up film gets lifted off first, then the surface buffs clear |
Control matters more than speed. Work in smaller sections. Keep one towel for the cleaning pass and one fully dry towel for the final buff. In Ontario weather, especially after a stretch of salted roads, patience beats extra product every time.
That is the difference between glass that only looks clean while parked and glass that stays clear in real driving conditions.
Your Essential Window Cleaning Toolkit
In the GTA, glass usually is not just dusty. It is carrying salt film in winter, pollen in spring, traffic haze in summer, and a greasy interior layer once the heaters or AC have been working hard. The kit matters because each of those messes reacts differently, and tinted glass gives you less room for error.
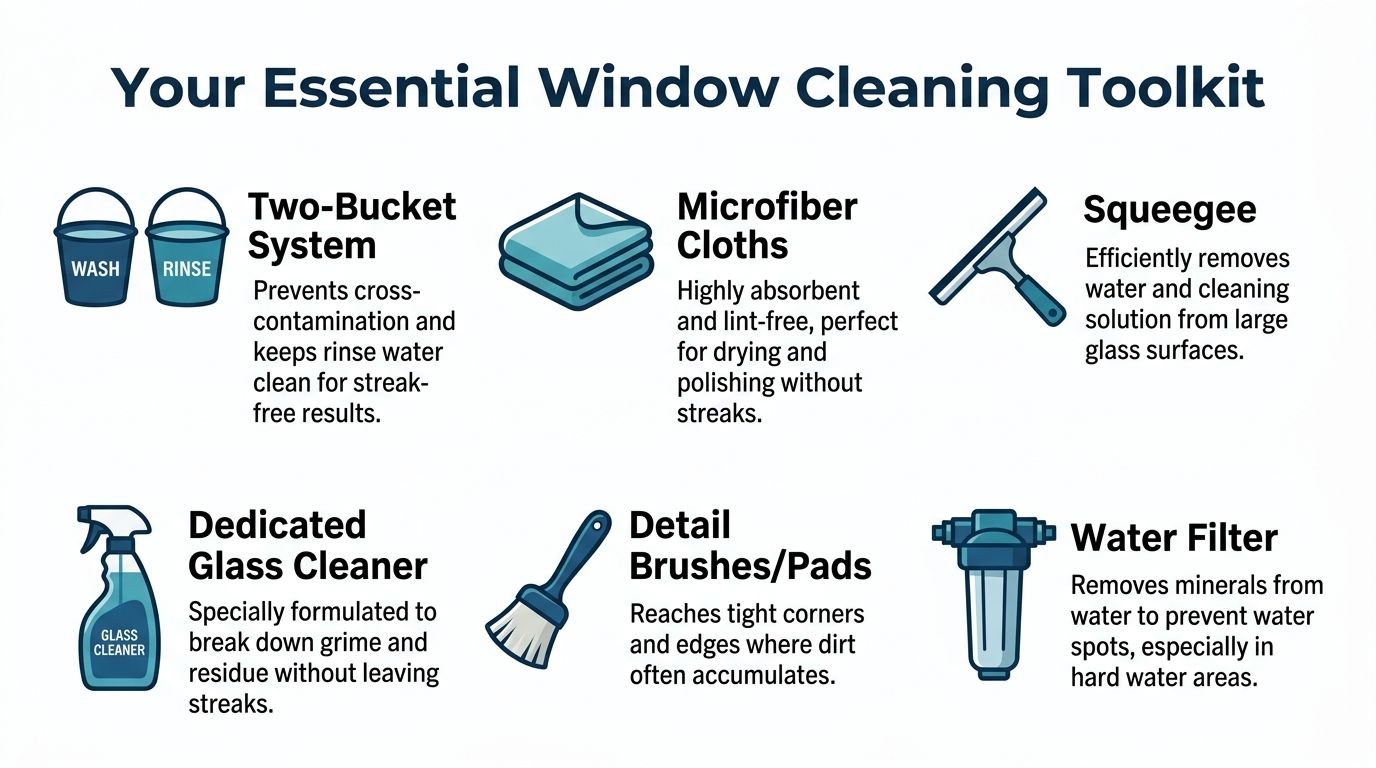
A good window kit is small. It also needs to stay clean and stay dedicated to glass. At Nanak Car Wash, the streakiest DIY jobs usually come from decent effort with the wrong towel, contaminated cloths, or a cleaner that leaves residue behind.
What belongs in your glass kit
Keep the setup simple:
- Two flat-weave microfibre towels. One for the cleaning pass, one kept fully dry for the final buff.
- An ammonia-free automotive glass cleaner. This is the safer choice for all cars and especially important if your windows are tinted.
- Distilled water for mixing a light solution or slightly dampening a towel without adding mineral spots.
- A small detailing brush or slim pad for the bottom corners of the windscreen and tight edges.
- A separate rinse bucket or fresh-water setup if the exterior glass has grit or salt crust on it.
- A squeegee for exterior glass only if you already know how to control the blade and catch runoff.
The two-towel method is the backbone. AutoZone's guide on cleaning car windows with the two-towel method recommends one damp flat-weave microfibre for lifting film and a second dry towel for the final clear finish. That lines up with what works in practice. One towel gets the contamination moving. The second removes what the first leaves behind.
Practical rule: If a towel has touched tire dressing, dashboard protectant, wax, door jamb grime, or interior trim, keep it off the glass.
What to keep away from your windows
The wrong supplies create work you then have to undo.
Skip these:
- Paper towels because they leave lint and often smear more than they lift.
- Fluffy, plush microfibres because they drag on glass and can shed fibres.
- Household ammonia cleaners because they can leave residue and are a poor choice for tinted windows.
- One all-purpose rag for the entire car because it transfers oils, dressings, and dirt back onto the glass.
Tint-safe cleaning should be part of the plan from the start, not a last-minute adjustment. For a tighter breakdown of safe product choices for film-covered glass, see how to clean tinted windows.
One more trade-off to keep in mind. Buying the right towels and cleaner is cheap compared with redoing smeared glass three times, but some drivers still do not want to stock a kit, especially during a Toronto winter when water access is limited. In that case, a full-service wash with interior glass cleaning can reset the car properly, and home touch-ups become much easier between visits.
The Professional Exterior Window Method
Exterior glass usually looks simpler. On GTA roads, it often carries the nastier mix. Fine grit, oily traffic film, bug residue, hard water marks, and winter salt spray can all sit on the same pane, especially around the lower half of the windshield and front door glass.
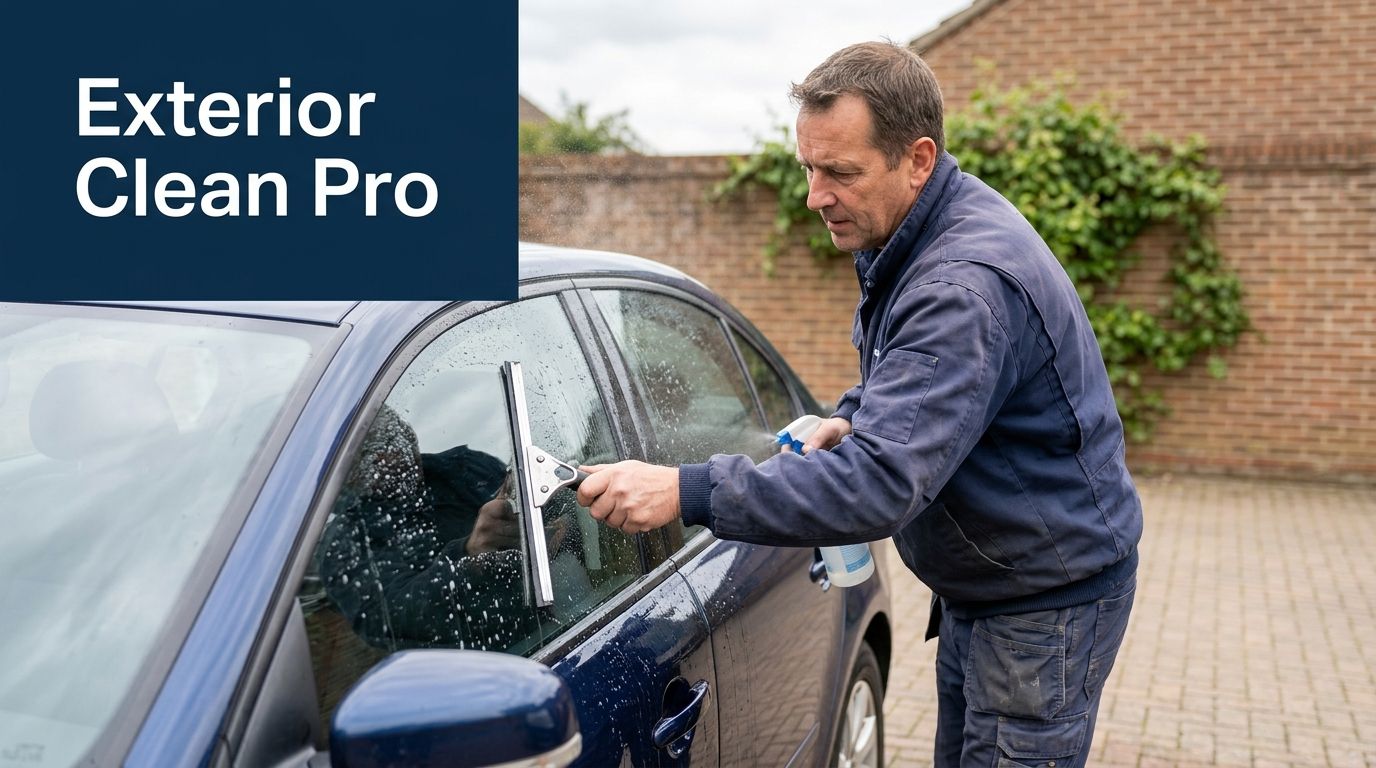
Start with dry dirt and heavy film
This step determines the outcome of most DIY jobs. Loose contamination has to come off before the towel starts doing real cleaning. Otherwise, that first wipe smears salt film and drags grit across the glass.
If the vehicle is dusty, gritty, or carrying winter residue, rinse the exterior glass first. In a Toronto winter, that is not always practical. Condo parking, frozen hoses, and coin wash lineups get in the way. In that case, use a very light pre-dust with a dedicated clean microfibre and keep expectations realistic on neglected glass.
A trade-style approach works well on exterior windows:
- Remove loose grit first with a rinse or careful pre-dust.
- Apply cleaner to the towel for routine cleaning so runoff stays controlled.
- Split the window into sections and finish one area before the cleaner dries.
- Let bug splatter or salt film dwell briefly so the residue softens before you wipe.
- Use patience at the edges and seals because trapped grime often creeps back onto clean glass.
At Nanak Car Wash, heavily smeared exterior glass often improves with a simple three-step reset. Pre-dust first. Agitate with a mild soap solution and a clean towel. Follow with a second unused microfibre to dry and clear the surface. It takes a little longer than a quick spray-and-wipe, but it cuts down on the redo work that usually follows a rushed job.
Use the two-towel method properly
Your first towel should be damp, not wet. Its job is to loosen and lift traffic film, salt residue, and whatever bonded lightly to the surface. The second towel finishes the job while the cleaner is still workable.
For exterior glass, use this pattern:
- Wipe vertically so streaks are easier to spot from the driver's seat.
- Flip to a fresh side often once the towel starts to drag or leave haze.
- Buff right away with the second towel before residue dries on the glass.
- Clean the edges last because seals and trim tend to hold dirty moisture.
| Exterior move | Why it works |
|---|---|
| Vertical passes | Easier runoff control and easier streak tracking |
| Light mist on towel | Better control than soaking the glass |
| Fresh second towel | Removes residue instead of redistributing it |
Circular motion is fine for a bird drop, bug mark, or a stubborn patch of salt film. Finish with straight passes. That gives you a cleaner read on what is still left behind.
One trade-off matters here. More product does help on heavy grime, but over-wetting the glass can flood trim, leave drips down the door, and create extra streaks around tint edges on film-covered side windows. Keep the cleaner controlled and tint-safe from the start.
If water spots remain after a normal wash and proper towel work, you are likely dealing with mineral deposits rather than routine dirt. Repeating the same wipe usually adds haze and frustration. That is the point where a more specialized correction process, or a professional set of hands, makes sense.
Conquering the Awkward Interior Glass
You finish the wash, pull out of the driveway, and the first bit of sun across the windscreen shows every streak you missed. Interior glass does that. In the GTA, winter idling, damp floor mats, road salt tracked into the cabin, and everyday off-gassing from plastics all leave a film that catches light fast.
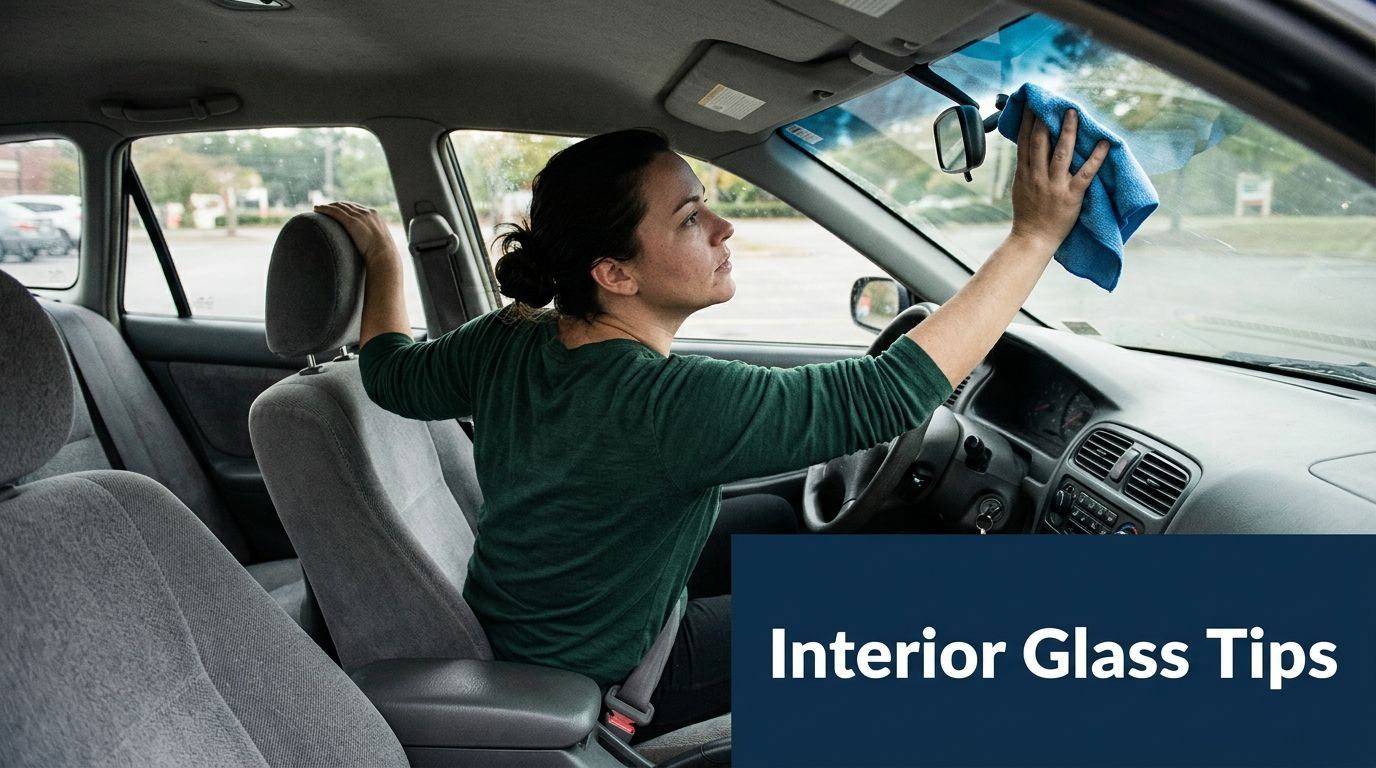
Why the inside looks worse than it should
Interior glass usually has less grit than the outside, but it has more smear-prone residue. That is why people struggle with it. Too much product spreads that film around, especially on a cold Ontario morning when cleaner flashes slowly and cabin light is poor.
Keep the process controlled:
- Mist the towel, not the glass. That keeps cleaner off dashboards, screens, and the edges of tinted film.
- Use less product than you expect. A lightly damp towel cuts film better than a soaked one.
- Wipe horizontally on the inside. Different wipe directions make it easy to tell whether a mark is inside or outside.
That horizontal pattern saves time. If the exterior was finished with vertical passes, any leftover streak tells on itself right away.
A practical way to reach the windscreen corners
The lower corners are where DIY jobs usually fall apart. Tight dashboards, steep glass, and thick towels make it hard to keep even pressure.
Use a towel-wrap method that stays flat against the glass:
- Wrap a clean microfibre around the back of your hand.
- Flatten your fingers so the towel can reach the base of the windscreen.
- Work in short horizontal passes along the lower edge and into the corners.
- Follow with a second, dry towel using the same hand position.
For side and rear windows with tint film, keep the same tint-safe method the whole way through. Use an ammonia-free cleaner, keep moisture light, and avoid hard scrubbing along the film edge. I see a lot of damaged rear tint from people cleaning the center of the glass properly, then getting aggressive around the borders where residue likes to collect.
A few habits make interior glass much easier to finish clean:
- Open the doors for light so residue shows up while you work.
- Start with the windscreen while your towels are at their cleanest.
- Change towel sides early once drag or haze starts.
- Check the glass from the passenger side because a different angle will reveal marks the driver's seat hides.
If the glass only looks clean from one seat, it is not finished.
Interior glass is awkward, but the fix is straightforward. Use less liquid, keep your towel contact flat, and inspect from more than one angle. If haze keeps coming back after a careful clean, the issue may be baked-on residue, smoker film, or neglected tint edges. That is usually the point where a proper detailing service saves time and gives you a cleaner result than another round of wiping.
Troubleshooting and Tips for Ontario Drivers
You clean the glass, pull out onto the Gardiner, and the sun hits the windscreen just right. Suddenly the haze is back. In the GTA, that usually comes down to residue the glass picked up from salt spray, slush, traffic film, hard water, or summer dust. The fix is matching the method to the mess.
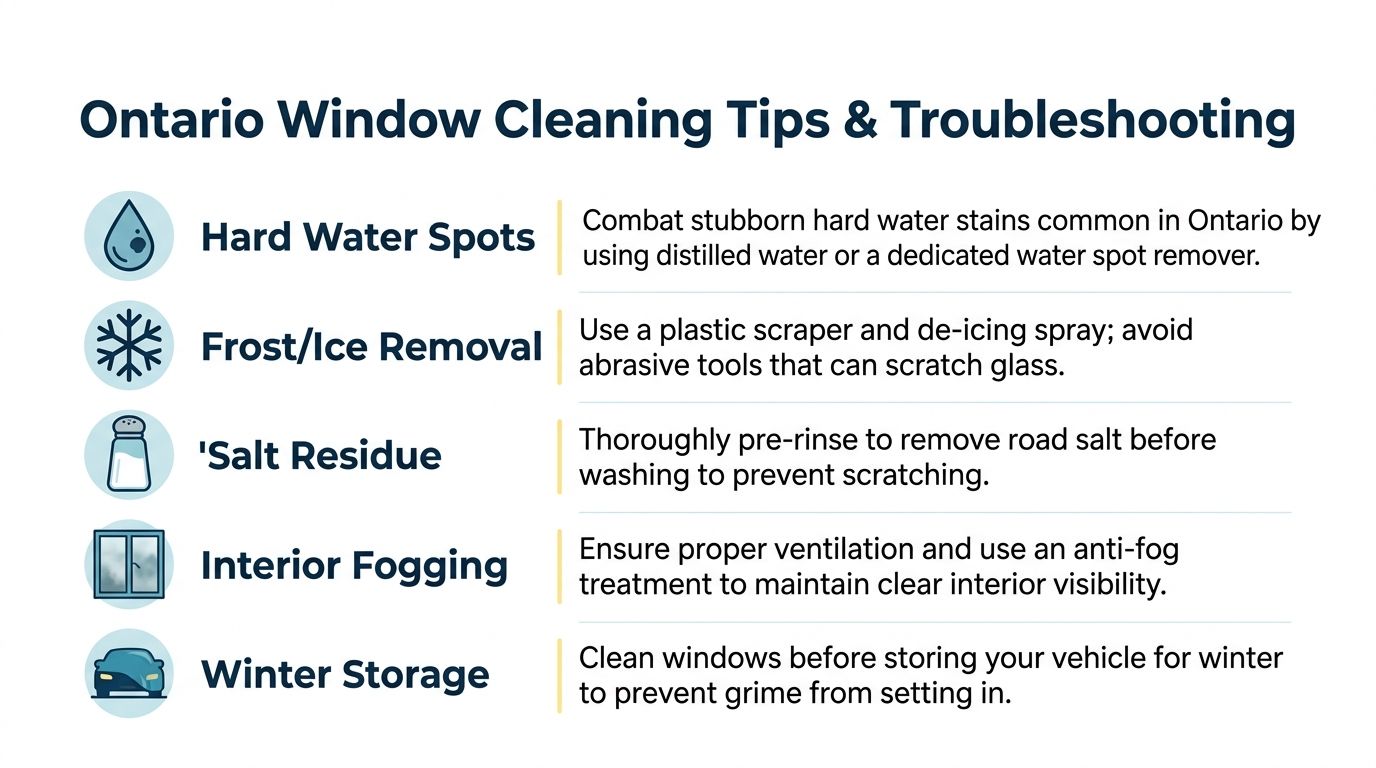
The local problems that change your method
The two headaches I see most on Ontario vehicles are winter salt film and oily road grime. They smear differently than ordinary dust, especially on the lower half of the windshield and rear glass. If you go straight in with a household cleaner, you often just spread that residue into a thin, cloudy layer.
For that kind of buildup, start with a light rinse if the exterior is gritty, then use a tint-safe, ammonia-free cleaner or a simple mix of isopropyl alcohol and distilled water on the glass itself. Keep the towel damp, not soaked. On tinted side or rear glass, use less liquid near the edges and avoid aggressive scrubbing where the film meets the seal.
Heat changes the job too. Glass cleaned in direct summer sun around Toronto can flash dry before you finish wiping, which is why a product that works fine in the garage suddenly streaks in the driveway. Work in shade when possible, do smaller sections, and buff right away with a dry microfibre.
Fast fixes for common Ontario window problems
A few patterns show up again and again:
- Cloudy film after winter driving: road salt and traffic grime are still on the glass. Pre-rinse first, then clean.
- Spots after a driveway wash: your water is leaving mineral residue. Use distilled water for the final wipe if your tap water spots badly.
- Smearing on warm days: too much product or too much heat. Use less cleaner and shorten your working area.
- Haze along tinted edges: moisture or residue is trapped near the film border. Switch to a barely damp towel and lighter pressure.
- Wiper area still looks dirty: that section usually has the heaviest oily buildup. Give it a second pass instead of flooding the whole windshield again.
Some mistakes create extra work fast:
- Do not use one towel for the whole job. Once it loads up, it starts redepositing grime.
- Do not keep using a towel that touched the ground. Grit and glass do not mix.
- Do not soak the glass near tint edges, switches, or seals.
- Do not judge the finish from one angle. Ontario sun is ruthless and will expose residue you missed.
Here is the quick seasonal adjustment I recommend:
| Ontario condition | Better move |
|---|---|
| Winter salt film | Rinse first, then clean with a degreasing wipe |
| Spring construction dust | Lift loose dust before wiping |
| Summer heat | Work in shade and smaller sections |
| Damp autumn mornings | Finish with a dry buff and inspect twice |
If spotting stays put after a normal clean, the problem may be mineral damage rather than leftover dirt. This guide on preventing water etching on auto glass is worth reading because etched glass needs a different approach from ordinary streaks.
Ontario conditions are hard on glass. Adjust the method early, stay tint-safe the whole way through, and you will save yourself a lot of pointless re-wiping.
When Your Windows Need the Professional Touch
You finish the job, pull out into bright GTA sun, and the glass still looks cloudy. That is usually the point where more wiping stops helping.
Some window problems are not regular dirt. Road salt residue that has sat through winter, hard-water spotting, smoker film, overspray, and old buildup along tint edges can all hang on after a careful DIY clean. I tell drivers this all the time at Nanak Car Wash. If you are making pass after pass and the result only looks good in the shade, the issue is probably the contamination itself, not your effort.
Signs DIY has hit its limit
Bring in a pro when you notice one or more of these:
- The haze comes back right after cleaning
- Spots stay put even after a proper wash and glass clean
- Tinted windows need edge work you are not comfortable doing
- The windshield in a large SUV, van, or truck is too awkward to reach cleanly
- You want the glass reset without risking streaks on trim, switches, or seals

For drivers dealing with stubborn mineral damage rather than ordinary grime, this piece on preventing water etching on auto glass is a useful companion read because etching needs a different response from normal streaks.
Professional service also makes sense when the actual problem is time, access, or risk. A proper glass reset means using clean towels at each stage, controlling moisture around tinted edges, and catching residue from more than one angle. On daily-driven cars in the GTA, especially after winter, that extra care is often what separates clear glass from glass that looks clean until the sun hits it.
If your windows still haze up, streak in sunlight, or need a full inside-and-out reset, Nanak Car Wash offers exterior washes, full-service packages with interior window cleaning, and detailing options across the GTA. It's a practical choice when you want clear glass without experimenting on your tint, trim, or time.




 6600 Finch Ave W, Etobicoke, ON M9V 3Z6
 647-703-8515
 MON – SUN 8 AM to 7 PM