Tired of that coffee stain? Crumbs in every seat? That smell you just can’t place? A messy car can be overwhelming. You want it clean, but don’t know where to start. And you don’t want to spend big money on a professional detailer. We are here to help. This guide gives you the pro secrets for complete car interior cleaning without the professional price tag. This is your SUPER MONEY SAVING guide to a car that looks and feels brand new.
Forget being confused about what products to use or worried about damaging your dashboard. We give you a simple, step-by-step checklist for EVERYTHING. Learn how to safely clean fabric, leather, and plastic. No expensive tools? NO PROBLEM. We show you how to get amazing results with what you already have. Get ready to remove tough stains, eliminate bad odours, and make your car showroom-fresh. Let’s get started and help you enjoy a clean ride!
Key Takeaways
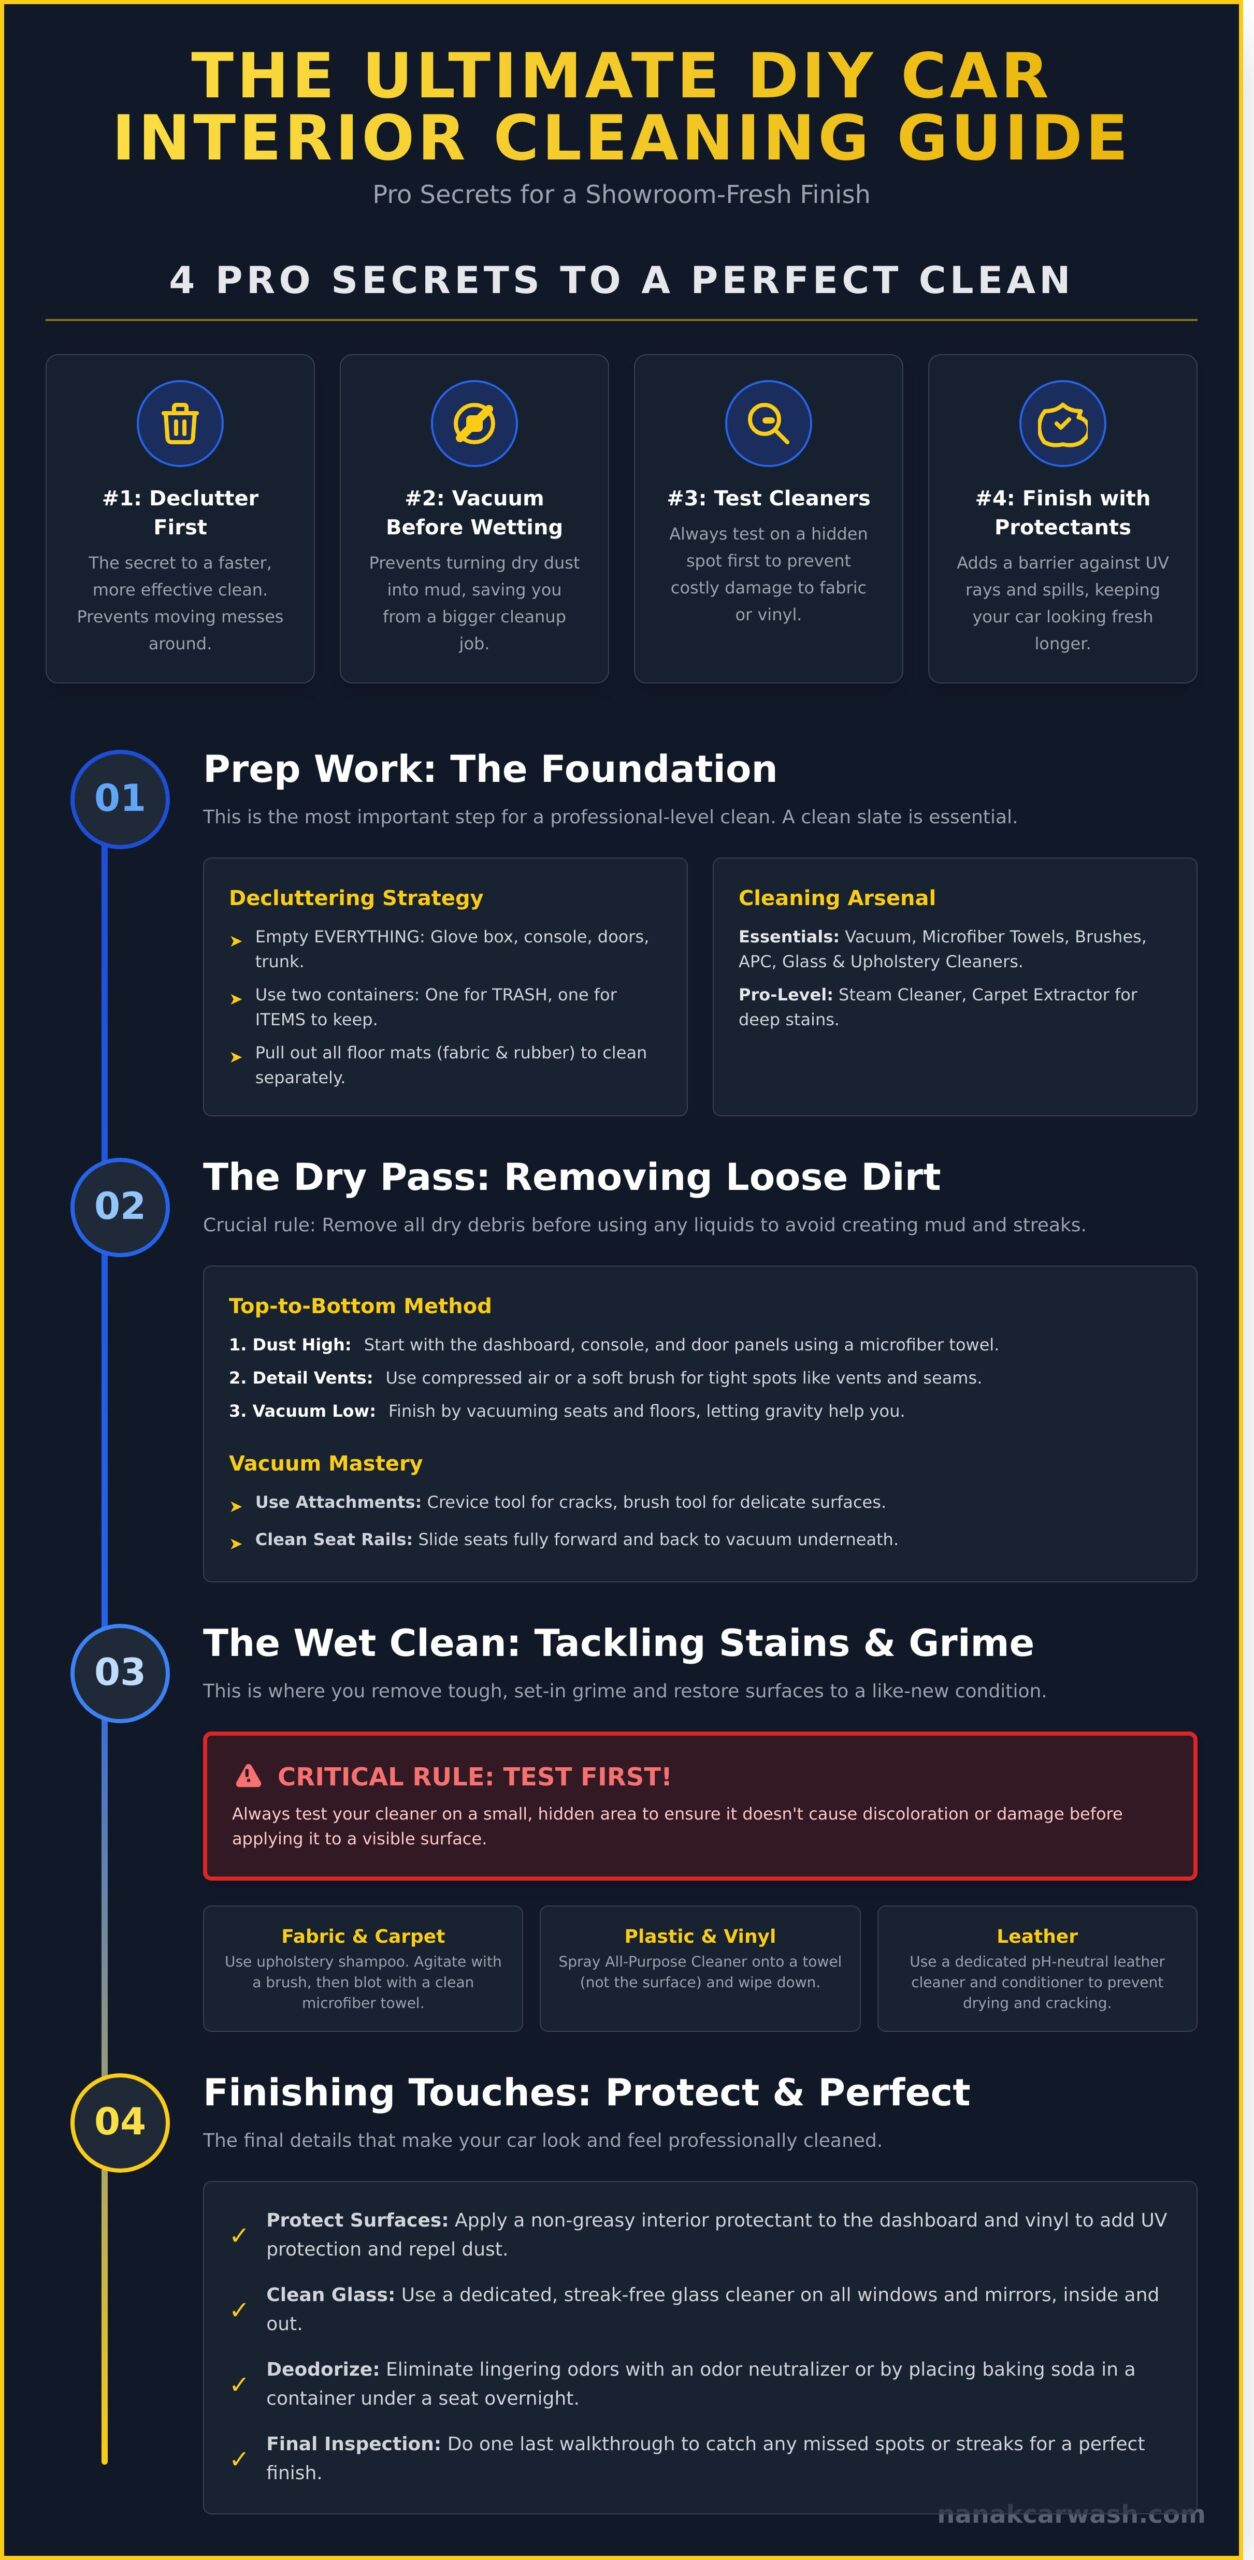
- Start with a full declutter. This is the #1 secret to a faster, more effective clean and prevents you from just moving messes around.
- Always vacuum *before* using liquids. This simple step prevents turning dry dust into mud, saving you from a bigger cleanup job.
- Test all cleaners on a hidden spot first. This is the key to a professional car interior cleaning without causing costly damage to your fabric or vinyl.
- Finish the job with protectants. This final step adds a barrier against UV rays and future spills, keeping your car looking showroom-fresh for longer.
Step 1: Prep Work – The Foundation of a Perfect Clean
This is the MOST IMPORTANT STEP. Do not skip it. Proper preparation is the secret to a professional-level clean and will SAVE YOU TIME later. Trying to clean around clutter just moves dirt around and leads to missed spots. A good prep stage is what separates a quick vacuum from true auto detailing. By starting with a completely empty vehicle, you set yourself up for a faster, better, and more efficient job. This is the foundation for a perfect finish.
Start by completely emptying your vehicle. We mean everything. Clear out the glove box, centre console, and all door pockets. Don’t forget the trunk. This initial reset is critical for a deep clean. Pull out all floor mats-both fabric and rubber-and set them aside. They need to be cleaned separately and thoroughly. Now you have a clean slate to begin your car interior cleaning project.
Gathering Your Cleaning Arsenal
Get all your supplies ready before you start. This keeps you focused and makes the work go faster. You don’t need to spend a lot of money to get great results.
- Essential DIY Supplies: A strong vacuum with brush and crevice attachments, a set of clean microfiber towels, and a few detailing brushes of various sizes are your must-haves.
- Essential Cleaners: Have a quality all-purpose cleaner (APC) for hard surfaces, a streak-free glass cleaner, and a dedicated carpet and upholstery shampoo.
- Optional Pro-Level Tools: To take your car interior cleaning to the next level, consider a steam cleaner for sanitizing surfaces or a carpet extractor for deep-stain removal.
Best Practices for Decluttering
Work smart, not hard. Use two bags or boxes as you empty the car: one for TRASH and one for items that need to go back into your home. This simple system keeps the process organized and quick. Be thorough and check everywhere. Look under the seats, between the seat cushions, and in any hidden storage compartments. You’ll be surprised what you find! A totally empty car ensures every inch gets the attention it needs. Enjoy a clean ride, starting with a clear space.
Step 2: The Dry Pass – Removing Loose Dirt and Dust
Before you even think about sprays or liquids, get ALL the loose stuff out. This is the most important rule for a professional car interior cleaning result. Adding moisture to dust and dirt just creates mud. It causes streaks and makes more work for you. Save time and get a better clean by doing a thorough dry pass first.
The best method is simple: work from top to bottom. Gravity is your friend! Dust and debris will fall downwards as you clean. Start with the headliner, move to the dashboard and console, then finish with the seats and floors. This system ensures you only clean each area once. Quick and efficient.
For tight spots like air vents, seams, and around the gear shifter, use compressed air to blow out trapped debris. A soft-bristled detail brush also works great to agitate and loosen stubborn dust before you vacuum it up.
Mastering the Vacuum
A good vacuum job is the foundation of a clean interior. Don’t rush this part. Use the right attachments for the best results. A powerful vacuum makes all the difference for a deep clean that lasts.
- Use Attachments: The long, thin crevice tool is PERFECT for getting between seats and into tight cracks. Use the brush attachment for the dashboard, door panels, and delicate surfaces to avoid scratches.
- Clean The Rails: Slide your front seats all the way forward and vacuum underneath. Then, slide them all the way back and do it again. You will be shocked what you find in the seat rails.
- Don’t Forget The Trunk: Empty the trunk completely and vacuum every corner. Lift any floor mats or liners to get the hidden dirt underneath. Check all storage compartments too.
Dusting Hard Surfaces
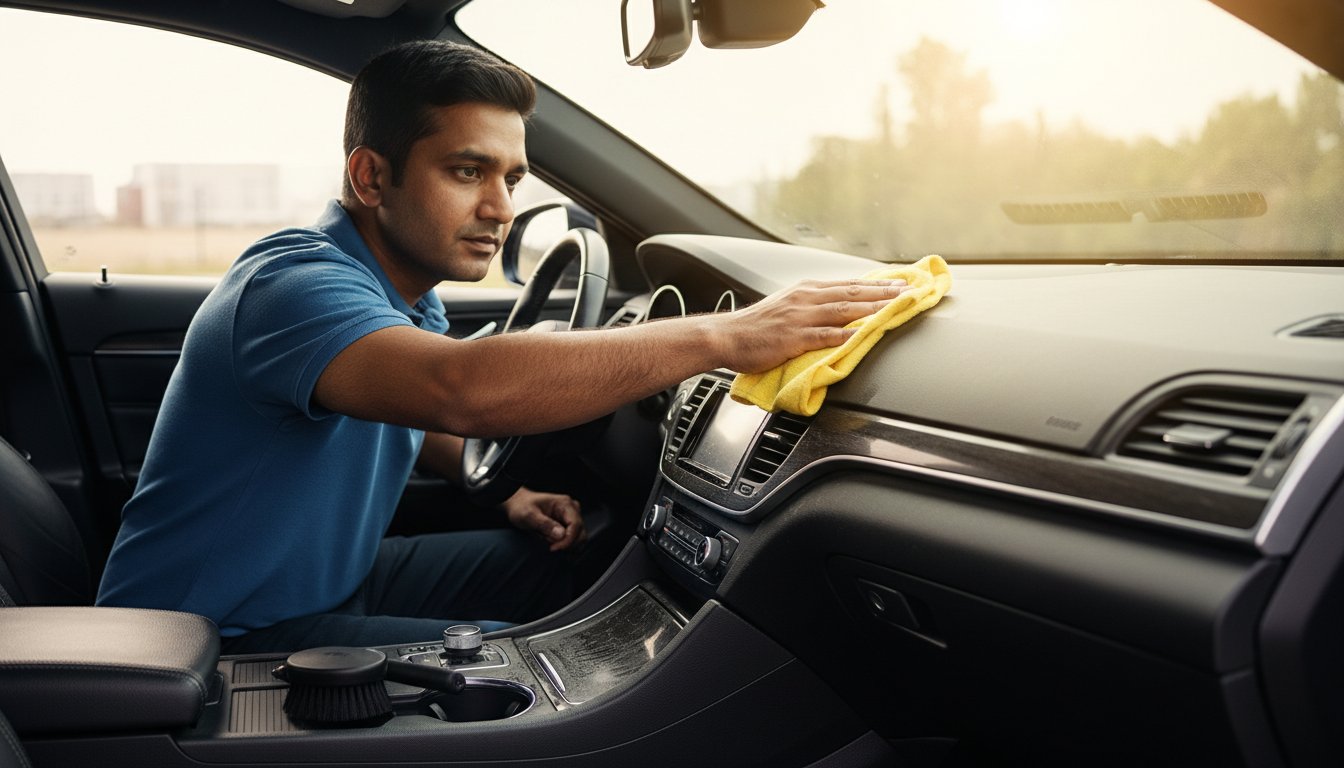
With the loose debris gone, it’s time to tackle the dust on all your hard surfaces. A dry, high-quality microfiber towel is your BEST tool here. It traps dust particles instead of just pushing them around. This simple step makes your car feel instantly cleaner.
- Wipe Everything Down: Use your microfiber towel on the dashboard, centre console, and door panels.
- Detail The Small Stuff: Use a small, soft detail brush to get dust out from around buttons, knobs, and air vents.
- Hit The High-Touch Areas: Give extra attention to the steering wheel, gear shifter, and turn signal stalks. Removing dust and grime here makes the whole car feel better.
Step 3: The Wet Clean – Tackling Stains and Grime
Now for the deep clean. This is where we remove the tough stains and restore that fresh-car feeling. A proper wet clean is a key part of any professional car interior cleaning process. To get the best results and avoid damage, ALWAYS follow these simple rules:
- Test First: Before using any new cleaner, test it on a small, hidden area to make sure it doesn’t cause discolouration.
- Don’t Oversaturate: Too much liquid can damage electronics and lead to mould in your fabrics. A little goes a long way.
- Use Clean Towels: Keep separate microfiber towels for glass, plastic, and upholstery to prevent spreading dirt and chemicals.
Cleaning Fabric Seats and Carpets
Tackle coffee spills, dirt, and grime head-on. First, pre-treat any noticeable stains with a dedicated spot cleaner. Next, use a quality carpet shampoo with a medium-stiff brush. Agitate the fibers in small, circular motions to lift the dirt out. Finally, blot the area with a clean, dry towel to absorb the moisture and grime. NEVER scrub hard, as it can damage the fabric.
Conditioning Leather and Wiping Vinyl
Leather and vinyl require different approaches for a safe, effective clean. Use a dedicated, pH-balanced leather cleaner-harsh all-purpose cleaners will dry it out. After cleaning, apply a leather conditioner to restore moisture and prevent cracking. For your dashboard, door panels, and other vinyl or plastic surfaces, a gentle all-purpose cleaner sprayed on a towel works perfectly to wipe away dust and fingerprints. This simple step makes a HUGE difference.
Achieving Streak-Free Windows and Screens
Get a crystal-clear view with these quick pro tricks. Forget frustrating streaks on your glass and navigation screens. For a perfect, streak-free finish every time:
- Spray glass cleaner onto your microfiber towel, NOT directly onto the glass. This prevents overspray on your freshly cleaned dashboard.
- Use the two-towel method. One towel to apply the cleaner and a second, completely dry towel to immediately buff the glass dry.
- Wipe interior windows in a different direction (e.g., horizontal) than exterior windows (e.g., vertical). This makes it easy to spot which side any leftover streaks are on.
Step 4: Finishing Touches – Protection and Odor Elimination
You did the hard work. Now it is time to protect it. These final steps are what separate a good job from a GREAT one. They lock in the value of your deep clean, protect surfaces from future damage, and make sure your car smells as clean as it looks. This is how you make your car interior cleaning results last.
Do not skip this step. It is a quick way to protect your investment and keep that fresh feeling for weeks.
Protect Your Plastics and Fabrics
Your car’s interior faces constant attack from the sun and spills. The strong Canadian sun can cause dashboards to crack and fade over time. Protectants are your best defense. They are a SUPER money saving trick to avoid costly repairs later.
- UV Protectant: Apply a non-greasy, matte-finish protectant to your dashboard, door panels, and all plastic or vinyl trim. This creates a barrier against harmful UV rays, preventing fading and keeping plastics looking new.
- Fabric Guard: For cloth seats and carpets, use a fabric protector spray. This simple step makes fabrics resistant to liquid spills, giving you time to clean up messes before they become permanent stains. A MUST-HAVE for anyone with kids or pets.
Neutralize Lingering Odors for Good
A truly clean car has no smell at all. Air fresheners just mask bad odors, but a professional car interior cleaning eliminates them at the source. Find the cause of the smell, don’t just cover it up.
- Find the Source: Check under seats, in seat pockets, and deep in crevices for the cause of any bad smells. Remove it.
- Use an Odor Neutralizer: For tough, lingering smells from smoke, pets, or mildew, use an odor-eliminating spray or “bomb.” These products attack the odor-causing molecules directly.
- Replace the Cabin Air Filter: If you get a musty smell when you turn on your heat or A/C, it is time for a new cabin air filter. This is a simple, low-cost fix that makes a HUGE difference to your car’s air quality.
Once all surfaces are protected and the air is fresh, place your perfectly cleaned floor mats back in the car. Now your interior is not just clean-it’s protected. For a deep clean without the work, the pros at Nanak Car Wash offer the best value and service. Enjoy a Clean Ride!
DIY vs. Professional Cleaning: When to Call the Experts
Doing your own car interior cleaning is a great way to save money and maintain your vehicle. But sometimes, a scrub brush and a shop vac just aren’t enough. It is important to know when to call in a professional detailer to get the job done right. They have the tools and training to handle the toughest jobs, saving you time and frustration.
Think about the value of your time. A deep clean can take a full afternoon-3 to 5 hours of hard work. For many busy Canadians, paying for a professional service is a smart investment for a guaranteed, high-quality result. Sometimes, the best way to keep your car looking new is to let an expert give it a factory-fresh reset.
Signs You Need a Professional Detailer
Look for these signs that your car needs more than a simple DIY clean:
- Deeply Set Stains: Spills from coffee, ink, grease, or makeup that your home cleaners can’t lift. Pros have special chemicals to break them down safely.
- Lingering Odors: Heavy smoke, pet smells, or spilled milk that have soaked into the fabric. Professionals use ozone generators and special enzymes to eliminate odors, not just cover them up.
- Mold or Mildew: If you see or smell mold, it’s a health risk. Detailers can safely remove it and sanitize the area to prevent it from coming back.
- You Lack the Time: If you can’t set aside several hours for a deep clean, a professional service is the fast and convenient choice.
What a Professional Service Includes
When you hire a professional, you are paying for expertise and equipment that is not available to most car owners. They use powerful hot water extractors to pull dirt from deep within your carpets and upholstery, something a vacuum can never do. Steam cleaning is used to sanitize surfaces like vents, consoles, and door panels, killing 99.9% of germs and bacteria without harsh chemicals.
Professionals are trained to use pro-grade products safely on all types of materials, from leather to delicate electronics. They deliver a complete car interior cleaning that restores your vehicle and helps protect its value. For the ultimate transformation that includes both interior and exterior restoration, consider a professional car detailing service that brings back that showroom finish.
Is the job too much to handle? Let the pros at Nanak Car Wash handle it! We get it done right, so you can just enjoy a clean ride.
Feel Good In A Clean Car: The Final Polish
Mastering a deep car interior cleaning is a fantastic skill. You’ve learned that the secret isn’t just hard work, but a smart process: starting with a thorough prep and dry pass, tackling grime with a targeted wet clean, and applying those crucial finishing touches. This method guarantees a better result every time and helps protect your vehicle’s value for years to come.
But sometimes, you just don’t have the time or the specialized tools. That’s where we come in. At Nanak Car Wash, we are Highly recommended on Google because we do our best to give good service at a great price. Get a professional-grade clean with our super money saving deals, and skip the weekend of hard labour.
Ready for a showroom-fresh interior? Save time and get a perfect finish. Book your Interior Detailing Package today!
Treat yourself and your vehicle. Enjoy a Clean Ride!
Frequently Asked Questions
How often should I deep clean my car’s interior?
For most drivers in Canada, a deep clean is best every 4 to 6 months. If you have pets, kids, or eat in your car, do it more often-maybe every 3 months. Regular cleaning keeps your car fresh and protects its value. A professional deep clean saves you time and gives the BEST results. Feel Good In A Clean Car!
What is the best way to clean dirty car floor mats?
First, take the mats out. Use a stiff brush to loosen all the packed-in dirt, then vacuum them well. For rubber mats, use a good all-purpose cleaner and a pressure washer or hose. For carpet mats, a carpet shampoo and a scrub brush work best. ALWAYS let them dry 100% before putting them back to avoid a musty smell.
Can I use household cleaners like Windex or dish soap in my car?
We do NOT recommend this. Household cleaners are often too harsh for your car’s surfaces. Windex has ammonia, which can damage tinted windows and dry out dashboards. Dish soap leaves a sticky residue on fabric that attracts even more dirt. Always use products made specifically for cars. It is safer and gives a professional finish.
How do I get rid of tough smells like cigarette smoke or pets?
Start by removing the source. Clean out all trash and give the car a deep vacuum. For bad smells, you need to shampoo the carpets and seats. For the toughest odours like smoke, a professional ozone treatment is the only way to kill the smell completely. Don’t just cover it with an air freshener-eliminate it for good.
What’s the difference between a simple interior clean and a full interior detail?
A simple clean is a quick vacuum and wipe-down of the main surfaces. It is for regular upkeep. A full interior detail is a complete, top-to-bottom, deep car interior cleaning. We shampoo carpets, steam clean vents, condition leather, and treat all plastics. It restores your car’s interior to a like-new condition. It is a SUPER value for the results you get.
How can I clean my car’s headliner without damaging it?
Be very gentle. The glue on headliners is sensitive to moisture. NEVER spray cleaner directly on the fabric. Spray a small amount of proper upholstery cleaner onto a clean microfiber towel. Lightly blot the stained area. DO NOT scrub hard or soak the fabric. This can make the headliner sag. Work in small, careful sections for the best result.