

By Friday evening, a lot of GTA cars feel less like a cabin and more like a catch-all drawer on wheels. There's the dried coffee ring in the cup holder, that gritty white crust creeping up the floor mats after a slushy week, and enough crumbs in the seat tracks to feed a family of raccoons. Add hockey bags, school pickups, takeout runs, and one rainy grocery trip, and the interior starts looking tired fast.
That doesn't mean you're careless. It usually means you use your car in line with how vehicles are generally used around Toronto. Hard. The problem is that our climate doesn't just make interiors dirty. It makes them difficult to clean properly. Salt gets ground into carpet fibres, humidity hangs around in cloth seats, and temperature swings punish plastic, leather, and adhesives.
That's why interior car detailing matters. Done properly, it resets the cabin, pulls out the grime you can't reach with a gas-station vacuum, and deals with the stuff that makes a car feel older than it is.
Table of Contents
- From Salt Stains to Showroom Fresh
- What Exactly Is Interior Car Detailing
- The Professional Detailing Process Unpacked
- DIY Detailing vs Hiring a Professional
- Your Nanak Car Wash Detailing Appointment
- Keeping Your Car Clean Between Details
- Interior Detailing FAQs for GTA Drivers
From Salt Stains to Showroom Fresh
A typical GTA winter interior tells on itself. The mats get that chalky salt outline first. Then the lower carpet goes stiff, especially by the pedals and door sills. By the time spring rain shows up, the cabin has trapped a mix of moisture, grit, and old odours that no hanging air freshener is going to solve.
Families see it one way. Commuters see it another. Rideshare and delivery drivers see it fastest of all. Different mess, same result. The interior stops feeling clean even after you remove the obvious clutter.
That's the point where a proper detail makes sense. Not because the car needs to look concours-ready, but because the cabin needs a real reset. Dirt in a vehicle behaves a lot like sand in a shoe. A little doesn't seem like much at first, but once it works into every corner, you feel it constantly.
A messy car isn't a moral failing. It's a maintenance backlog.
In the GTA, the biggest offenders are predictable:
- Road salt residue sticks to mats, carpets, door jamb edges, and lower trim.
- Moisture from boots and umbrellas lingers longer than people think, especially in cool weather.
- Food and drink spills creep into seams and padding, where smells can settle in.
- Dust and skin oils build up on steering wheels, consoles, touch points, and door pulls.
What changes everything is depth. A casual clean gets the visible stuff. Interior car detailing goes after the contamination that has already settled into fabric, trim texture, seat rails, vents, and stitching. That's when a cabin stops smelling “covered up” and starts smelling clean.
The best part is psychological as much as visual. A freshly detailed interior changes how the whole car feels. The commute is calmer. The seats feel looked after. You stop apologising when someone opens the passenger door.
What Exactly Is Interior Car Detailing
Interior car detailing is the difference between splashing water on your face and getting a proper deep-cleansing facial. One freshens you up. The other deals with what's lodged in the pores.
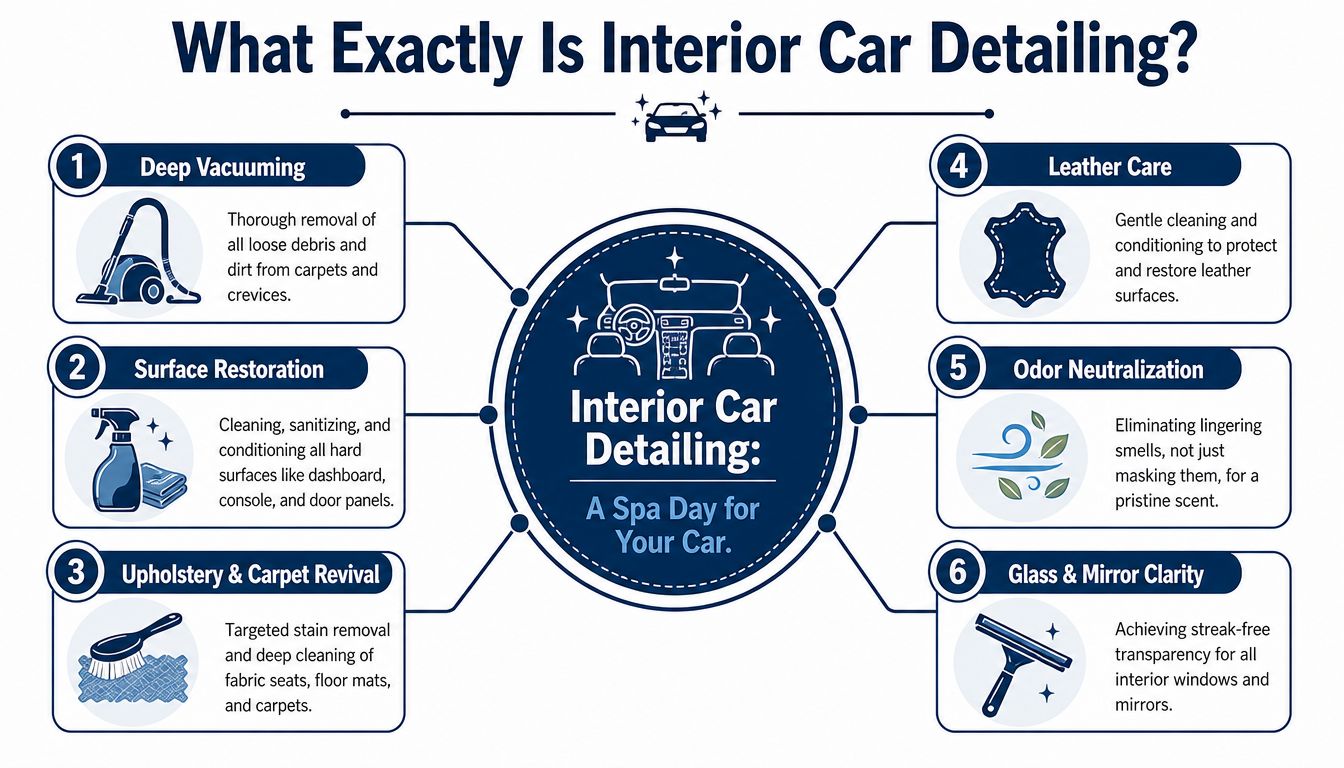
More than a quick tidy
A basic interior clean usually means a vacuum, a wipe of the dash, and maybe the windows if someone's feeling generous. That's maintenance cleaning. Useful, but limited.
Interior car detailing is more thorough and more methodical. It treats the cabin as a set of different materials, each with its own needs. Plastic trim doesn't want the same cleaner as leather. Cloth seats don't tolerate the same moisture level as rubber mats. Piano-black trim scratches if you look at it the wrong way.
Practical definition: Interior car detailing is a material-specific deep clean and reset of the cabin, focused on removing embedded dirt, correcting neglect, and protecting surfaces so they wear more slowly.
That's one reason the category keeps getting more attention. The Canadian car detailing services market is projected to reach USD 2,301.6 million by 2030, with interior detailing identified as the fastest-growing and most lucrative segment in that market, according to Grand View Research's Canada car detailing outlook.
If you want another practical perspective, this expert car detailing Pickering guide is useful because it helps show how service quality depends on process, not just a checklist.
The three jobs it needs to do
A proper interior detail usually has three pillars.
Deep cleaning
This is the grime-removal stage. Vacuuming every crevice, agitating carpet fibres, cleaning vents, lifting salt, treating stains, and cleaning sticky touch points all live here.Restoration
A tired cabin starts looking cared for again. Leather gets gently cleaned and conditioned. Plastic and vinyl lose that dusty, chalky look. Rubber mats get scrubbed so they don't feel like they've been dragged through February forever.Protection
Clean is good. Protected is what lasts. This part means using the right non-greasy dressing on trim, keeping leather from drying out, and leaving glass clear instead of smeary.
A bad detail leaves a shiny dashboard and wet seats. A good one leaves the car looking natural, feeling dry, and smelling neutral.
The Professional Detailing Process Unpacked
The difference between amateur results and pro results usually isn't effort. It's sequence. Good detailers don't attack the whole cabin at once. They work in an order that prevents re-soiling, over-wetting, and surface damage.
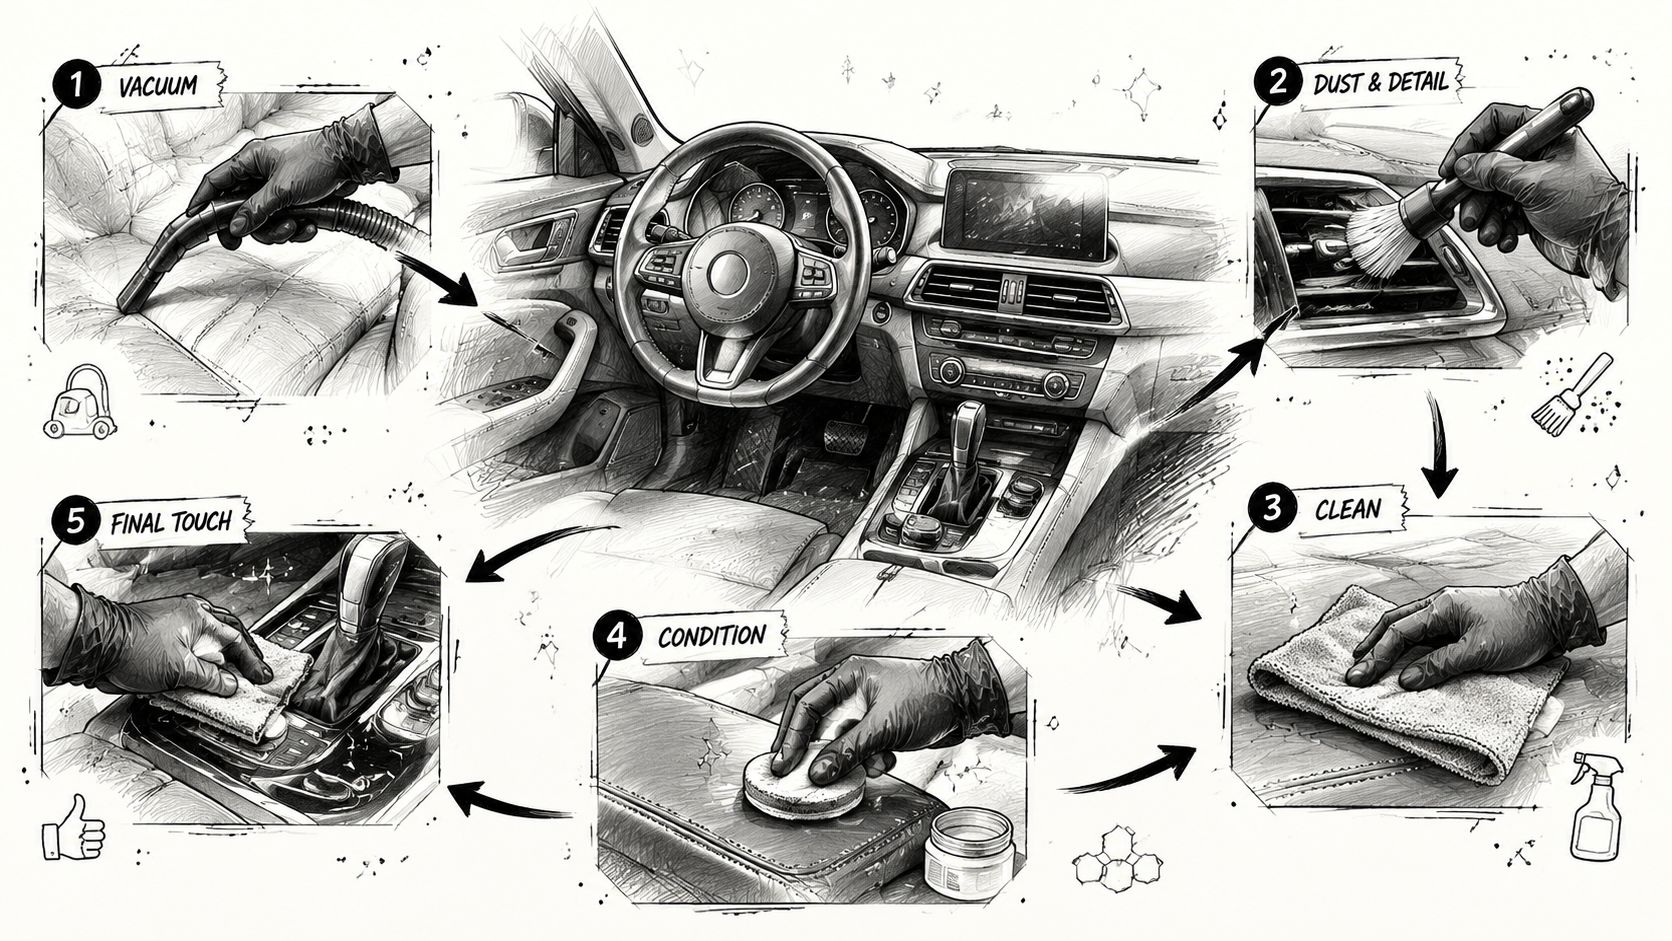
Before the cleaners come out
The first stage is de-trashing and dry removal. Floor mats come out. Loose items come out. Large debris gets picked by hand because no vacuum likes coins, wrappers, and mystery Lego pieces.
Then comes air and vacuum work. A proper crevice tool, soft brushes, and compressed air or an air gun help move dirt out of seat rails, stitching lines, switchgear, and vents. Without this preliminary removal, wet-cleaning over loose grit turns dirt into mud. That's how DIY jobs get streaky and frustrating.
There's also a technical rule many people miss. Surfaces need to be cool before chemicals touch them. Applying cleaners to hot plastics or leather can cause damage, and pros also test products for colourfastness before full application to avoid dye transfer or stripping, as noted in Malco Automotive's interior detailing guide.
Where the real correction happens
Once the cabin is dry-cleaned, the material-specific work starts.
- Fabric seats and carpets need controlled cleaning, not a flood. Agitation with a soft interior brush lifts soil. Low-moisture cleaning or extraction follows, depending on the stain load and the fabric.
- Plastic, vinyl, and textured trim respond well to interior-safe cleaners, microfiber towels, and detailing brushes that reach grain patterns and tight seams.
- Centre consoles and cup holders usually need repeated passes because sugary residue behaves like glue.
- Vents, buttons, stalks, and trim gaps are the places where a rushed job gives itself away.
This is also where trade-offs show up. Steam can be useful in some hands and overused in others. Strong all-purpose cleaners can save time but leave sensitive surfaces faded or dry if the dilution is wrong. Fast work often means shiny residue, and shiny residue usually means product left behind.
The cabin should look clean, not dressed up for a nightclub.
The finishing steps people notice
Leather care is one of the biggest separators between a proper detail and a sloppy one. Leather should be cleaned gently, then conditioned after cleaning to help restore feel and preserve the surface barrier. If the seat feels greasy after, too much product is sitting on top instead of being worked in or levelled off.
Glass comes near the end because interior windows catch overspray and fingerprints during the rest of the process. A clean towel matters as much as the cleaner. The wrong towel just smears film around like butter on toast.
The last pass is inspection. Under-seat areas, seatback pockets, mirror edges, door pulls, pedal area, and the top edge of the steering column all need a final check. A professional detail doesn't just improve the obvious view from outside the car. It cleans the places your hands and eyes notice every single day.
DIY Detailing vs Hiring a Professional
Most owners can improve their interior at home. The main question is how far you want to go, how much time you have, and how much risk you're willing to take with the materials inside the cabin.
What works well at home
DIY makes sense for maintenance cleaning and light messes. If the car mainly needs a vacuum, a wipe-down, and quick attention to a fresh spill, home care can do the job.
A sensible DIY kit usually includes:
- A decent vacuum with crevice tools for seat edges, rails, and carpet corners.
- Microfiber towels separated by job, one set for trim, one for glass, one for dirtier tasks.
- A gentle interior cleaner that won't leave plastics sticky.
- A soft brush for vents, seams, badges, and textured trim.
- A dedicated leather cleaner and conditioner if your seats aren't cloth.
If you like learning techniques before you start, these expert car interior cleaning methods offer a useful DIY-oriented overview.
Where DIY usually runs into trouble
The first trap is moisture. In Ontario cold, adding too much liquid to interior surfaces can create headaches that last well beyond cleaning day. In freezing conditions, captured moisture can crystallise, so professionals often spray cleaner onto towels rather than directly onto surfaces to avoid oversaturation and related problems, as shown in this cold-weather detailing demonstration.
The second trap is tool mismatch. Household carpet machines, bargain brushes, and random cleaners from the garage shelf can work against you. They may leave seats too wet, mar trim, or push dirt deeper instead of lifting it out.
The third trap is time. A proper DIY interior detail can eat an afternoon, and that's if everything goes smoothly. Pet hair, salt lines, old spills, and greasy steering wheels all slow the job down.
| Factor | DIY Detailing | Professional Detailing |
|---|---|---|
| Cost structure | Lower immediate spend if you already own tools | Higher direct cost, but equipment and products are included |
| Time | Usually takes much longer than expected | Faster workflow because the process is repeated daily |
| Equipment | Limited by what fits in a garage or closet | Access to extractors, air tools, specialty brushes, and commercial products |
| Risk | Higher chance of over-wetting, streaking, or using the wrong cleaner | Lower risk when the technician understands surface-specific methods |
| Result on light dirt | Good if you stay consistent | Good and usually more complete |
| Result on salt, odours, pet hair | Possible, but labour-heavy and inconsistent | Usually more thorough because the workflow is built for harder contamination |
DIY is great for upkeep. It's not always great for recovery.
For many GTA drivers, the sensible split is this: handle weekly mess at home, then book a proper detail when the cabin crosses from untidy into embedded grime.
Your Nanak Car Wash Detailing Appointment
A GTA car in February tells its story fast. White salt lines creep up the mats, damp boots leave the cabin humid, and the back seat often carries a mix of crumbs, pet hair, and whatever came home from hockey or Costco. A good appointment starts with that real condition, not with a generic package name.

What to have ready when you book
The more accurately you describe the vehicle, the better the shop can set time, labour, and expectations. That matters in the GTA, where one car may only need a cleanup and the next has winter salt baked into the carpet with moisture sitting underneath.
Have these details ready:
- Your vehicle type because a compact sedan and a three-row SUV are different jobs.
- Your main concern such as salt stains, pet hair, odour, spilled coffee, or an overall reset.
- Your timeline because some interiors can be turned around quickly, while others need more time to clean and dry properly.
- Any sensitive materials like soft leather, piano-black trim, aftermarket accessories, or electronics that need extra care.
For drivers who want washing and detailing handled in one place, Nanak Car Wash offers interior cleaning and detailing by appointment, along with exterior wash services and rust proofing.
What the appointment usually looks like
Drop-off should include a short inspection and a plain-language conversation about what can be improved and what will remain. That is where experience shows. Salt can often be reduced dramatically, but worn carpet fibres do not magically return to new. The same goes for scuffed plastic, dye transfer on light leather, or old stains that have been cooking through two summers and one winter.
A proper interior appointment also accounts for local weather. In humid conditions, over-wetting seats or carpet is asking for trouble, especially if the car goes right back into a closed garage. Shops that do this work every day plan around cleaning time and drying time, not just product time.
What affects the scope
Some interiors look manageable until the work starts. Then the labour reveals itself.
- Pet hair grips carpet and fabric tightly, especially in cargo areas and seat seams.
- Salt staining often needs repeated passes and controlled moisture, not aggressive scrubbing.
- Odours need the source identified first. Melted snow, food spills, smoke residue, and mildew each behave differently.
- Sticky consoles and cup holders take longer than they look because residue traps dust in every corner.
Older vehicles often benefit the most from honest detailing. They may not look factory fresh, but they can feel cleaner, drier, and far more comfortable to drive. That is a worthwhile result in a GTA climate that punishes interiors for half the year.
The best appointments are built on clear expectations. Detailing removes contamination and improves how the cabin looks and feels. It cannot erase years of wear, but it can reset a hard-used interior so it feels cared for again.
Keeping Your Car Clean Between Details
A good detail lasts longer when your maintenance habits are boring. Boring is good. Boring keeps salt from turning into crust, crumbs from turning into smells, and one wet umbrella from turning into a swampy back seat.
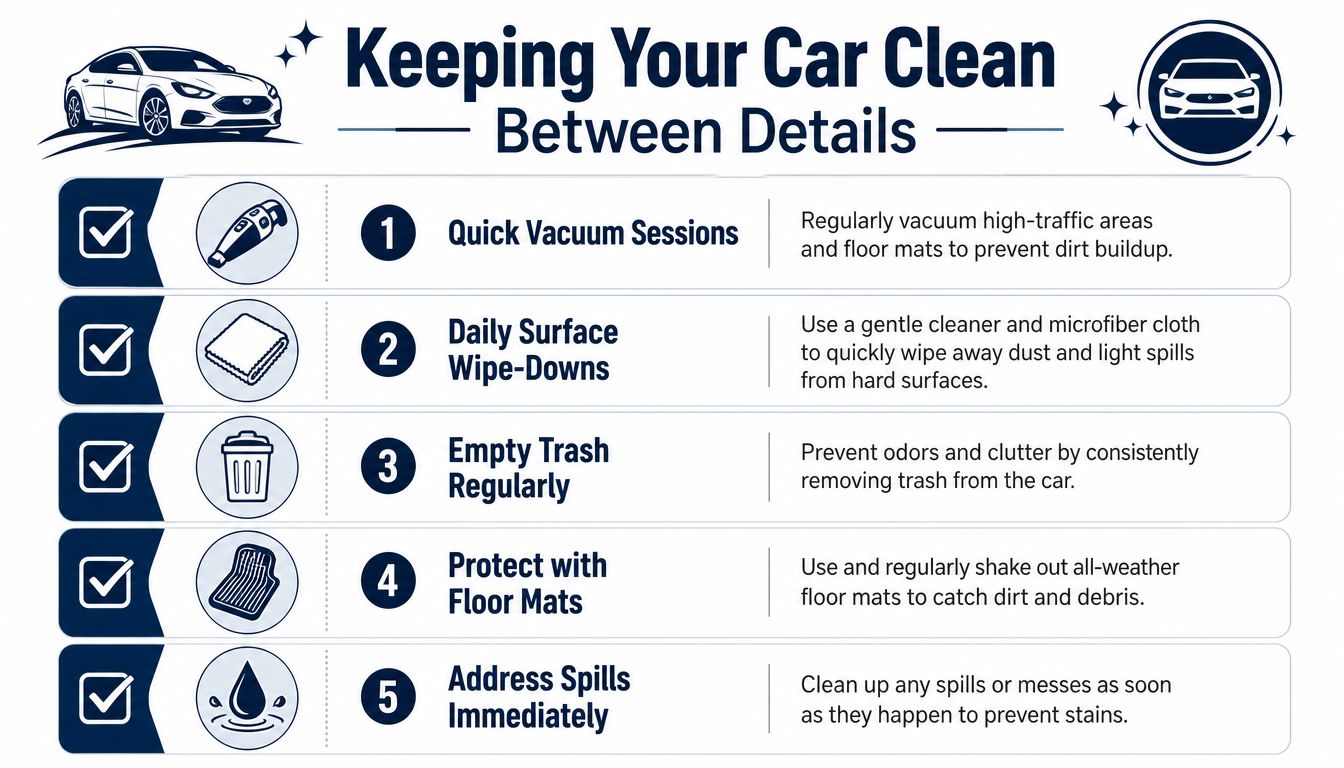
A simple maintenance rhythm
You don't need a full setup at home. You need repeatable habits.
- Do a five-minute weekly reset by removing trash, shaking out mats, and vacuuming the obvious traffic zones.
- Keep a clean microfiber cloth in the glove box for quick wipe-downs of screens, trim, and dusty panels.
- Treat spills immediately because fresh mess is cooperative and old mess gets stubborn.
- Use all-weather mats in sloppy months and empty them before salt slurry starts travelling onto the carpet.
- Open the cabin and air it out when conditions are dry so trapped odours don't settle in.
The GTA moisture problem
Local conditions matter. In the GTA, too much water inside cloth seats and carpets can cause trouble because humidity hangs around. Consumer Reports cautions against over-wetting upholstery, and the same source context notes that 68% of Ontario car owners report recurring interior odour issues tied to moisture retention, making restraint with liquids especially important in our climate, as discussed in Consumer Reports' interior detailing advice.
That means a few practical rules matter more here than they might in a drier place:
- Blot, don't soak when you're handling fabric stains at home.
- Spray your towel, not the seat if you're cleaning a small area.
- Don't shampoo upholstery late in the day if the vehicle won't have time to dry properly.
- Watch the under-mat area because moisture often hides there longer than expected.
In the GTA, the enemy isn't just dirt. It's dirt that stays damp.
If you follow that rule alone, your interior will stay fresher between major cleanings.
Interior Detailing FAQs for GTA Drivers
How often should I book interior car detailing in Ontario
For GTA drivers, every 3 to 6 months is a sensible range. The right timing depends less on the calendar and more on what your car deals with every week. Winter salt, wet boots, coffee runs, kids, dogs, hockey bags, and summer humidity all speed up the decline inside the cabin.
A vehicle that sees daily commuting through Toronto, Brampton, Mississauga, or Vaughan usually needs attention sooner than a weekend car. If the carpets feel gritty, the glass hazes up faster, or the cabin starts smelling damp after rain, it is time.
Can detailing remove bad odours completely
Sometimes. Sometimes only partly.
Fresh food spills, light pet odours, and that damp smell from wet mats usually come out well if the source is still near the surface. Smoke, old milk, repeated moisture exposure, or water that has reached the underlay are a different job. At that point, the smell is sitting deeper in the materials and often needs extraction, targeted cleaners, and proper drying time.
In the GTA, humidity makes this worse. A car can seem dry on top while the padding underneath is still holding moisture.
Is it worth detailing an older car
Yes, in many cases it is money well spent. A proper interior detail will not erase worn leather, faded plastic, or permanent staining, but it can remove years of body oil, dust, salt film, and grime from the surfaces you touch every day.
That changes how the car feels to live with. Older vehicles often get the biggest visible improvement because the starting point is further gone.
Should I use lots of product to make the interior shine
No. Too much product usually creates a new problem. Glossy dressings can leave the dash reflective, make trim feel greasy, and turn the steering wheel into something you do not want in your hands during a lane change on the 401.
A well-detailed interior should look clean and even, not wet or slippery. Factory-finish is the target.
If your cabin has moved past light upkeep and into set-in salt marks, sour odours, or sticky buildup in seams and trim, a professional service is often the safer call. Nanak Car Wash handles the kind of GTA interior mess that home products often only spread around, especially after winter and during humid stretches.
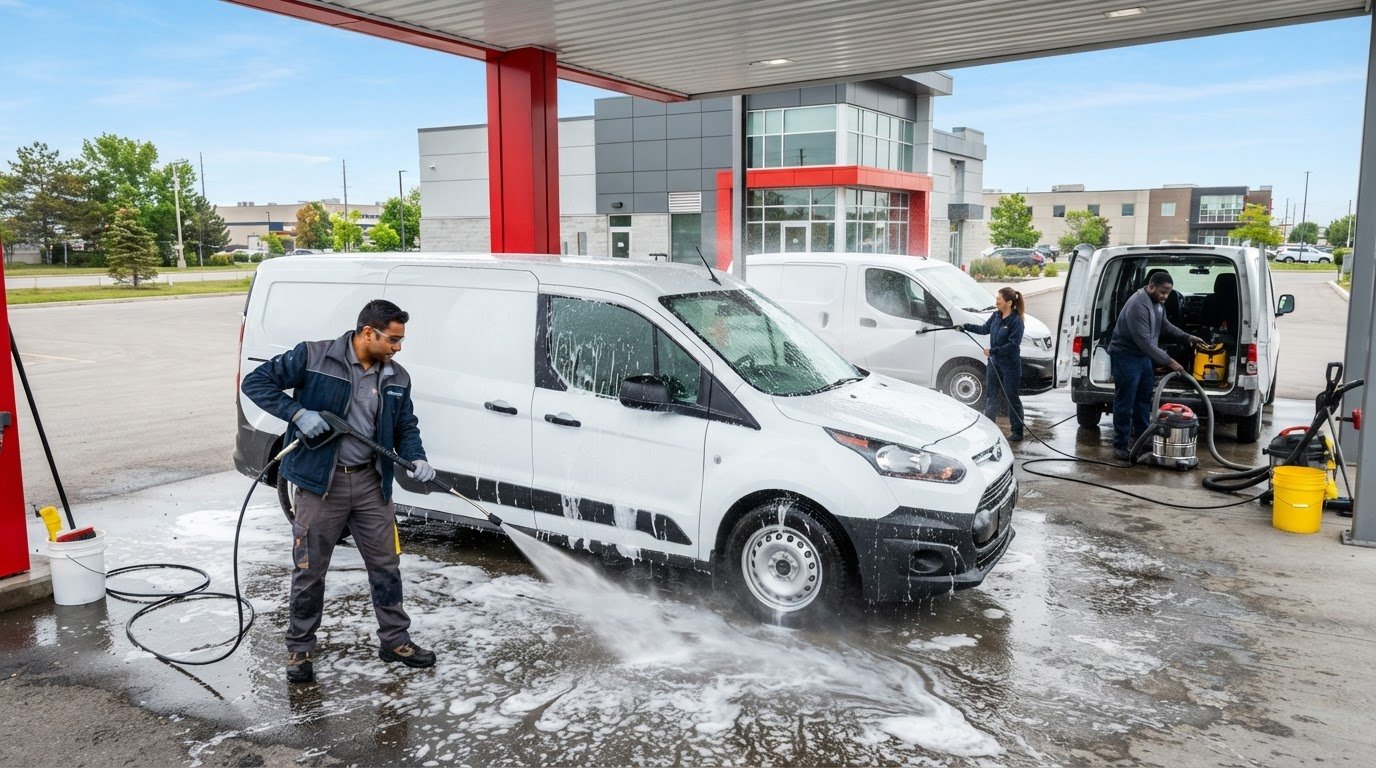


 6600 Finch Ave W, Etobicoke, ON M9V 3Z6
 647-703-8515
 MON – SUN 8 AM to 7 PM