
You turn the fan on in March, expecting a clean blast, and instead get that stale mix of dust, road salt, and old winter air. If you've driven the GTA long enough, you know the smell. The good news is that how to clean air vents in car without wrecking the dash comes down to using the right amount of moisture, the right order, and a little patience around the electronics.
Table of Contents
- Why Your Car Vents Smell Like Winter
- Gather Your Vent Cleaning Kit
- Quick Wipe and Deep Extraction
- Kill Odours Hidden in the Ducts
- When to Call Nanak Car Wash
- Keep Vents Clean in Ontario Climate
- Your Vents Are Part of Car Care
Why Your Car Vents Smell Like Winter
You know the moment. The cabin feels fine until you crack the fan, and then the air carries a dusty, slightly salty bite that tells you winter left more than slush on the mats. In Ontario, that's not just a cosmetic annoyance, because cabin filters had become standard on many passenger vehicles sold in Canada by the late 2000s and 2010s, which pushed vent cleaning into normal HVAC maintenance rather than a once-in-a-blue-moon detail. The region's winter road salt and spring pollen also load the cabin with debris faster than a mild climate ever would, so vents need regular attention. That's the practical reason low-moisture cleaning matters, since vent louvers and actuator parts are thin plastic and don't appreciate heavy liquid or rough scrubbing, as described in the regional maintenance guidance from Kwik Kar White Settlement.

Why the smell keeps coming back
If the vents keep getting dirty again, the problem usually isn't just the slats you can see. Seasonal grime in the GTA settles into the cabin, and then the airflow keeps recycling it through the same narrow openings. That's why a quick wipe can look successful while the car still smells off the next day.
A lot of drivers also treat vent cleaning like a trim touch-up. It isn't. A vent full of dust can make the cabin feel stuffy, weaken the airflow you notice at your face, and leave the interior feeling neglected even when the rest of the car looks decent.
Practical rule: if the dirt came in with winter boots, melted slush, or spring pollen, treat the vents as part of HVAC upkeep, not just dashboard detailing.
Gather Your Vent Cleaning Kit
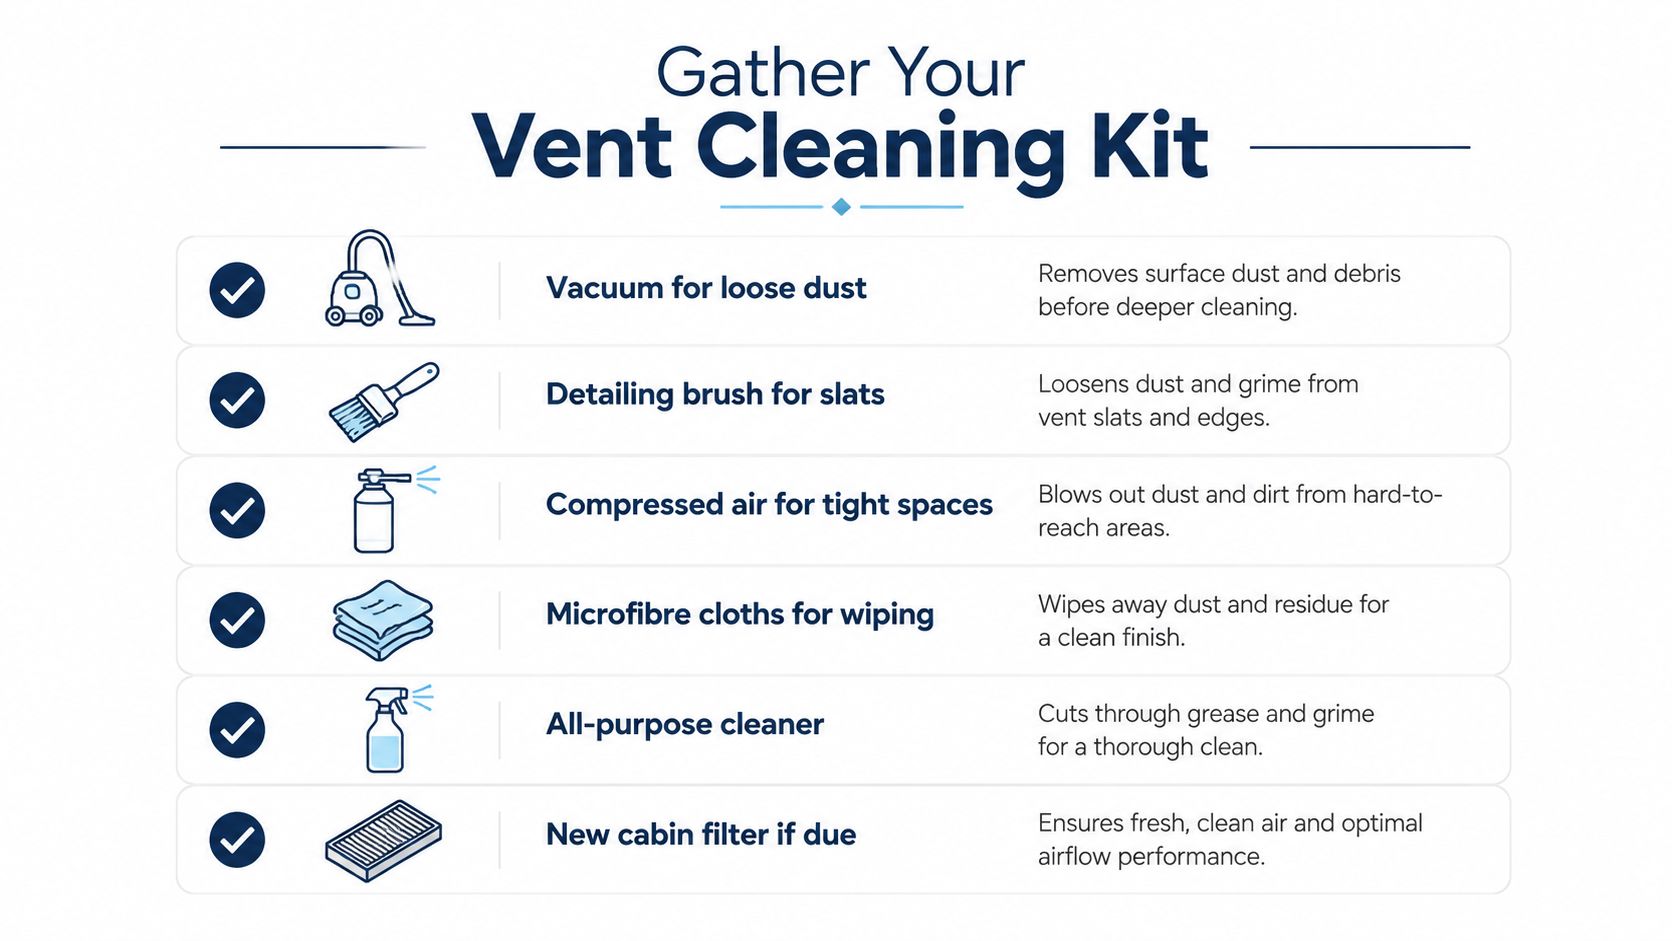
Before touching the slats, pull together a vacuum with a crevice tool, a soft detailing brush, compressed air, microfibre cloths, and an all-purpose cleaner. That sounds like a lot, but it's really a small, low-drama kit. If your cabin filter is due, keep a replacement nearby too, because a dirty filter can keep feeding the same grime back into the system.
What each tool actually does
The vacuum catches loose debris before it floats back into the cabin. The soft brush loosens dust trapped between louvers without gouging the plastic. Compressed air reaches into corners the brush can't touch, and the microfibre cloth gives you the final wipe without leaving lint behind.
Keep your cleaner use conservative. The safest approach is to dampen the cloth lightly or spray the product onto the cloth or brush, not into the vent cavity. That matters because blended-dashboard electronics sit close to many vent assemblies, and over-wetting can leave residue where you don't want it.
The prep that saves you from mistakes
Work with the engine off unless a later odour treatment specifically calls for the fan. Open a door or window so dust doesn't just swirl around and resettle. If you're cleaning a car that's seen a full Ontario winter, start by checking whether the filter looks tired before you spend time polishing the visible slats.
A slightly damp cloth is enough for sticky film. A soaked cloth is the start of dashboard regret.
Quick Wipe and Deep Extraction
A lot of vent cleaning jobs stop at the visible face of the slat. That works if the dust is light, but once you're dealing with a winter build-up, you need to choose between a fast surface clean and a deeper extraction that removes the loosened mess. The order matters, because dust that's brushed loose but not captured just settles again on the louvers.
Quick DIY for everyday dust
Start with the vacuum, then run the soft brush along the slats, then finish with a slightly damp microfibre cloth. That sequence lines up with the standard DIY method described in regional maintenance guidance, and it's the right option when the vents just look dusty rather than packed with debris. It's quick enough to do between full interior cleans, which is why it makes sense for regular maintenance.
Use short, controlled motions. Don't grind the brush into the edges, because vent assemblies are made to move air, not take punishment. If the louver flexes, back off and let the brush do the work.
Deep clean when dust keeps hiding
For heavier buildup, AutoZone recommends a more aggressive but still careful sequence, starting with removing the vent trim when possible, then using compressed air to blow dust out of the duct, followed immediately by a vacuum at the vent opening to catch what got dislodged, and then wiping accessible surfaces with a damp microfibre and all-purpose cleaner, as outlined in AutoZone's vent-cleaning guide. That two-tool extraction approach matters because it removes the particulate after it's been loosened instead of forcing it deeper into the HVAC box.
Dust released by brushing is easiest to remove before it gets a second chance to settle.
Some vents can pop out and be washed, but only if they're fully dried before going back in. If you skip drying, you've just traded dust for moisture inside the dash. That's a bad exchange in any climate, and especially in a car that already sees condensation, slush residue, and messy commuting.
Kill Odours Hidden in the Ducts
Surface wiping won't fix a musty smell that keeps returning the moment the fan comes on. That kind of odour usually lives deeper in the system, where the evaporator core and duct surfaces hold onto residue. For that job, the cleaning has to move through the airflow path, not just across the visible vent face.
Treat the intake, not just the slats
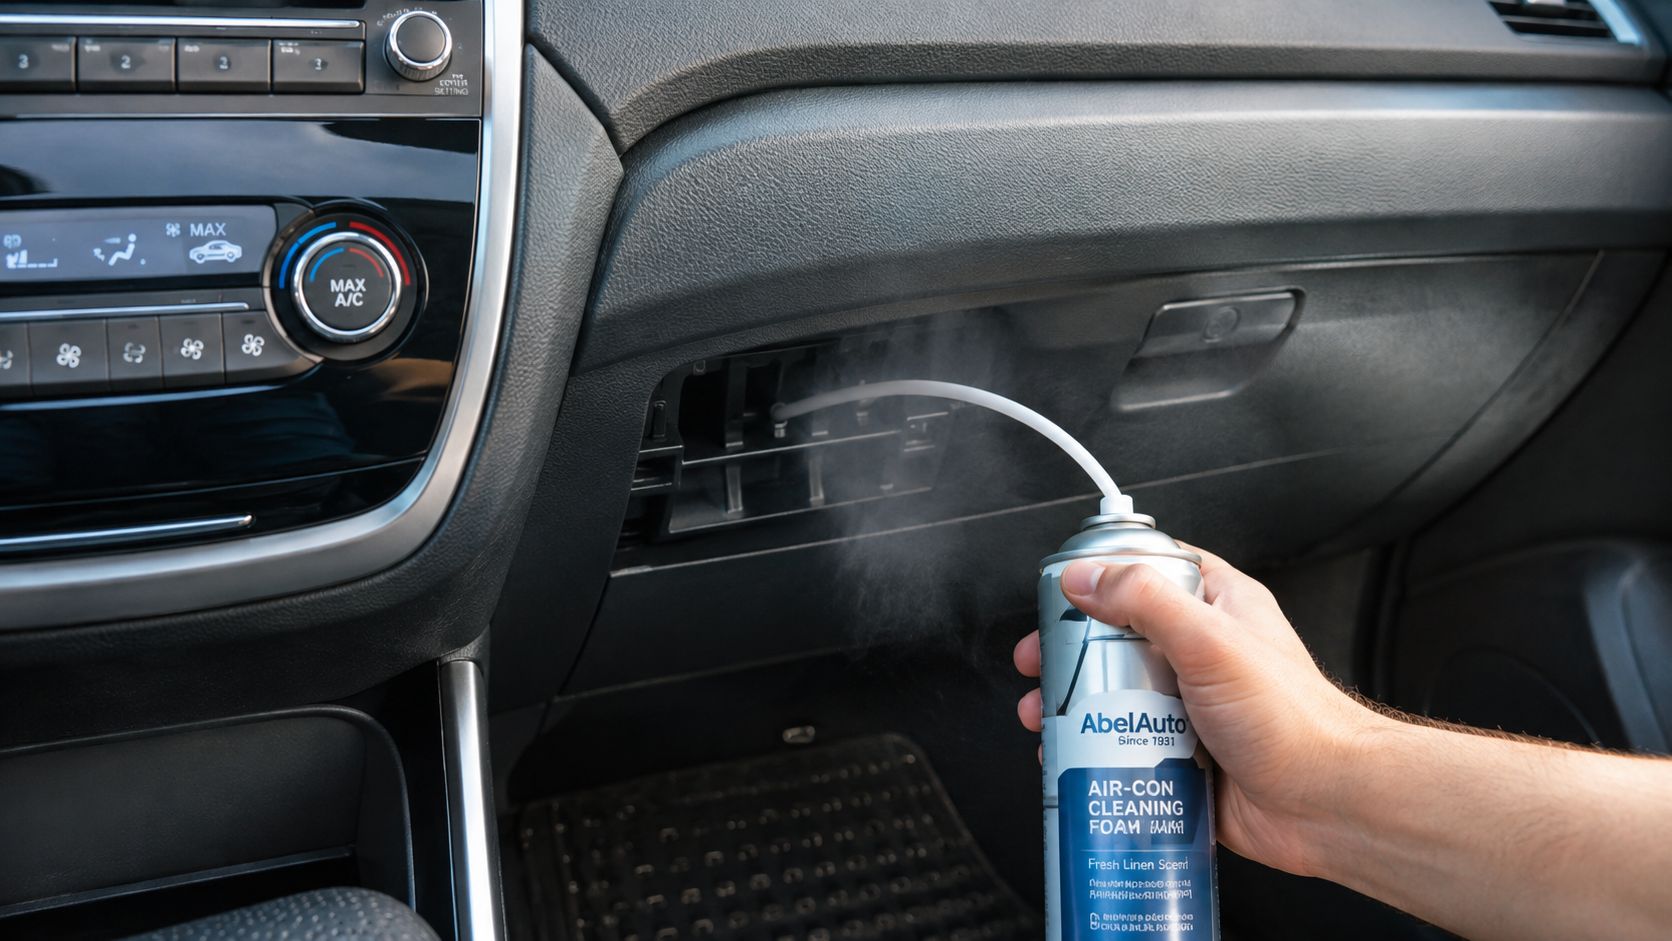
The usual system-level approach is simple. Set the blower to maximum on recirculate, spray cleaner into the cabin-air intake below the glove box and the cowl intake near the windshield, then let the product dwell before airing the car out. WellWhisk's instructions recommend splitting the can between the interior intake and the cowl opening, then ventilating the car for at least 10 minutes after treatment, while other DIY HVAC guides advise keeping the fan on high for 10 to 15 minutes so the cleaner passes through the ductwork, as described in WellWhisk's AC vent cleaning guide.
That works because the problem isn't always visible dirt. Odour-causing residue can sit on hidden surfaces that a cloth never reaches. You're using the blower to move the cleaner where the smell lives.
Don't reuse a saturated filter
A cabin filter check matters here. If the filter is loaded with debris or holds onto odour, put in a new one instead of trying to squeeze another season out of it. A saturated filter can reintroduce the same smell and trapped dust into a system you just cleaned.
For broader indoor-air comparisons, the concept is similar to home duct cleaning, where the visible grille is only part of the story and the mess often sits deeper in the airflow path. Cars are smaller, but the logic is the same. If the hidden path stays dirty, the smell comes back.
When to Call Nanak Car Wash
DIY makes sense when the vents are dusty and the smell is mild. It stops making sense when the car is high-use, the dust comes back fast, or the cabin always seems one week away from looking tired again. That happens a lot in rideshare cars, delivery vehicles, and family SUVs, where passenger turnover, snacks, wet shoes, and repeated recirculation keep the interior under constant pressure.
What a professional blowout adds
A proper detailing visit can bundle the vents with the rest of the cabin instead of treating them as a single narrow task. Nanak Car Wash has been operating since 2004 and offers by-appointment interior and exterior detailing that includes vent and crevice blowout, with typical service time of 1 to 4 hours and locations including Etobicoke, Brampton, Concord, Oshawa, Sheppard/North York, Burlington, Cambridge, and Guelph. That matters because the vents do not sit alone. They pick up dust from the same dashboard seams, cupholder edges, and trim gaps that home cleaning often misses.
If you want a useful comparison point, duct cleaning services explained shows the same basic idea in home systems, where a blowout approach reaches hidden buildup that surface cleaning never touches. The car version is smaller and faster, but the maintenance logic is familiar.
When the car has already told you enough
If airflow still feels weak after you've cleaned the slats and changed the filter, the vents are telling you the issue runs deeper. If the odour returns quickly, the intake area or the cabin filter is still carrying contamination. At that stage, repeated wiping usually just means repeated frustration.
Professional detailing also reduces the chance of forcing liquid into a tricky dash layout. That matters on modern vehicles with layered trim, multi-zone controls, and tight vent assemblies that do not forgive sloppy hand cleaning. The Nanak Car Wash site lays out the service in a way that makes it easy to match the job to the car instead of guessing from the driveway.
Keep Vents Clean in Ontario Climate
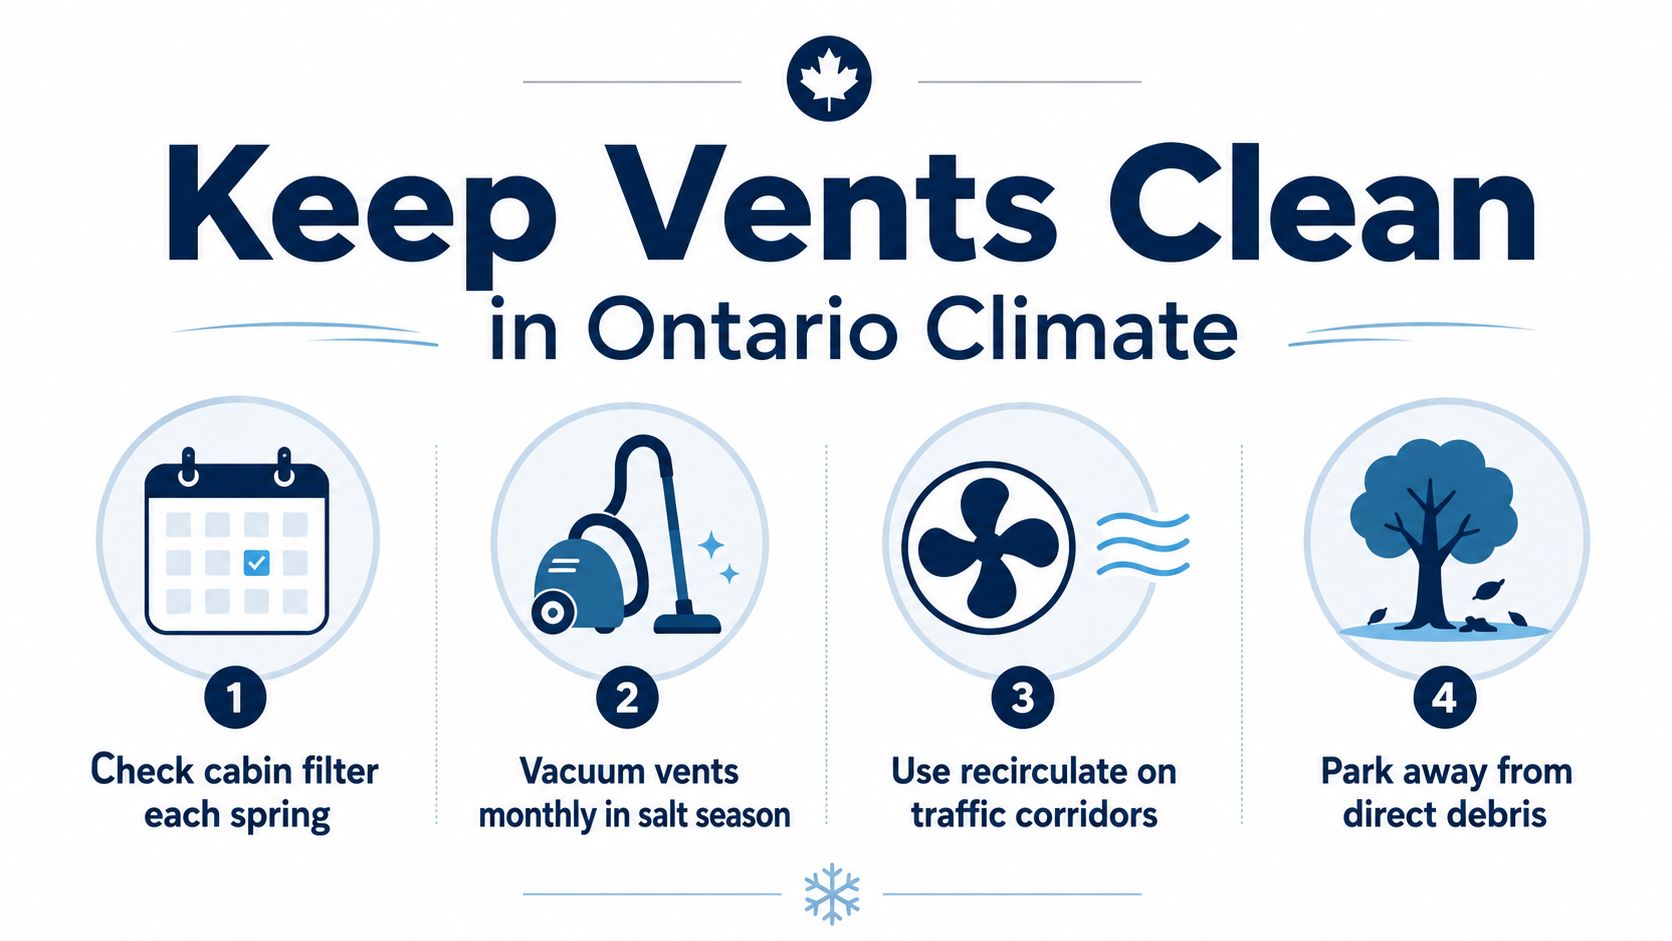
Prevention beats scrubbing every time, especially in a province where the seasons keep loading the cabin with different debris. The GTA's winter salt, slush residue, and spring pollen make vent care a recurring job rather than a one-off chore, and the easiest wins are the small habits that stop grime from building up in the first place.
Four habits that keep the airflow cleaner
- Check the cabin filter each spring. If it looks loaded or smells off, replace it instead of trying to nurse it through another season.
- Vacuum the vents during salt season. A quick pass catches the debris before it works deeper into the trim.
- Use recirculate on heavy traffic corridors. It helps reduce what gets drawn in while you're crawling through congestion.
- Park away from direct debris when you can. Trees, blown pollen, and construction dust all end up in the cabin faster than people expect.
These habits don't take much time, but they cut down on the number of full cleanings you need. They also make every wipe-down more effective, because you're dealing with maintenance dirt instead of a baked-on interior mess.
A lot of Ontario drivers ignore vents until the air smells stale. That's the expensive version of the routine. The cheaper version is a little maintenance spread across the year.
Your Vents Are Part of Car Care
Clean vents aren't a luxury detail, they're part of keeping the cabin usable. Quick DIY handles surface dust, deep extraction clears stubborn buildup, system treatment deals with odours, and a professional vent-and-crevice blowout makes sense when the car gets heavy daily use. The low-moisture approach protects the dash, and that's the part many forget until a wet cloth leaves them with a bigger problem than dust.
For a broader interior care approach, Derek's Auto Detail Seattle is a useful reference point for how professional interior work can go beyond the obvious surfaces and into the seams that trap grime. The same principle applies here, but the Ontario climate makes it more urgent.
If your vents still smell like winter, Nanak Car Wash can handle the vent-and-crevice blowout as part of an interior detail by appointment. Visit Nanak Car Wash to book a service that fits your car's condition, then stop letting salt, pollen, and dust cycle through the cabin every time you turn the fan on.




 6600 Finch Ave W, Etobicoke, ON M9V 3Z6
 647-703-8515
 MON – SUN 8 AM to 7 PM