

You open the centre console looking for a charging cable and find a cup holder coated in yesterday's coffee, old crumbs, and a gritty ring of Ontario road salt. A quick wipe removes the obvious mess, but the sticky film stays in the corners, while moisture hides beneath the liner and along the console seams. That's where how to clean cup holders in car stops being a cosmetic chore and becomes a careful interior-maintenance job.
The safe method is simple: remove what can be removed, vacuum before scrubbing, use low moisture around fixed components, and dry everything completely. Modern interiors combine hard plastic, rubber, soft-touch coatings, screens, sensors, and electronic trim, so more cleaner and more pressure don't automatically produce a better result.
Table of Contents
- Why Cup Holders Deserve More Attention
- Essential Tools and Materials You Need
- Quick 10-Minute Cleaning Method
- Deep Cleaning for Stubborn Stains and Odors
- Ontario Winter Challenges and Salt Damage Prevention
- Maintenance Schedule and Professional Detailing Options
Why Cup Holders Deserve More Attention
Most cup holders get cleaned only after they become embarrassing. A passenger lifts a removable liner and exposes a dark, tacky cavity underneath. There may be a dried coffee ring on the base, grit pressed into the rubber, and a faint smell that returns whenever the cabin warms up. The area is small, but it collects exactly the materials that are difficult to remove later, including sugary residue, dust, crumbs, and winter contamination.
In Ontario, road salt and brine are recurring interior contaminants during the winter months. GTA detailing guidance describes winter cleaning as a process for removing dirt, stains, dry mud, and salt, while dedicated Ontario services treat salt-stain removal as a regular detailing need. Cup holders sit low in the cabin and contain deep recesses, so slush and damp debris can remain there long after the visible floor mats look clean. Ontario salt-stain removal guidance places cup-holder cleaning within that larger winter interior-restoration problem.
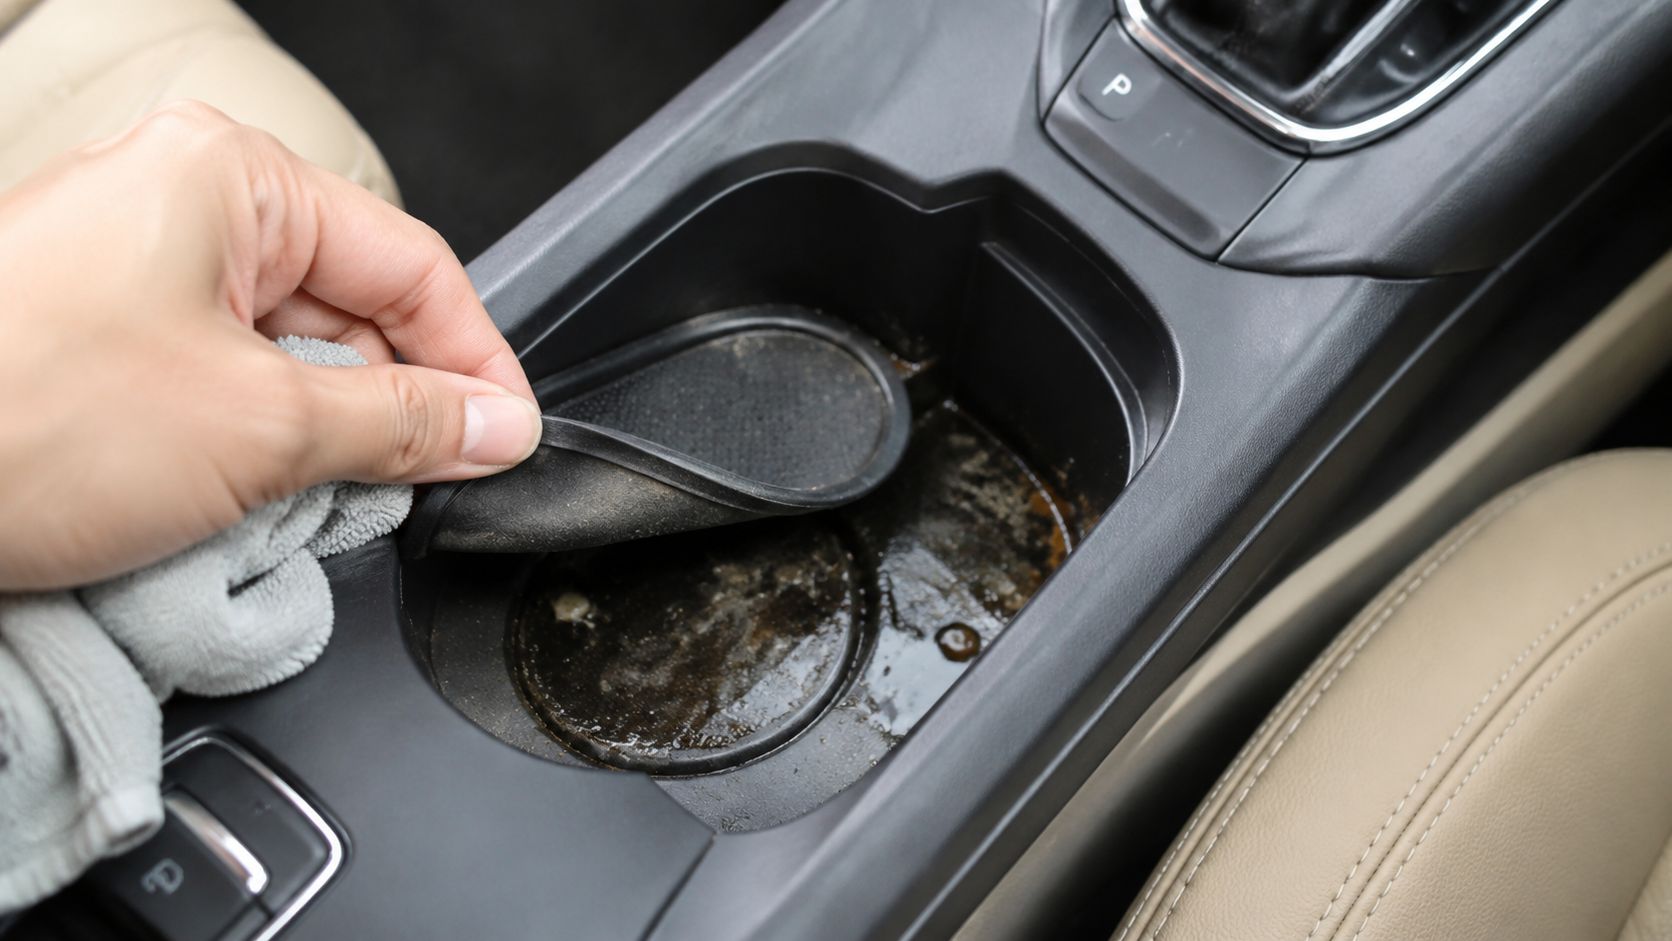
The hidden risk is moisture
A fixed cup-holder well may sit beside buttons, sensors, charging hardware, or electronic controls. Flooding it with spray can push liquid into seams, where it dries slowly and may leave odours or marks. Soft-touch trim also reacts badly to aggressive scrubbing and harsh household chemicals, which can change its texture or finish.
The practical difference between a quick wipe and proper cleaning is control. Spray the towel, not the console. Use a crevice attachment before introducing moisture. If the liner comes out, wash it separately instead of forcing a wet cloth into the narrow gap between the insert and the surrounding trim.
Practical rule: Treat the cup holder as a hard-to-reach zone, not as a flat surface. Remove, vacuum, wash, wipe, and dry in that order.
Essential Tools and Materials You Need
A reliable cup-holder kit doesn't need to be elaborate. You need tools that lift debris without scratching, apply cleaner in a controlled way, and remove moisture before it settles into seams.
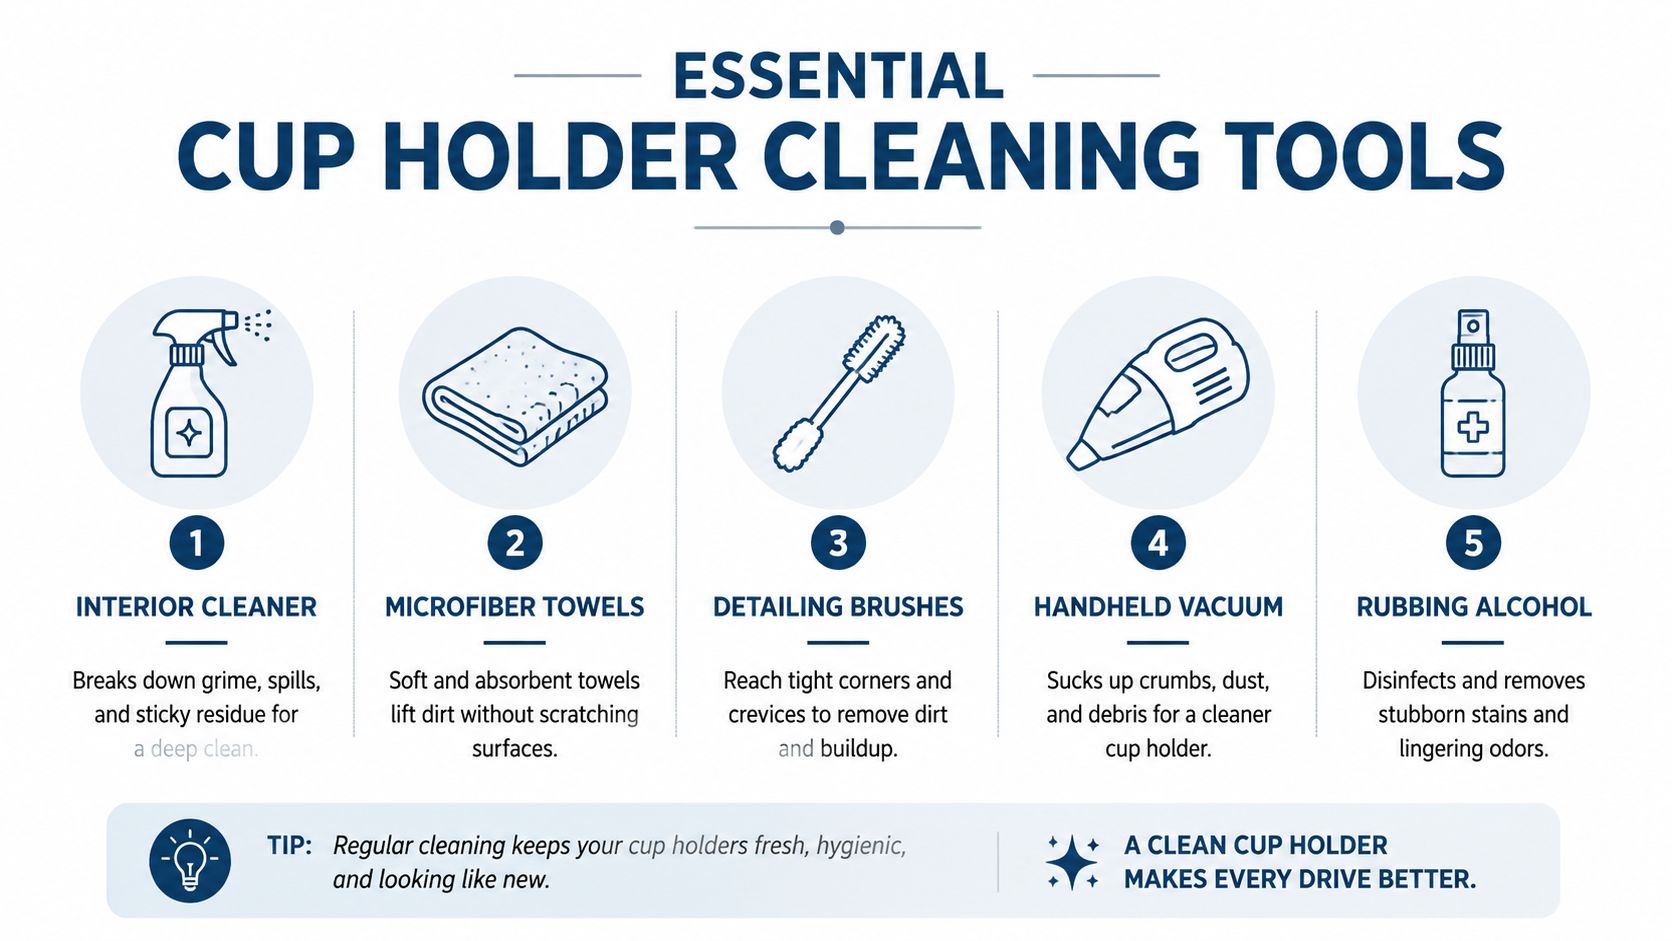
Start with two clean microfiber towels. One is for lifting cleaner and grime, and the other is reserved for the final dry pass. A compact vacuum with a crevice attachment matters more than a powerful brush because loose grit can scratch plastic when you spread it around with a damp cloth. Add a soft detailing brush for textured surfaces and a smaller brush or cotton swab for the corners where the brush head can't reach.
Use an automotive interior cleaner suitable for the material you're cleaning. Apply it to the cloth or brush rather than spraying freely into a fixed well. For removable rubber or plastic inserts, mild dish soap and water are appropriate, followed by thorough rinsing and drying. A small amount of rubbing alcohol can help with greasy residue on compatible hard plastic, but test it on an inconspicuous area first and keep it away from soft-touch coatings, painted trim, and sensitive finishes.
What belongs on the avoid list
- Ammonia-based products: CAA North & East Ontario advises avoiding ammonia-based cleaners on infotainment screens because they can damage them. Use a screen-safe product on the cloth, never a wet spray into the console. CAA-aligned Ontario detailing guidance also supports interior wipes or automotive cleaner with microfiber for hard surfaces.
- Abrasive powders and rough scrubbers: They can dull plastic and leave visible scratches in glossy trim.
- Excessive water: Soaking a fixed cup holder creates a moisture problem instead of solving one.
- Kitchen degreasers and bleach: Their strength isn't an advantage on delicate automotive materials.
If reducing packaging matters to you, Fillaree's guide to green cleaners offers useful context when choosing a lower-waste all-purpose cleaning option. Whatever product you choose, read its surface directions and test first.
Quick 10-Minute Cleaning Method
For fresh spills, light dust, and routine upkeep, you can clean a cup holder quickly without removing the insert. The key is to spend the first part of the job removing dry debris, not turning it into wet mud.
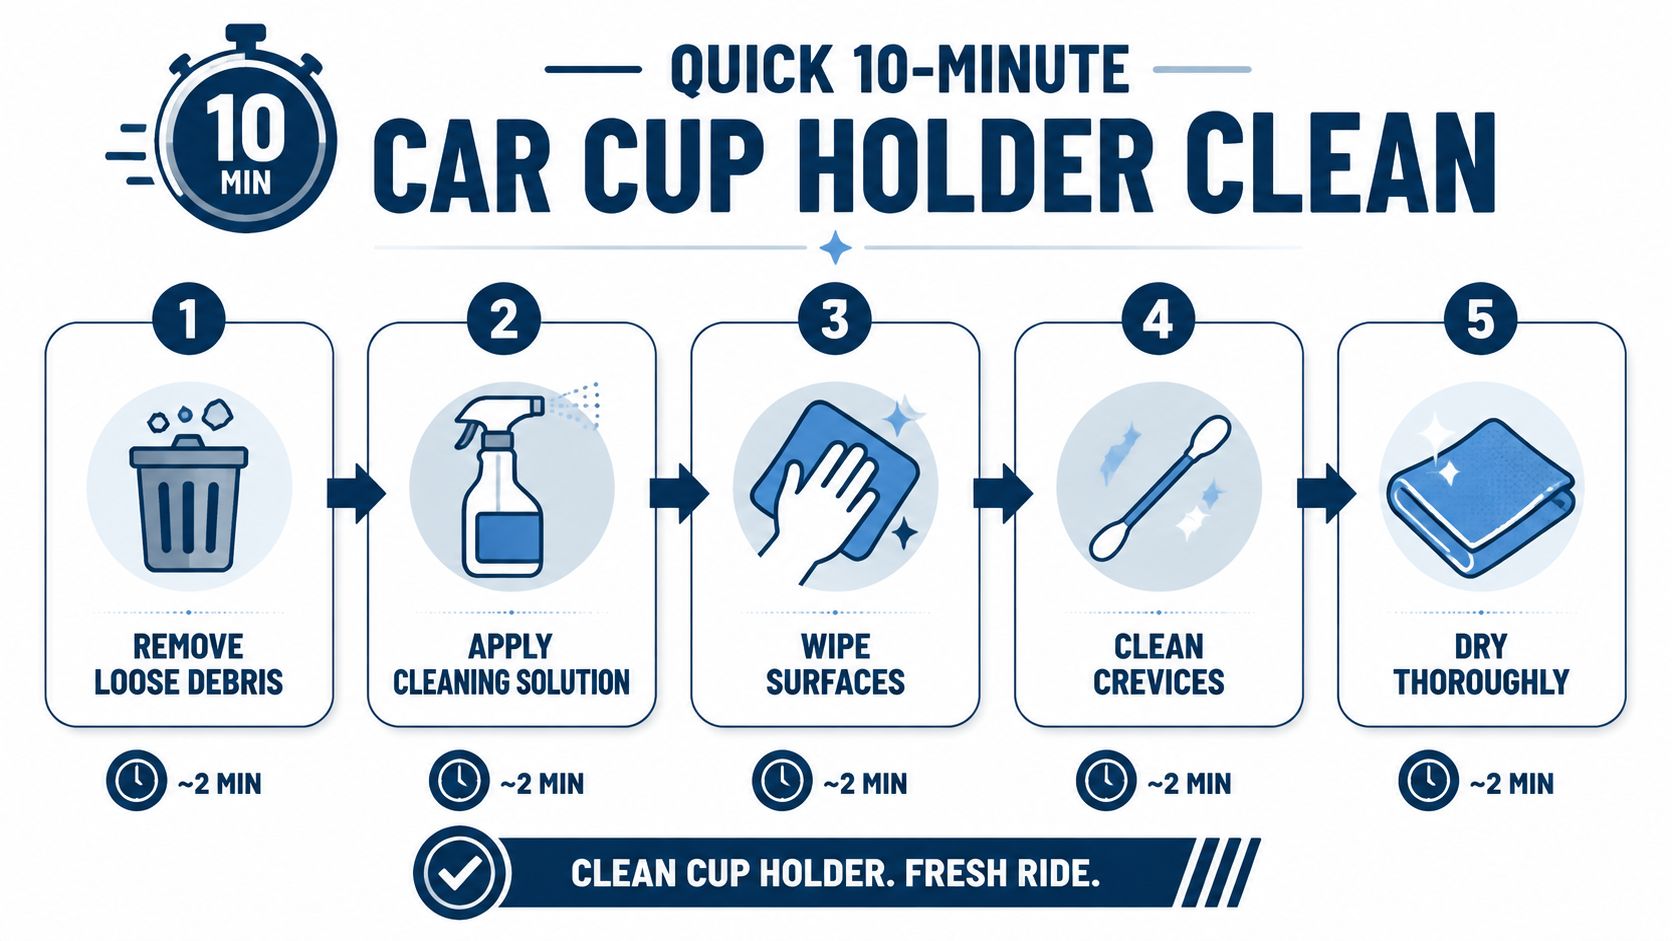
- Clear the well. Remove coins, wrappers, receipts, and any loose objects. Pick out larger crumbs by hand so they don't smear across the liner.
- Vacuum first. Use the crevice tool around the rim, corners, and the space where the liner meets the console. Keep the nozzle just above delicate trim rather than dragging it across glossy surfaces.
- Dampen the towel. Spray a small amount of interior cleaner onto a microfiber cloth. The cloth should be damp, not dripping.
- Wipe the accessible surfaces. Work around the base and walls, folding the towel to expose a clean face as grime transfers. For textured rubber, use a soft brush with a small amount of cleaner.
- Detail the edges and dry. Run a cotton swab or narrow brush along grooves, then follow with a dry microfiber towel. Leave the lid or cover open briefly so trapped moisture can escape.
This method works for a light film and a recent drink spill. It won't reliably remove hardened sugar, salt crust, or an odour coming from residue beneath a removable liner. In those cases, repeated wiping usually wastes time and pushes contamination into the edges.
For rideshare and delivery vehicles, keep a folded microfiber towel and a small interior-cleaner bottle in a sealed kit. A controlled wipe between passengers or stops is useful, but don't clean while the vehicle is moving or while controls are active.
A fast clean should remove loose contamination and surface film. It shouldn't leave the console wet enough to collect more dirt.
Deep Cleaning for Stubborn Stains and Odors
Sticky soda, dried coffee, and winter grit need a different approach. Start by checking whether the cup-holder insert is designed to lift out. Don't pry against painted trim or force a liner that appears fixed. If it comes out easily, place it aside before applying any liquid to the surrounding console.
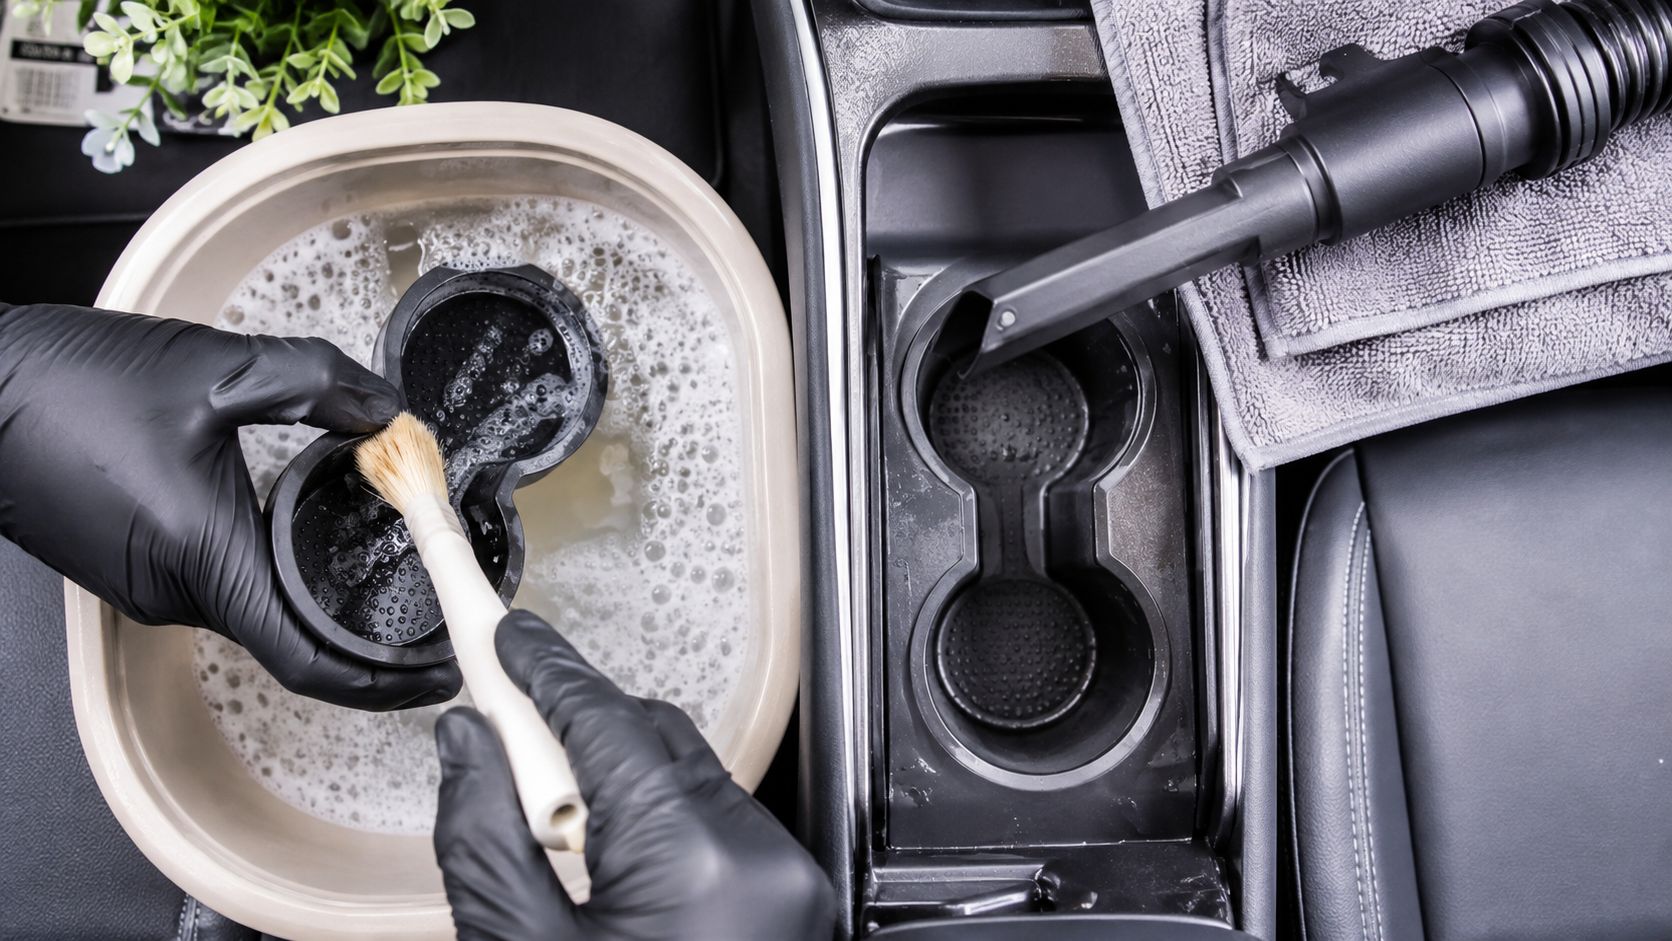
CAA North & East Ontario's recommended sequence is practical for this job. Remove the insert, vacuum the surrounding area with a crevice attachment, wash the removable part separately with dish soap, dry it, then reinstall it. CAA North & East Ontario's interior-cleaning guidance specifically identifies seat crevices and cup holders as areas suited to attachment-based vacuuming and recommends taking removable cup holders out for washing.
Work on the insert separately
Put the rubber or plastic liner in warm water with a small amount of dish soap. Let the solution soften the residue, then work the grooves with a soft-bristle brush. A brush removes grime from texture more effectively than a cloth alone, but avoid aggressive pressure that can roughen rubber or mark soft plastic.
Rinse until no soap remains and dry every channel with a towel. Let the piece air-dry fully before replacing it. If you're cleaning away from home, a compact handheld bottle for short runs can provide a practical way to carry a small amount of water for controlled rinsing, without bringing a large container into the vehicle.
Clean the fixed cavity with restraint
Vacuum the empty well again, paying attention to the lower corners. For dried residue, place a barely damp microfiber cloth over a fingertip and hold it against the spot to soften it, then wipe. A soft detailing brush can agitate the remaining film, but keep the cleaner on the brush rather than pouring it into the cavity.
Use cotton swabs around seams, sensor openings, and small channels. Never insert a metal tool, knife, or screwdriver to chip off residue. Scratching a cup holder creates a rougher surface that catches the next spill, and probing near electronics can cause damage.
Odour usually improves when the source is removed, not when fragrance is added. Clean the liner, wipe the cavity, remove damp material, and dry the surrounding trim. In cold weather, don't reinstall a wet insert and close the console immediately. Bring the removable piece indoors to dry if necessary, while keeping the vehicle's fixed surfaces only lightly damp.
Ontario Winter Challenges and Salt Damage Prevention
Winter changes the material inside the cup holder. Salt arrives with wet gloves, slushy containers, boots, grocery bags, and clothing, while brine can dry into a pale crust around the base and rim. A casual wipe may remove the loose dust but leave dissolved salt behind, especially in the grooves of rubber liners.
Ontario detailing sources describe salt as a serious recurring interior contaminant, not merely a stain. GTA winter detailing information connects winter cleaning with the removal of salt, mud, dirt, stains, and other contamination, which is why cup holders deserve attention whenever the rest of the cabin receives a seasonal clean.
Remove salt without spreading it
Vacuum dry grit first. Then use a lightly damp microfiber cloth to lift the residue in small passes, rinsing or changing the cloth as it becomes dirty. Flooding the well can dissolve the salt quickly, but it also carries moisture into seams and leaves more drying work behind, so controlled dampness is the safer trade-off.
For removable liners, washing with dish soap is straightforward. For fixed wells, use a damp cloth, a soft brush for grooves, and a dry towel immediately after. If salt has dried into a hard edge, soften it gradually instead of scraping.
Freeze-thaw conditions make drying especially important. Moisture left in a seam can remain unnoticed, then freeze when the vehicle cools and thaw again when the cabin warms. That cycle can leave stale odours or water marks, so open the cup-holder cover, wipe the edges, and don't reinstall wet liners.
Winter habit: Clean visible salt before it becomes a crust. A short, low-moisture wipe is safer than a dramatic soak later.
Silicone liners can make seasonal maintenance easier because you can lift them out and wash them separately. They aren't a substitute for cleaning the cavity underneath, though. Check beneath them after slushy drives, particularly in vehicles used by families, delivery workers, or rideshare operators.
Maintenance Schedule and Professional Detailing Options
Cup-holder maintenance works best as a small habit tied to another task. Empty the wells when you remove rubbish, vacuum them when you vacuum the mats, and wash removable liners whenever they collect visible residue. Daily-use vehicles need more frequent attention because drinks, food, passengers, and winter debris create different kinds of buildup.
Use the quick method for fresh spills and light dust. Choose a deep clean when the liner feels tacky after wiping, salt remains in the grooves, an odour returns, or moisture has collected beneath the insert. If the surrounding console contains charging hardware, sensors, or delicate soft-touch trim, a careful low-moisture process is more important than speed.
Professional detailing makes sense when contamination extends beyond the cup holder or when the vehicle needs broader interior restoration. Nanak Car Wash lists full-service interior cleaning that includes cup holders, consoles, dashboards, windows, and vacuuming, while its detailing options include carpet and seat shampooing, salt and stain removal, and vent and crevice cleaning. That can suit GTA owners who need the cup holders handled as part of a complete interior service rather than as an isolated task.
For a vehicle that sees heavy winter use, the best routine is consistent removal of loose grit, controlled cleaning of residue, and complete drying. That approach protects the mixed materials found in modern cabins and keeps a small problem from becoming a sticky, odorous restoration job.
Nanak Car Wash offers full-service interior cleaning and appointment-based detailing that can include cup holders, consoles, crevice cleaning, salt and stain removal, and broader interior care. If your GTA vehicle has winter buildup or residue beyond a quick DIY clean, visit Nanak Car Wash and choose the service that matches the condition of your cabin.



 6600 Finch Ave W, Etobicoke, ON M9V 3Z6
 647-703-8515
 MON – SUN 8 AM to 7 PM