
You pull into a Mississauga driveway after a February commute and notice the usual evidence of an Ontario winter. The floor mats are grey with slush, white salt lines have crept along the carpet edges, and the windows fog the moment the heater comes on. A quick vacuum might make the cabin look better, but it won't remove the contamination that melted snow has carried beneath the surface.
That's the important distinction when learning how to detail a car interior. The job starts with dry soil removal and moisture control, then moves to stains, odours, surfaces, and appearance. Clean-looking carpets can still hold salt, grit, pet hair, and dampness, especially around seat rails and floor anchors. A proper detail treats the cabin as a used environment, not a display cabinet.
Table of Contents
- Why Interior Detailing Matters More in Ontario Winters
- Prep the Cabin and Pull Out the Loose Grime
- Stain Removal That Actually Works on Real Messes
- Cleaning Seats, Carpets, and Leather Without Ruining Them
- Vents, Crevices, and the Stuff You Breathe
- DIY Versus Pro Detailing When to Call It In
- Your Interior Detailing Checklist and Maintenance Rhythm
Why Interior Detailing Matters More in Ontario Winters
Ontario's winter mess is unusually persistent because the contamination arrives in several forms at once. Road salt sticks to boots, slush wets the mats, and ordinary road grit settles into carpet fibres. When the cabin warms up, that moisture spreads. When temperatures drop again, the remaining residue dries and hardens.
A 2012 Canadian Tire survey reported that 73% of respondents cleaned their car interiors less than once every few months, while drivers spent an average of five hours per week in their vehicles. Those figures create a practical detailing problem: the cabin receives constant contact, but many owners leave high-touch areas and floor coverings unattended for long periods. The steering wheel, console, seats, door pulls, and mats keep collecting oils, crumbs, dust, and salt.

Salt is a contamination problem
The exterior corrosion connection is well established. A 1968 Transportation Research Board report recorded the highest atmospheric corrosion measurements in Toronto and Halifax, with Toronto measuring 5108 mg/dm² over 19 months. More recent Canadian research cited by NSERC states that about 50% of vehicle corrosion can be attributed to road salts. The Transportation Research Board corrosion report provides the historical Toronto context.
Inside the vehicle, salt doesn't attack the cabin in exactly the same way it attacks exposed metal, but it still creates trouble. Salt residue holds moisture, leaves white crust on fabric, contributes to stale odours, and can remain around floor anchoring points and seat hardware. If you wet a salty carpet before removing the dry residue, you can dissolve and spread the contamination deeper into the pile.
Practical rule: Treat an Ontario winter interior as a moisture-control job first. Cosmetics come after the cabin is dry and the loose contamination is out.
That's why spring and fall deep cleaning matter, particularly for vehicles used heavily by ride-hailing, delivery, and fleet drivers. A cabin that carries passengers or cargo all day wears faster than a lightly used commuter car. The detailer's task isn't just to make it smell pleasant. It's to remove what the driver and passengers track in before it settles below the visible surface.
Prep the Cabin and Pull Out the Loose Grime
The fastest way to waste time detailing is to start spraying. Begin by making the cabin empty and accessible, then remove dry contamination before liquid touches anything.
Empty everything before reaching for the vacuum
Open every door and the hatch. Remove rubbish, bottles, child-seat accessories, floor mats, boot mats, and anything stored in door pockets. Slide each seat fully forward and fully back so you can see beneath the rails. Drop the glove box if the vehicle allows it, and check the area around the spare-wheel well if the boot has carried wet gear.
Take the mats outside. Knock carpet mats against a hard surface, brush them, and leave them separate from the vehicle while you work. Don't bang them together inside the cabin, because salt dust and grit will settle back onto the seats and console.
Vacuum in a controlled order
Use a rigid-hose shop vacuum with a crevice attachment if you have one. Start dry and work from higher surfaces toward the floor:
- Dashboard and upper panels: Use a soft brush to loosen dust, then collect it with the vacuum. Keep the nozzle near the brush so debris doesn't drift into vents.
- Seats and seams: Vacuum stitching, seat gaps, buckle housings, and the spaces beside the console.
- Rails and tight hardware: Run the crevice tool along seat tracks, under brackets, and around floor anchors.
- Carpet and footwells: Brush embedded grit with a stiff nylon carpet brush, then vacuum again.
- Mats and boot area: Clean these separately so you don't carry loosened salt back into the cabin.
CAA North & East Ontario recommends vacuuming the full interior with attachments for seat crevices and cup holders, followed by microfibre cleaning of dashboards, door panels, and steering-wheel contact areas. Its ultimate car interior cleaning guide also warns against putting dressing on the steering wheel, pedals, or shifter, where a slick finish can create a safety hazard.
Don't use compressed air during the first pass. It can blow salt and dust into HVAC ducts, dashboard seams, and electronics, making later odour work harder. Save controlled air use for vents and crevices after surrounding surfaces are already clean.
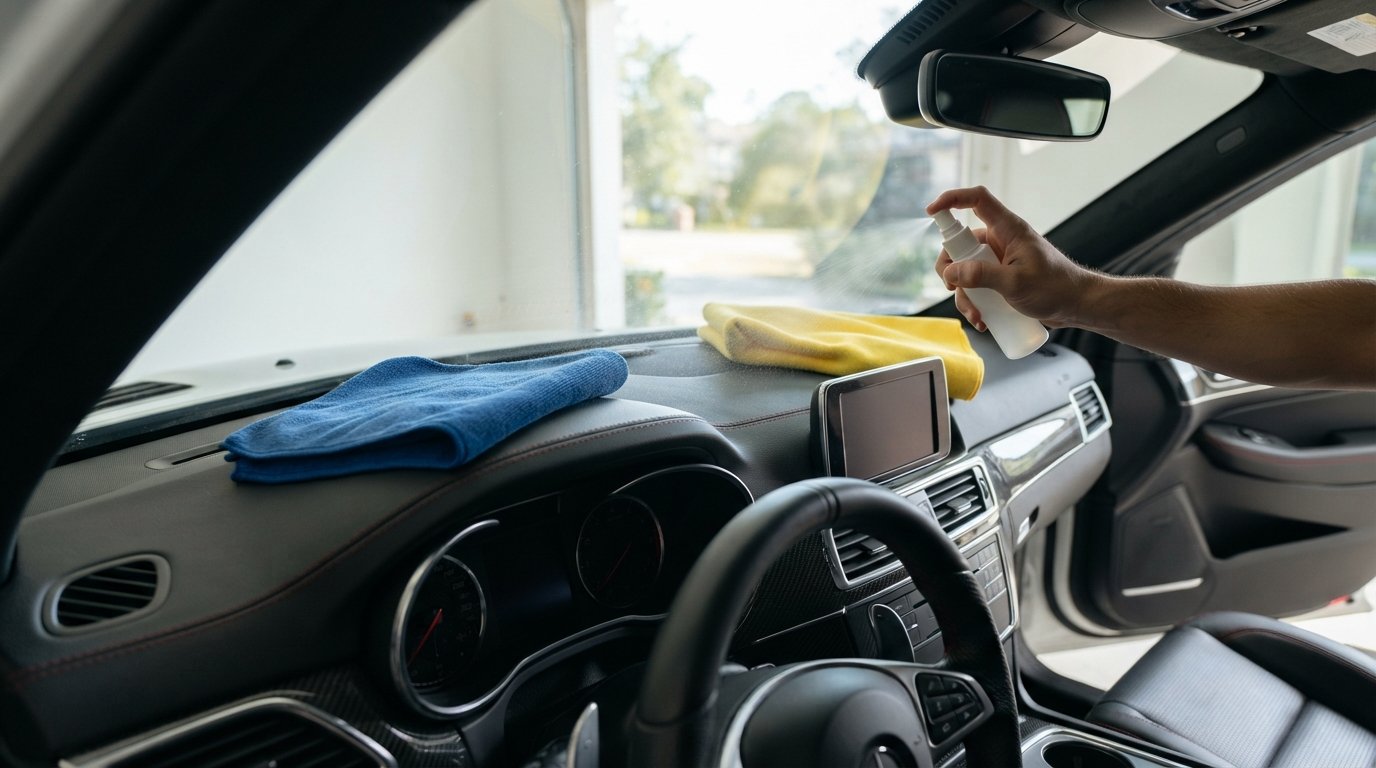
Finish the dry stage with a barely damp microfibre on hard plastics. Spray the cleaner onto the cloth, not directly onto screens, switches, or instrument clusters. Liquid applied too early can turn loose dust into paste and push it into seams.
Stain Removal That Actually Works on Real Messes
A stain isn't just a dirty spot. It's a material sitting in a particular fibre, coating, or foam structure. The correct treatment depends on what was spilled, how long it has sat, and whether someone has already scrubbed it with the wrong product.
Identify before treating
Protein-based contamination, such as milk, blood, or a pet accident, needs an enzyme-based product that can break down the organic material. A hot rinse can drive protein further into fabric and make the odour harder to remove. For pet-related contamination, this guide to a stain remover that breaks down pet odors offers useful product-selection context.
Coffee, hot chocolate, and juice behave differently. These tannin-rich marks usually respond better to a mildly acidic cleaner and gentle tamping. Rubbing aggressively spreads the stain, distorts the carpet pile, and can create a larger faded area than the original spill.
Salt lines are mineral deposits, not ordinary dirt. Lightly mist a diluted white-vinegar solution, allow it a short dwell period, then blot and extract. Don't flood the area. The objective is to dissolve the deposit while controlling where the moisture travels.
Ink and denim dye transfer require caution. Dab isopropyl alcohol onto a cotton swab or small cloth, test an inconspicuous seam first, and work from the outside toward the centre. Alcohol can lift the original carpet dye as well as the transfer, so restraint matters more than strength.
Use the least aggressive method first
| Stain Type | Treatment |
|---|---|
| Milk, blood, or pet accident | Use an enzyme-based cleaner, allow appropriate dwell time, then blot and extract without hot water. |
| Coffee, juice, or hot chocolate | Use a mildly acidic cleaner and soft tamping. Avoid hard rubbing. |
| White salt line | Mist diluted white vinegar, allow it to work briefly, then blot and extract with controlled moisture. |
| Ink or denim dye | Dab isopropyl alcohol after a hidden-area test. Work from the outside inward. |
| Unknown mark | Start with a neutral fabric cleaner and minimal moisture before escalating. |
Blot from the perimeter toward the centre. That simple direction keeps the liquid and dissolved soil from forming a larger ring. If a stain has soaked through the fabric into seat foam, repeated surface spraying won't solve it. You'll need extraction, drying, and sometimes professional treatment to remove what the cloth cannot reach.
Cleaning Seats, Carpets, and Leather Without Ruining Them
Different materials need different levels of moisture, agitation, and chemical strength. A woven cloth seat can tolerate controlled agitation that would mark coated leather. Alcantara can develop a changed texture if you scrub it like carpet, while vinyl may only need a gentle cleaner and wipe-down.
Match the method to the surface
| Surface | Cleaner Type | Brush/Tool | Agitation Pressure | Drying Method |
|---|---|---|---|---|
| Carpet and woven fabric | Fabric or carpet cleaner | Stiff nylon brush, extractor | Firm but controlled | Vacuum extraction, then blower or air mover |
| Cloth seat | Upholstery cleaner | Soft or medium upholstery brush | Light to moderate | Extract lightly and force-dry |
| Coated leather | pH-balanced leather cleaner | Soft leather brush or microfibre | Gentle | Wipe dry, then condition when fully dry |
| Vinyl | Interior-safe cleaner | Soft brush or microfibre | Light | Microfibre wipe, then air dry |
| Alcantara or velour | Material-specific cleaner | Very soft brush | Minimal | Controlled air movement, no saturation |
| Hard plastics | Interior cleaner | Microfibre and soft detailing brush | Light | Dry microfibre buff |
For carpet and fabric, agitation does most of the lifting. Brush the dry or lightly treated fibres so embedded grit and salt release from the pile, then extract the dirty solution. Over-wetting is the shortcut that produces the sour smell later. It can leave the underlay damp long after the surface feels dry.
Leather and vinyl need a different rhythm. Apply a pH-balanced cleaner to the tool or microfibre, work in a small area, and wipe away suspended soil. Condition leather only after the surface is clean and dry. Conditioner won't remove embedded grime, and applying it over contamination can leave a greasy film in the grain.
The mistake I see most often: owners use more liquid because the fabric still looks dirty. In winter cabins, more liquid often moves the salt deeper instead of removing it.
Avoid cosmetic shortcuts
Never scrub leather with a stiff toothbrush or abrasive pad. Don't use a drill brush on delicate upholstery unless the material and brush are appropriate, and don't assume steam is safe for every trim, adhesive, screen, or seat component. A professional extraction machine can remove suspended contamination, but only when the operator controls the amount of solution and follows with thorough drying.
Keep plastics looking factory-matte unless the vehicle's finish specifically calls for dressing. Shiny dashboard products attract dust, create glare, and leave steering wheels, pedals, and shifters dangerously slick. Clean surfaces should feel dry and natural, not oily.
After extraction, open the doors and use a blower or air mover to move moisture out. Avoid closing the vehicle immediately after shampooing. Floor mats should stay out until completely dry, especially after salt treatment.
Vents, Crevices, and the Stuff You Breathe
A cabin can look spotless and still smell musty when the fan starts. Surface fragrance won't fix dust, organic residue, a loaded cabin filter, or moisture inside the HVAC path. Odour control begins by finding where the air is travelling.
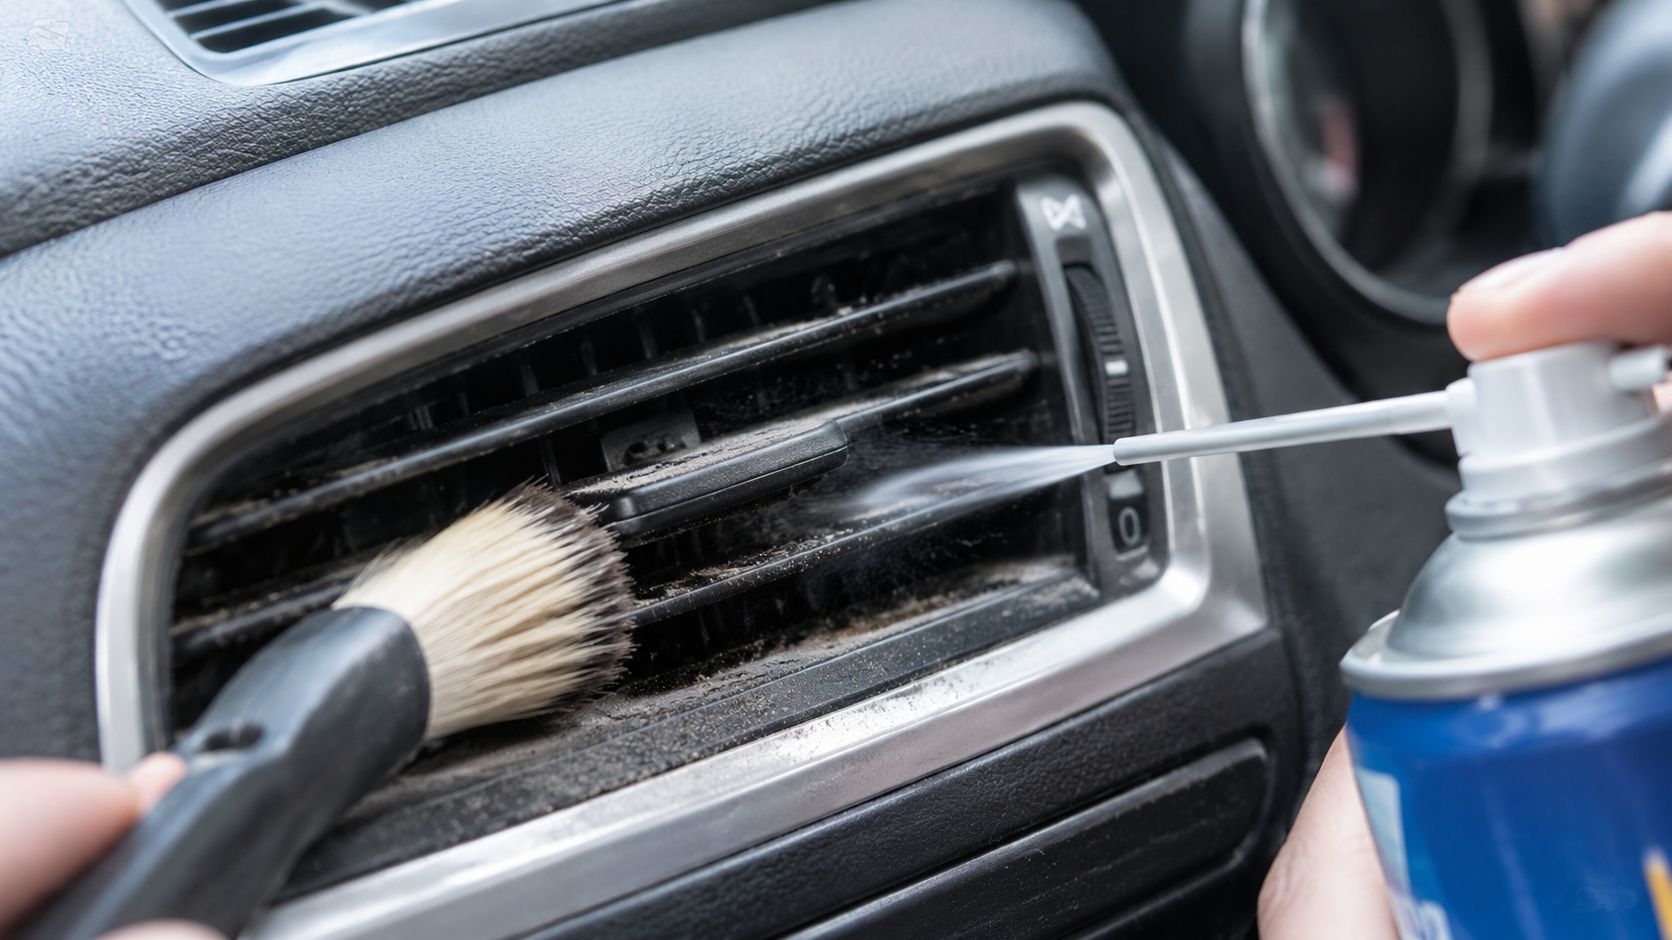
Clean airflow components after the main cabin
Leave vents and deep crevices until nearby seats, carpets, and panels are already clean. Otherwise, loosened debris falls onto finished surfaces and creates rework.
Use a soft vent brush or foam swab between louvre slats. Hold the vacuum nozzle nearby while brushing, and avoid forcing dust into the duct. A detailing brush works along the seam where the dash meets the windshield, while a crevice tool handles seat rails, buckle housings, and the gap beside the centre console.
Compressed air can help in these tight areas, but use short, controlled bursts with the vacuum positioned to capture what comes loose. Uncontrolled air blasts relocate dirt.
Investigate the odour source
Check the cabin air filter for pet hair, dust, salt staining, or dampness. Replace it when it's loaded or contaminated according to the vehicle manufacturer's requirements. Ontario HVAC guidance also points to air ducts, cabin filters, and ventilation settings as part of persistent odour problems, which is why vehicle HVAC cleaning guidance is useful when a clean seat doesn't resolve the smell.
A foaming HVAC cleaner may help clean the evaporator area, but verify that the condensate drain operates before applying a product through the intake. If water cannot drain properly, adding more liquid can create a larger moisture problem.
Use fresh-air intake after cleaning rather than relying on fragrance. If the cabin smells clean before any scent is sprayed, you've removed contamination instead of masking it.
DIY Versus Pro Detailing When to Call It In
DIY cleaning works well for maintenance. A shop vacuum, microfibres, a soft brush, a suitable fabric cleaner, and patience can handle loose grit, light spills, and regular wipe-downs. It also gives owners immediate control after a messy commute or a child drops food in the back seat.
The trade-off is equipment and judgement. Home vacuums often remove surface debris but can't match professional extraction for contaminated foam and carpet underlay. An inexperienced operator can also over-wet a seat, spread a salt line, lift dye, or set a protein stain.
| Factor | DIY Interior Detail | Professional Interior Detail |
|---|---|---|
| Cost | Lower equipment and product cost | Service price reflects labour, vehicle size, and soil level |
| Time | Requires a clear block of uninterrupted time | Staff handle the workflow while the owner is away |
| Equipment | Household or small shop vacuum, brushes, microfibres | Commercial extraction, drying, and specialised tools |
| Best for | Routine upkeep and minor spots | Deep salt buildup, pet hair, odour, stains, and neglected cabins |
| Risk | Mistakes can damage fabric, leather, or electronics | Experienced technique reduces process errors |
A small car can be manageable at home, but a three-row SUV with child seats, pet hair, and winter buildup becomes a substantial project. Professional detailing also makes sense when a stain has penetrated foam or when the cabin can't be dried properly in the available space.
Use DIY cleaning between deeper resets. Call a professional when the contamination is below the surface, the odour returns after cleaning, or the material is too valuable to experiment on.
Your Interior Detailing Checklist and Maintenance Rhythm
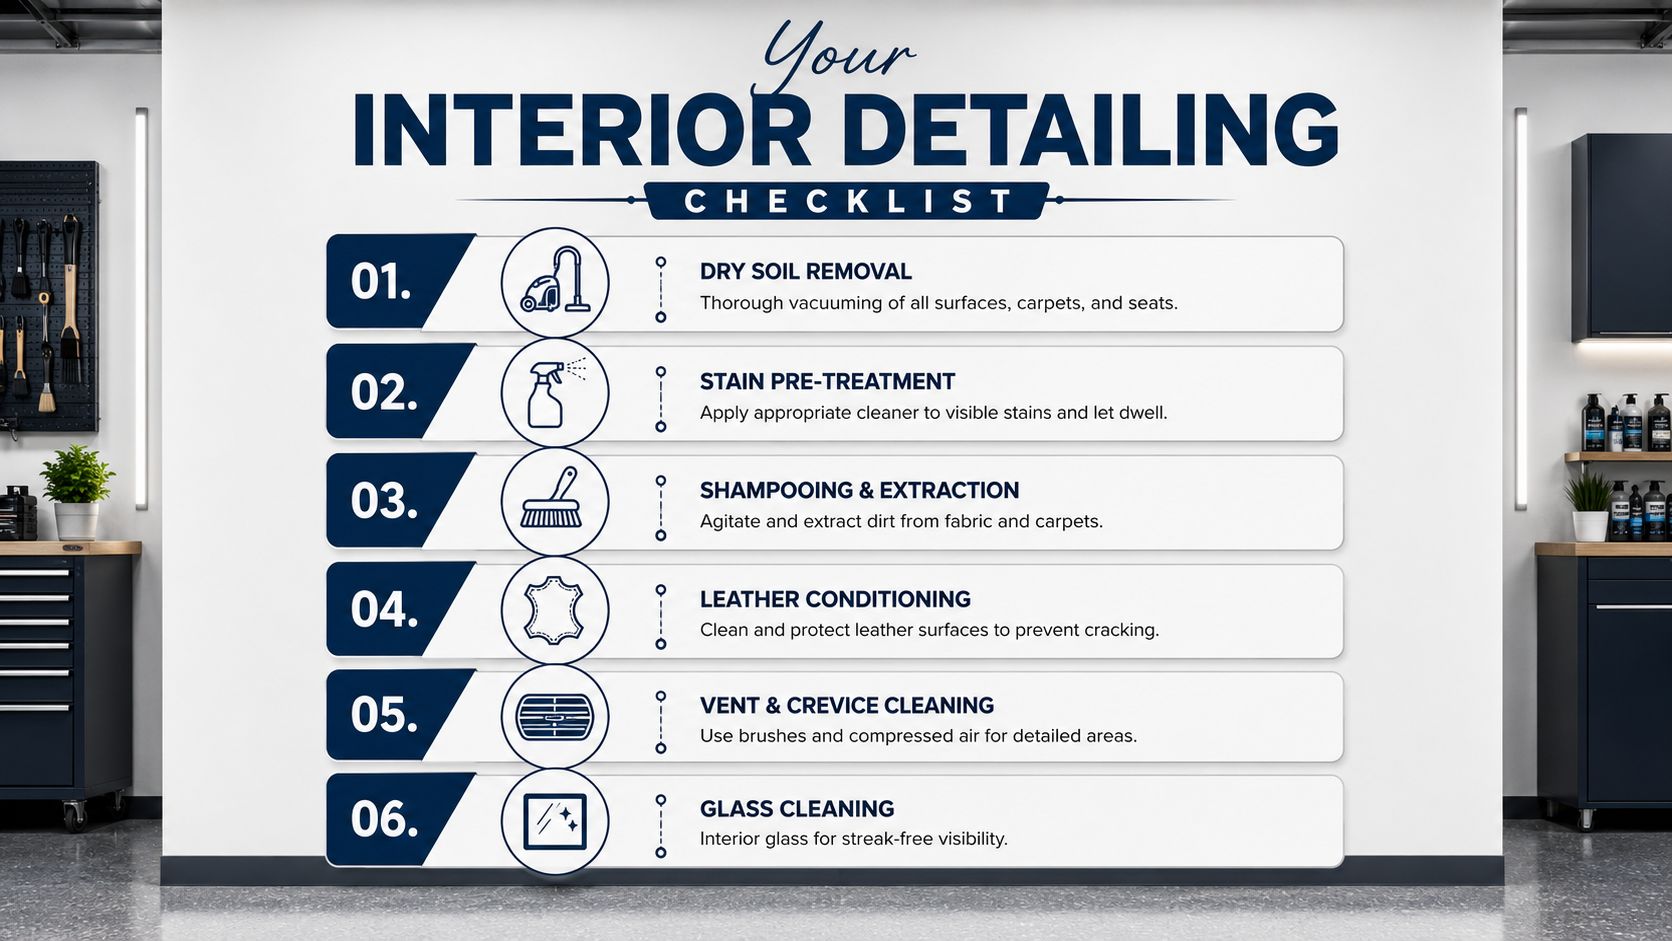
A dependable workflow is more useful than a shelf full of products. Keep the sequence consistent:
- Remove clutter and mats: Empty the cabin and clean mats separately.
- Vacuum dry soil: Brush and vacuum carpets, seats, rails, cup holders, and boot areas.
- Pre-treat stains: Match the cleaner to the spill and allow controlled dwell time.
- Clean and extract fabric: Agitate lightly, extract thoroughly, and dry completely.
- Clean leather and vinyl: Use suitable cleaner, wipe dry, and condition leather only when dry.
- Detail vents and crevices: Brush while vacuuming, then inspect the cabin filter and HVAC path.
- Clean glass last: Use an interior-safe glass cleaner on the cloth, not directly on electronics.
- Inspect before dressing: Leave steering wheels, pedals, and shifters free of slick products.
During Ontario's winter, vacuum and wipe high-contact surfaces regularly, then give mats extra attention after major slush events. A deeper clean belongs on the calendar when salt has dried into carpet edges or moisture and odour keep returning. If you're assembling supplies, a car interior cleaning kit 95 value can provide a starting set of brushes, cloths, and cleaning tools.
For drivers who don't have the time or extraction equipment, Nanak Car Wash offers interior cleaning and detailing services that include vacuuming, shampooing, salt and stain removal, vent and crevice cleaning, and leather care. Visit Nanak Car Wash to arrange a service for a winter-beaten car, SUV, van, or work vehicle and get the cabin dry, clean, and ready for the next Ontario commute.


 6600 Finch Ave W, Etobicoke, ON M9V 3Z6
 647-703-8515
 MON – SUN 8 AM to 7 PM