
You open the car door in late February, slide into the seat, and that leather feels wrong. It's dull instead of rich. The bolster by the door looks pale. There's a chalky line where salty pant legs and wet boots keep brushing past it. Then summer rolls around and the same seat starts feeling stiff again after baking in a hot parking lot.
That's how leather gets ruined in Ontario. Not all at once. A little salt, a little grime, a lot of dry cabin heat, then UV in the warmer months. Many drivers react when they finally see cracking. By then, they're trying to fix damage instead of slowing it down.
Good leather care isn't about making seats shiny. It's about keeping them clean, flexible, and matte, without leaving greasy residue in seams, perforations, or stitching. And the answer isn't always “slap on more conditioner”. On many newer vehicles, that's exactly how people make the problem worse.
Table of Contents
- Why Your Leather Seats Feel Dry and Cracked So Fast
- Know Your Leather Before You Condition It
- What You Need to Clean and Condition Leather Properly
- How Often to Condition Leather in the Greater Toronto Area
- Common Mistakes That Damage Leather Seats
- When to Let a Professional Handle Your Leather Care
Why Your Leather Seats Feel Dry and Cracked So Fast
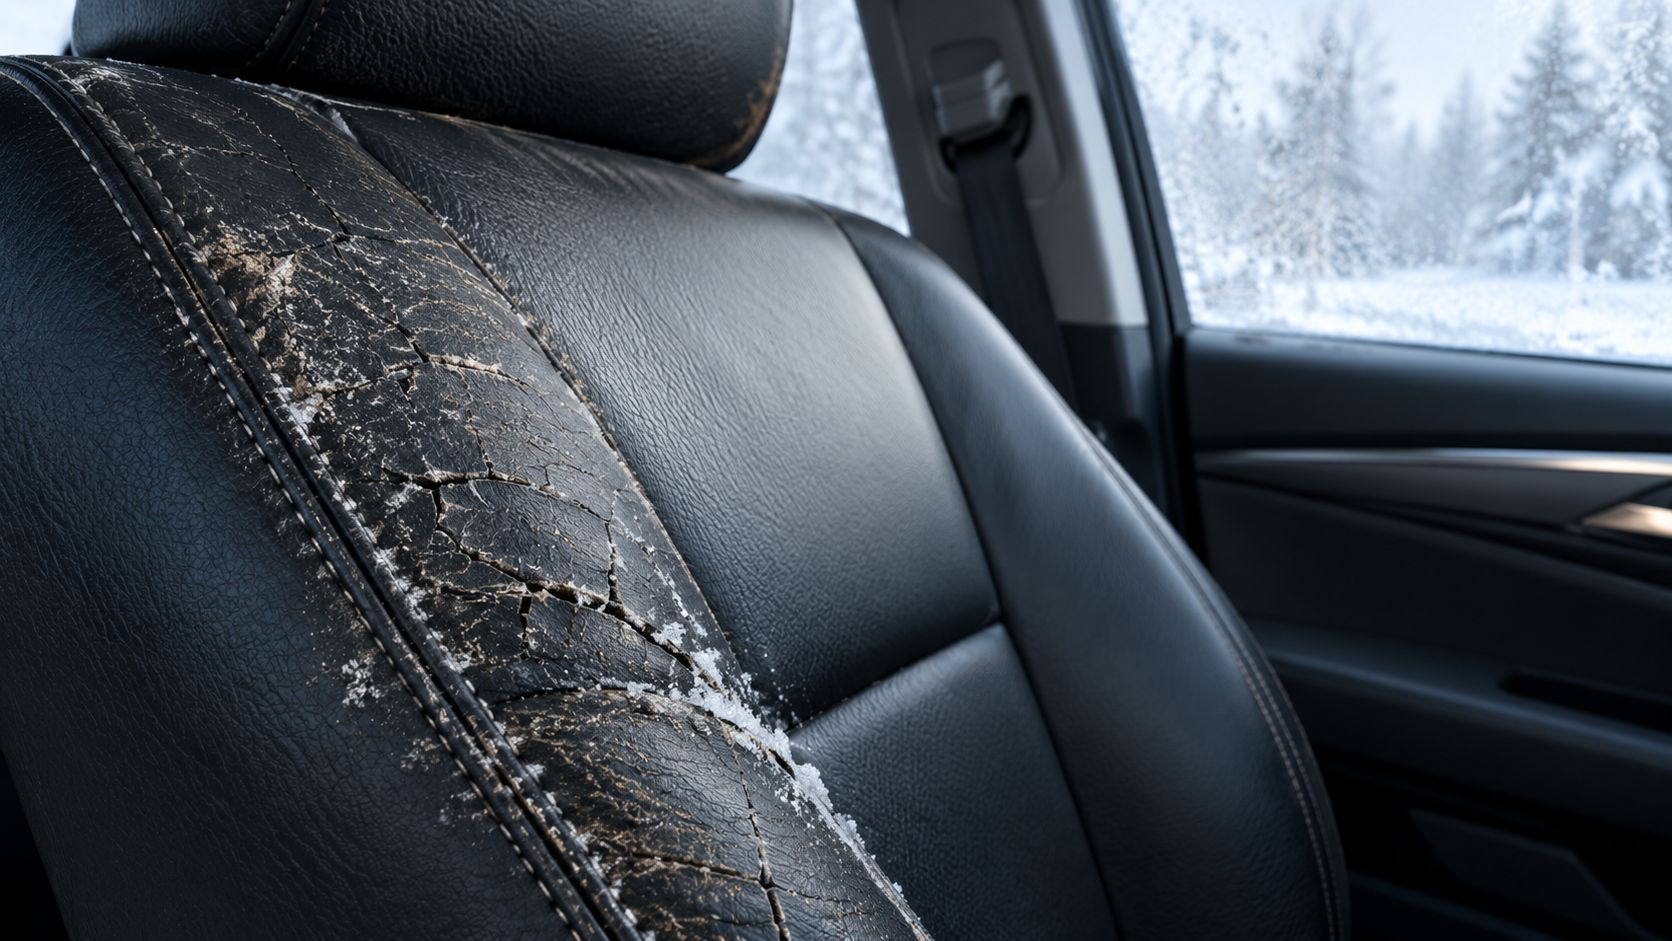
A seat can look tired long before the leather itself is failing. In the GTA, what drivers call "dry leather" is often a mix of salt residue, body oils, ground-in grime, friction on the bolsters, and cabin heat pulling moisture out of the surface over time.
Ontario beats up leather from both sides
Winter gets blamed first, and fair enough. Salt from boots and pant cuffs keeps rubbing into the driver seat, especially the outer bolster and lower cushion. Then the heater runs for months, the cabin air stays dry, and that contamination sits there unless somebody cleans it off.
Summer adds a different kind of stress. UV, heat buildup, sunscreen, sweat, and repeated sliding in and out all work on the same top surfaces. An Ontario leather-care guide notes that seasonal care matters because spring cleanup, summer sun, and winter cabin conditions all change what your seats are dealing with (Ontario leather-conditioning guidance).
For a lot of newer vehicles, the damage starts on the coating before it starts in the hide underneath. That matters because a coated seat usually does not need a heavy, greasy conditioner every time it feels a bit stiff. If the surface is dirty, more product just traps the mess.
Practical rule: Leather usually looks dry long before dryness alone is the underlying issue. In plenty of GTA cars, the seat needs proper cleaning and light protection more than another thick coat of conditioner.
Cracking usually starts with friction and contamination
Age plays a role, but usage is what I watch first. The outer edge of the driver seat takes the hit every single day. Wet jeans, salt, work pants, dog claws, child seats, rideshare traffic. Once that area stays dirty and keeps getting flexed, the finish wears down faster and the seat starts looking pale, rough, and eventually cracked.
Busy daily drivers usually look worse than weekend cars for exactly that reason. A five-year-old commuter car can have more seat wear than an older vehicle that spends most of its life in a garage.
What conditioning is actually supposed to do
Conditioning helps maintain feel and flexibility after the surface is clean. It does not repair broken finish, fill cracks, or reverse colour loss. On coated automotive leather, a light protectant is often the smarter choice than a heavy cream, especially on perforated seats where residue likes to collect.
Once the leather is already hard, flaking, or splitting, product choice stops being the main issue. At that point, you may be looking at repair work, recolouring, or replacement, and handing it to a pro can save you from making a worn seat look worse.
Know Your Leather Before You Condition It
A lot of Ontario drivers reach for conditioner the first time the seats start looking tired after winter. Sometimes that helps. Sometimes it makes the seat feel slick, loads product into the perforations, and does nothing for the problem.
The first job is figuring out what kind of leather you're dealing with.
Most automotive leather is coated
In newer cars, the leather usually has a protective topcoat. You are caring for that finished surface, not rubbing product straight into raw hide. That is why old furniture advice falls apart in a vehicle, especially one that sees Toronto slush, road salt, wet jackets, and strong summer sun.
A Toronto leather seat care guide makes this point clearly. Many newer seats respond better to regular cleaning and a light protectant than to a heavy conditioner, especially if the leather is coated or perforated (Toronto leather seat care guide).
Older, more traditional leather is a different story, but it is less common in daily-driven vehicles than people think. If you treat every seat like it needs a rich cream, you can create buildup faster than you create any benefit.
Check the seat before you pick the product
A quick inspection tells you a lot:
- Uniform finish and slight sheen: Usually a coated automotive leather.
- Perforations: Use less product. Residue collects in those holes fast.
- Heated or ventilated seats: Keep application light and controlled.
- Dry-looking but grimy surface: Clean first. Salt film, body oils, and old product can mimic dryness.
- Rough, faded outer bolster: That may be wear in the finish, not a lack of conditioner.
That last point matters in the GTA. After winter, I often see seats that look "parched" but are really carrying salt contamination and grime from boots, cuffs, and melted slush. If you condition over that, you trap contamination against the coating.
Conditioner and protectant are not the same job
Conditioner still has a place. On leather that feels dry, older leather without a heavy coating, or seats that have spent years in heated cabins and direct sun, the right automotive leather conditioner can help maintain a softer feel.
But on many modern seats, a light water-based protectant is the better call. It helps reduce friction, leaves less residue, and is easier to manage on perforated panels and bolsters that get constant entry-and-exit wear.
Start conservative. One light application is easy to build on. A sticky, overtreated seat is a pain to correct.
If the finish is flaking, the colour is wearing off, or the surface feels hard and brittle no matter what you use, stop treating it like a maintenance issue. That is usually the point where repair work, recolouring, or an upholstery specialist makes more sense than another bottle.
What You Need to Clean and Condition Leather Properly
A good leather job usually looks almost uneventful when it is done right. The seat ends up clean, even, and matte. No greasy shine, no product packed into perforations, and no stiff residue left around the stitching.
For Ontario drivers, the kit matters less than people think. The product choice and how lightly you use it matter more. On many newer coated seats, a heavy conditioner creates extra cleanup and attracts grime faster than a light protectant ever would.
Start with a small, sensible kit
Keep the setup simple:
- Vacuum with a crevice tool: For seams, seat tracks, buckle receivers, and the gap between the base and backrest.
- Dedicated leather cleaner: Automotive leather cleaner only. Household cleaners and strong all-purpose products can dull or dry the finish.
- Soft microfiber towels: Use several. One towel for cleaning, one for wipe-off, one for final buffing.
- Soft detailing brush or horsehair brush: Good for grain, seams, and textured panels.
- Foam or microfiber applicator pad: Helps spread product thinly and evenly.
- Conditioner or water-based protectant: Pick the one that suits the seat. Older, less-coated leather may respond well to conditioner. Most modern coated seats do better with a lighter protectant.
If you would rather book the interior work instead of buying products, Nanak Car Wash offers appointment-based interior detailing that includes leather deep cleaning among its detailing services, alongside interior cleaning and shampooing options.
The order matters more than the brand
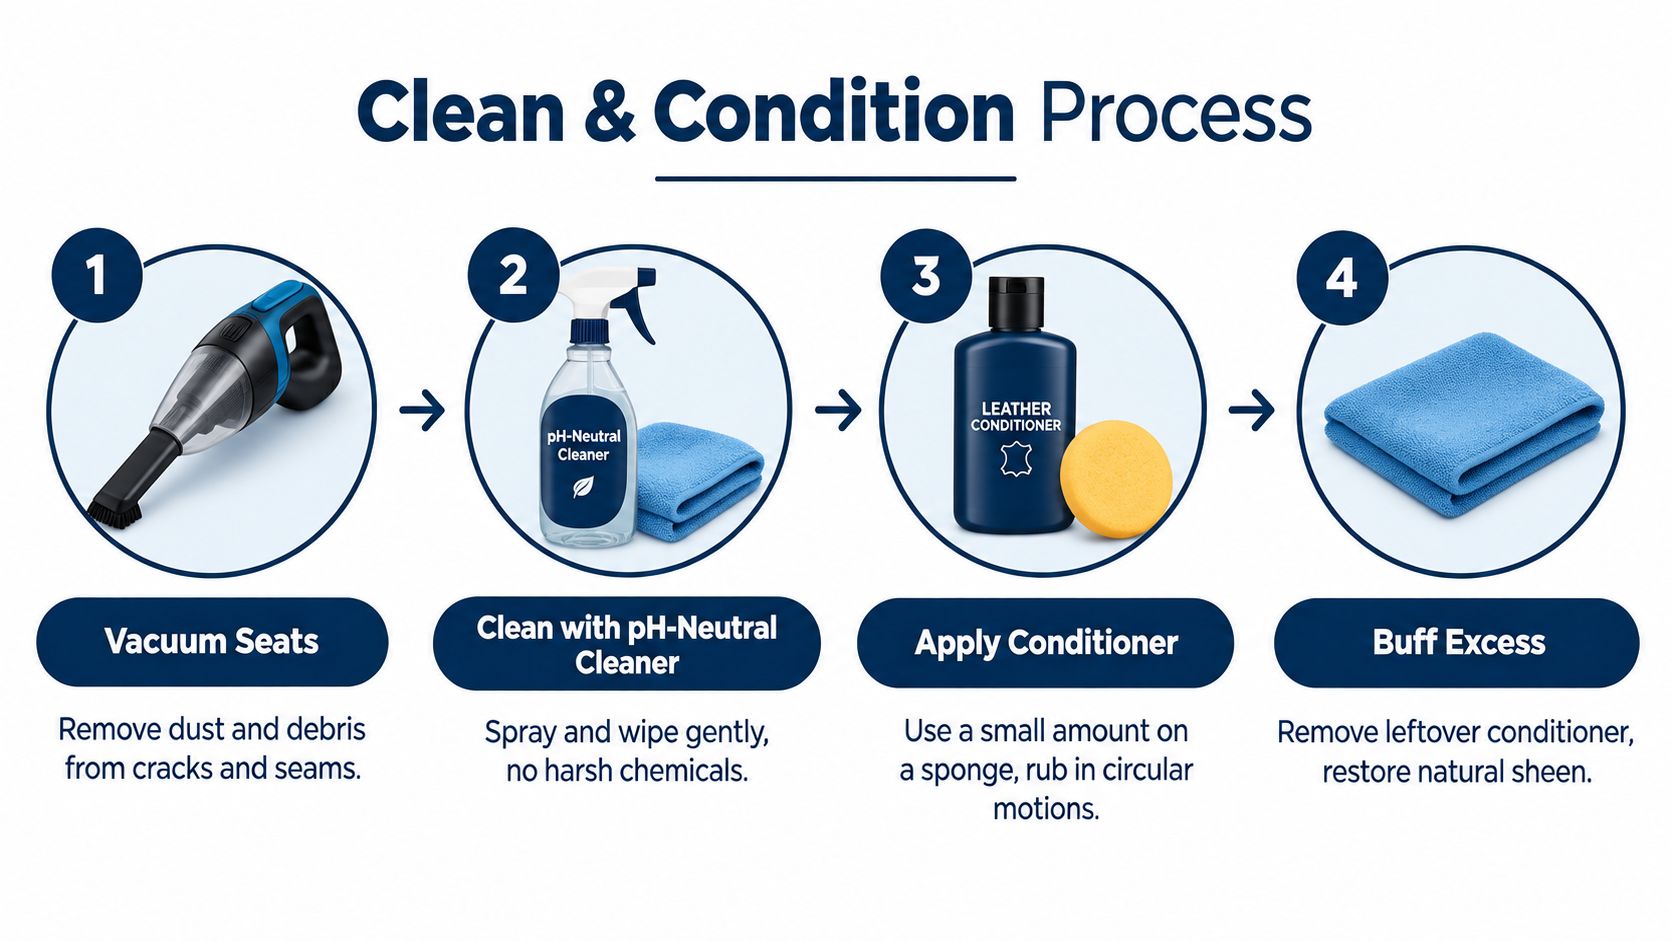
The safest process is straightforward. Vacuum first. Clean second. Protect or condition last, only after the surface is clean.
That sounds obvious, but it is where DIY jobs go sideways. I see seats all the time that were "conditioned" over body oils, salt film, coffee drips, and old product. The owner thinks the leather needs more moisture. What it really needs is a proper cleaning so the surface can breathe and feel normal again.
Clean with control
Use cleaner on the towel or brush instead of spraying the seat directly, especially on perforated panels and ventilated seats. Work one section at a time, agitate gently, and wipe the residue off before it dries. A Canadian interior-detailing guide outlines that same basic workflow for leather seats, including immediate wipe-off and a light final application after cleaning (Canadian leather-seat workflow).
A few habits prevent most problems:
- Work in small sections: One bolster or seat panel at a time.
- Use light pressure: Scrubbing hard wears the coating faster.
- Flip towels often: Dirty towels stop cleaning and start smearing.
- Keep moisture controlled: Wet leather seams, perforations, and foam backing are a headache.
Use less product than feels natural
This is the part that separates a clean finish from a slick, overtreated seat. Put a small amount of product on the applicator, spread it thin, and stop there. If the leather still looks thirsty after it flashes off, add a second light pass.
On coated leather, especially in late-model daily drivers, a light protectant is often the smarter choice. It leaves less residue, feels more natural, and does not load up perforations as easily. Traditional conditioner still makes sense on some older leather, but a lot of GTA vehicles do not need the heavy, lotion-style approach people were taught years ago.
Matte is the target. Factory leather should look clean, not glossy.
Let it settle, then level it out
If the label calls for a short dwell time, give it that time, then buff off any leftover film with a clean microfiber towel. Pay close attention to outer bolsters, stitched edges, armrests, and centre consoles. Those areas collect the most contact, the most transfer, and the most missed residue.
The finished seat should feel dry to the touch, smooth, and grippy enough that you do not slide around getting in and out. If it feels greasy, sticky, or overly slick, there is still too much product on the surface.
That is also the point where experience matters. If the leather still feels rough, looks blotchy, or keeps grabbing dirt right after care, the issue may be worn coating or embedded contamination rather than lack of conditioner.
How Often to Condition Leather in the Greater Toronto Area
A January commute in the GTA does more to leather than a lot of owners realize. Wet coats, salty pant legs, slush from boots, dry cabin heat, then summer sun a few months later. That cycle is why a flat, healthy seat can start looking tired fast, even if the car is not that old.
A fixed calendar does not work for every vehicle. A garage-kept coupe in Oakville, a school-run SUV in Markham, and a rideshare car doing Pearson runs all age differently inside.
The two intervals Ontario guides most often recommend
Ontario advice usually falls into two practical ranges. One camp treats every 3 to 4 months as a solid maintenance rhythm tied to the seasons. The other pushes every 2 to 3 months for harder-used interiors.
Both can be right.
The difference usually comes down to three things: how often the seats are used, how much contamination they see, and what kind of leather you have. Modern coated leather in many late-model vehicles often responds better to regular cleaning and a light protectant schedule than repeated heavy conditioning. Older, less protected leather can need richer care sooner, especially if it is already starting to feel dry or stiff.
Winter changes the schedule more than summer does
In Southern Ontario, winter is less about “feeding” leather and more about getting salt and grime off before they sit in the finish. Salt contamination dries on the surface, works into creases, and keeps grinding away as people slide in and out. That is why winter cars often need more frequent inspection and cleaning, not necessarily heavier product.
Some owners do fine on a seasonal routine. Others need a quick wipe-down and reassessment partway through winter. If the seat still feels clean, matte, and smooth after cleaning, adding more conditioner just because the date says so is how seats end up slick and overloaded.
One useful winter reference makes that point clearly. Cold-weather leather care often needs closer attention because of repeated salt and grit exposure, especially during active winter driving (Ontario winter leather-care recommendations).
Leather Conditioning Frequency for GTA Drivers
| Driver Type | Recommended Interval | Seasonal Note |
|---|---|---|
| Daily commuter | Every 3 to 4 months | Spring cleanup matters after winter salt and road grime |
| High-use rideshare or delivery vehicle | Every 2 to 3 months | Outer bolsters and driver seat base usually wear first |
| Family vehicle with kids and winter boots | About every 3 months, plus winter spot checks | Check lower cushions, seams, and edges for buildup |
| Low-mileage or garage-kept vehicle | Every 3 to 4 months, or based on condition | Low use helps, but summer heat and indoor heating still dry surfaces |
| Vehicle seeing heavy winter contamination | Inspect often in salt season and clean as needed | Cleaning frequency matters more than piling on more product |
A practical GTA schedule that holds up
For most Ontario drivers, four checkpoints a year work better than chasing random dates. Early spring for salt cleanup. Mid-summer for UV exposure. Fall before the cabin starts drying out from heat. One winter check if the interior is getting hammered by slush and road salt.
That does not mean every check needs a full conditioner application. On coated leather, many of those visits are really inspection, cleaning, and a light protectant if the surface calls for it. Save heavier conditioning for leather that needs it.
If the seat feels rough right after cleaning, looks patchy, or the colour is wearing off on high-contact areas, stop guessing. That is usually the point where a pro can tell the difference between dry leather, worn coating, and damage that conditioner will not fix.
Common Mistakes That Damage Leather Seats
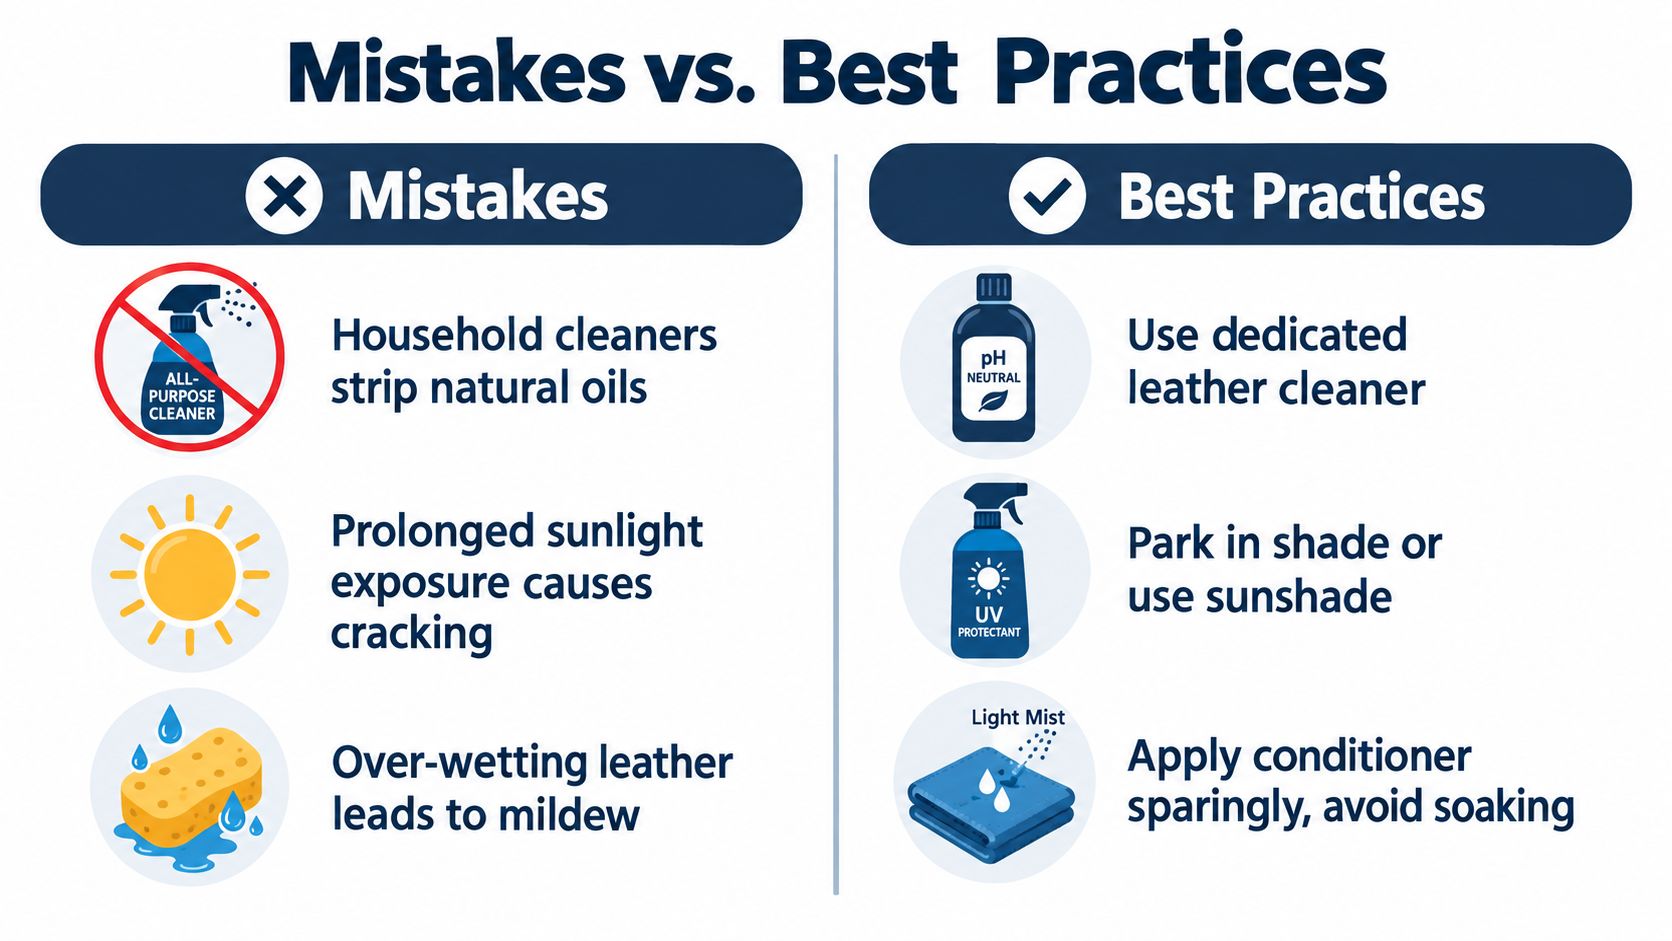
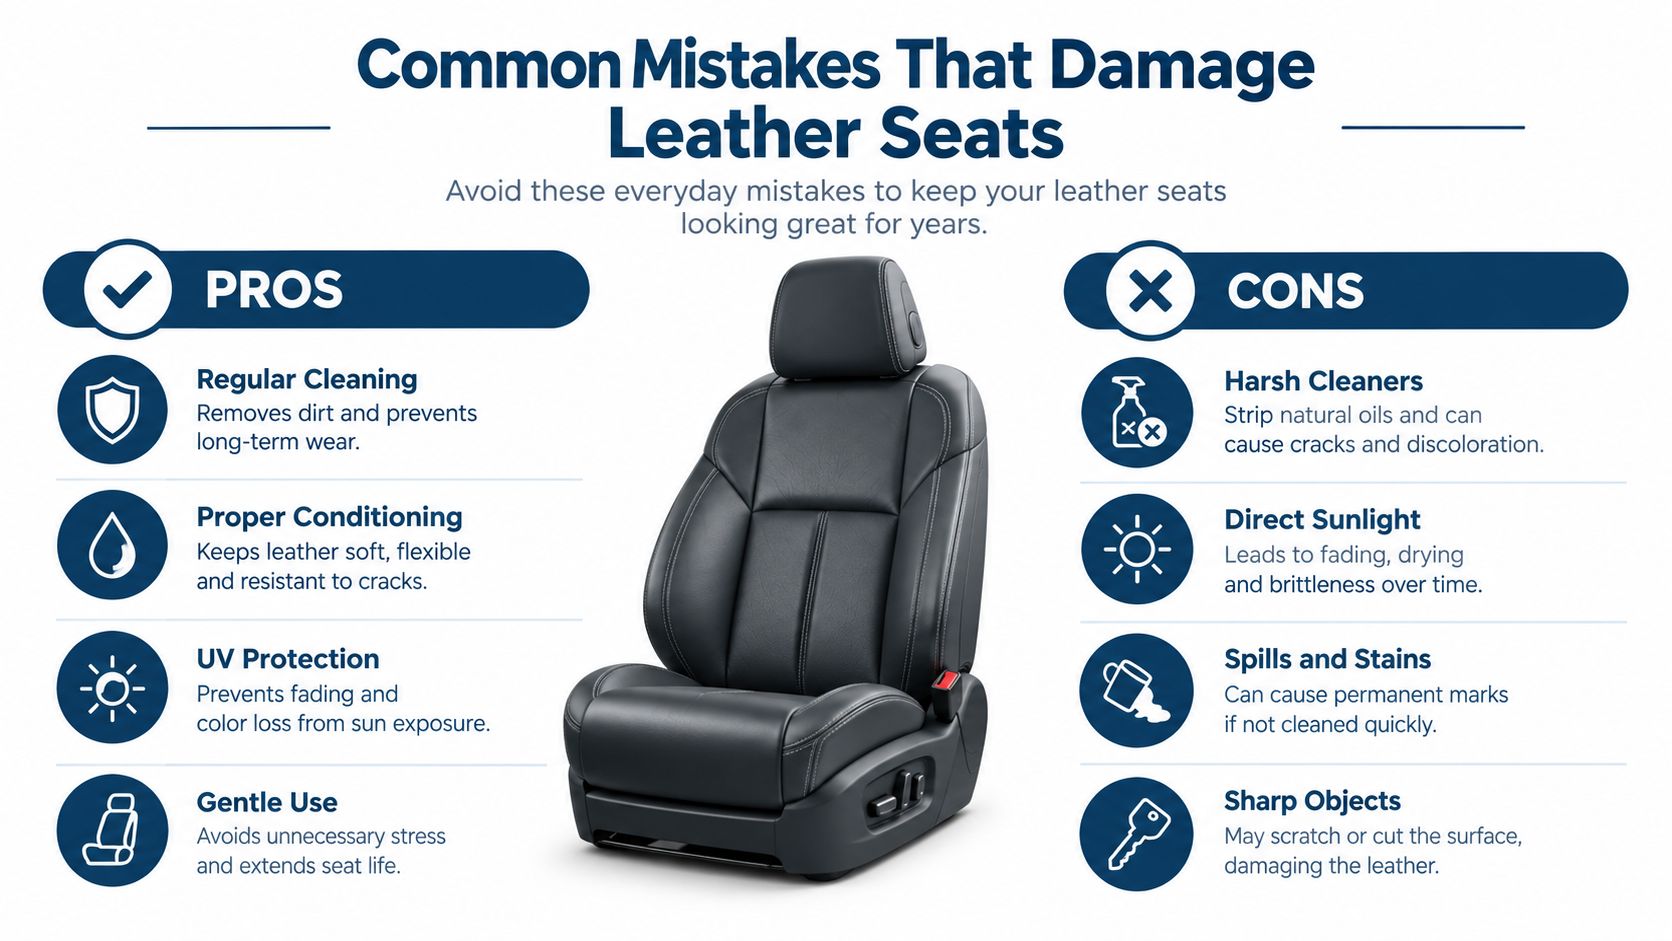
Most leather damage doesn't come from one dramatic mistake. It comes from bad habits repeated. Wrong cleaner. Too much product. No wipe-off. Dirty towel. Same story, different car.
The messes that show up all the time
- Conditioning dirty leather: This traps grime under product and leaves the seat feeling heavy instead of refreshed.
- Letting cleaner dry on the surface: Residue can streak, grab dirt, and make the finish look uneven.
- Using too much product: Thick layers leave shine, attract dust, and collect in stitching and perforations.
- Using household cleaners: Leather isn't the place to experiment with whatever's under the sink.
- Ignoring high-wear zones: The outer bolster, seat base edge, and armrest usually need the most attention.
Leather care goes bad when people chase shine instead of clean.
Why perforated seats get wrecked faster
Perforated leather punishes sloppy product use. Heavy creams settle into the holes, collect lint, and look dirty almost immediately. Ventilated seats are even less forgiving because owners tend to over-apply product trying to “help” the material.
The fix is simple. Spray less. Apply to the pad, not directly into the seat. Wipe thoroughly. If the holes look wet, you're using too much.
Shiny isn't healthy
A lot of people still judge a leather treatment by how glossy the seat looks after. That's backwards. On most automotive leather, excessive gloss usually means product sitting on top, not leather in better shape.
If the seat squeaks, feels tacky, or leaves residue on your hand, strip the excess with a proper leather cleaner and start over with a lighter application.
Quick correction: The right finish is usually a clean, even, low-sheen surface that feels dry to the touch.
One more mistake people underestimate
They wait until the seat is already complaining. Once the bolster is visibly worn, the leather has hardened, or the creases start looking pale and stressed, home care becomes maintenance, not rescue.
That doesn't mean you're doomed. It means the goal shifts. You're trying to slow further damage, improve feel, and keep the surface clean instead of expecting a bottle to reverse wear.
When to Let a Professional Handle Your Leather Care
DIY works well when the seats are dirty, a bit dry, or overdue for regular upkeep. It stops being the smart move when contamination is buried deep, the finish is starting to fail, or the leather needs more than a wipe-down and light product.
Signs the job is past a basic at-home treatment
Hand it off when you're dealing with problems like these:
- Salt staining that keeps coming back: Especially in seams, perforations, and lower seat panels.
- Ground-in grime on high-contact areas: Outer bolsters and driver-seat edges are common trouble spots.
- Lingering odours: If smells are living in the upholstery and surrounding interior materials, leather treatment alone won't solve it.
- Early cracking or surface wear: That needs careful cleaning and realistic product selection, not random layering.
- Ventilated or delicate trim you're nervous about: Caution is cheaper than regret.
What a professional service actually helps with
A proper interior detailing service can go beyond the quick homeowner version of leather care. That usually means deeper vacuuming, better seam and crevice cleaning, stain and salt removal around the whole cabin, and leather-specific treatment that matches the seat type instead of treating every interior the same way.
That's especially useful when the seats aren't the only issue. Once carpets, mats, centre consoles, door panels, and vents are carrying winter residue, leather care works better as part of a full interior reset.
If you've cleaned the seats properly, used the right product lightly, and they still look rough or feel stiff, that's your cue. At that point, more product probably won't save time or improve the result. Skilled cleaning will.
If your leather seats are fighting salt, grime, or that stiff winter-to-summer Ontario cycle, Nanak Car Wash offers interior detailing and appointment-based leather deep cleaning as part of its broader wash and detailing services across the GTA. It's a practical option when you want the seats cleaned properly, the residue pulled out of the seams, and the finish brought back without turning the cabin into a greasy experiment.


 6600 Finch Ave W, Etobicoke, ON M9V 3Z6
 647-703-8515
 MON – SUN 8 AM to 7 PM