
You're halfway through a January commute, the heater's finally working, and your passenger reaches up for the grab handle. That's when you notice the grey patches above the seat. The boots are wet, the mats are salty, and somehow the ceiling looks grubby too.
The temptation is to grab the upholstery spray and give it a scrub. Resist that. Cleaning the interior roof of a car starts with deciding whether you're looking at surface dirt, trapped moisture, or fabric that's already coming loose. Those problems can look similar, but they need very different responses.
Table of Contents
- Why Your Car Headliner Needs More Attention Than You Think
- Gathering Supplies and Checking the Headliner First
- Step-by-Step Method for Dry and Spot Cleaning
- Controlling Moisture to Protect Adhesive and Foam
- Tackling Odours and Tracing Hidden Moisture Sources
- Deciding When to Clean or Call for Repair
- Building a Seasonal Headliner Care Routine
Why Your Car Headliner Needs More Attention Than You Think
Your car's headliner is the fabric-covered interior ceiling. It's easy to overlook until a mark appears directly above someone's head. Unlike a floor mat, though, it can't be pulled out, washed, and left somewhere to dry.
In a GTA winter, contamination arrives with the passengers. A damp coat brushes the doorway. A glove touches the visor. Someone loads winter gear, then grabs the overhead handle with the same hand. Salt and grime don't need to splash directly onto the ceiling to find their way into the cabin.
How winter residue reaches the roof
Ontario's surrounding salt exposure is substantial. During the 2022–2023 winter season, 138 reporting Ontario organizations used 2,985,873 tonnes of solid road salt, according to the federal road-salt management report.
That's a measure of road treatment, not a measurement of salt inside vehicles. It provides regional context, not proof that every grey headliner mark is road salt.
Inside the vehicle, fine residue and moisture can collect around door openings, grab handles, sun visors, and the roof above frequently occupied seats. Those are sensible places to inspect when the cabin starts drying out after winter.
- Door openings: Look where wet coats and loaded bags pass close to the fabric.
- Grab handles: Check the surrounding material, not just the plastic handle.
- Sun visors: Inspect edges and nearby areas that passengers touch.
- Frequently used seats: Compare the roof above these positions with less-used areas.
Why the stain isn't the whole job
A headliner mark deserves attention, but it doesn't automatically justify a full-roof wash. An isolated handprint needs a different response from broad discolouration or a water ring near the windshield.
Ontario's salt burden isn't a recent development. Health Canada's road-salts assessment identified Ontario and Quebec as having Canada's highest annual road-salt loadings per road-length basis.
For drivers, the useful takeaway is routine inspection rather than enthusiastic scrubbing. Check what's on the fabric, establish whether it's dry and securely attached, and choose the least intrusive treatment that fits.
Gathering Supplies and Checking the Headliner First
Put the cleaner down until you've looked across the whole roof. You're checking whether the material can tolerate cleaning, not just deciding where to start.
Use a flashlight at an angle to spot loose fabric and uneven areas. Pay particular attention around the windshield, sunroof opening, and door-side edges. A dark patch beside an opening deserves more suspicion than an isolated fingerprint beside a handle.
Assemble a small, controlled kit
You don't need a shelf full of chemicals. You need tools that let you control contact and keep cleaning liquid off areas that don't need it.
- Vacuum with a soft upholstery brush: For loose dust on sound, firmly attached fabric.
- Clean microfibre cloths: Keep separate cloths for applying cleaner and absorbing residue.
- Mild upholstery cleaner: Follow its intended-use directions and any material restrictions.
- Small flashlight: Useful for comparing texture, colour, and existing damage.
- Ventilation access: Arrange somewhere you can safely leave doors or windows open, weather permitting.
Keep the cloths clean enough that you'd be comfortable using them on a light-coloured shirt. A towel that just cleaned a salty sill has no business going overhead.
Inspect before you test
Look for sagging, bubbling, loose edges, or recurring dampness. Don't press on a hanging patch to see whether it will stick back. If the material already looks detached, leave that area alone and arrange an assessment.
Photograph existing marks and loose areas before starting. This gives you a useful reference when you're judging whether cleaning changed anything.
Practical rule: If you can't tell whether a patch is dirt or damage, treat it as damage until you know otherwise.
For a sound headliner, choose an inconspicuous test area. Put a small amount of cleaner on the cloth, make light contact, then absorb the residue with a dry cloth. Let the test area dry before judging it.
Stop if you see colour transfer, an altered texture, a new ring, or any loosening. A successful test doesn't give you permission to flood the visible stain. It tells you only that the cautious method appears suitable for that material.
Step-by-Step Method for Dry and Spot Cleaning
Work on visible contamination rather than automatically treating the entire ceiling. A mostly clean headliner with a dirty patch doesn't need an all-over shampoo.
The useful sequence is dry removal, targeted cleaning, and immediate residue absorption. Professional Carwashing & Detailing's systematic interior-cleaning guidance supports vacuuming first, using a lightly moistened microfibre for remaining soil, and avoiding direct spraying onto the headliner.
Start with the dry pass
Fit the soft upholstery brush and guide it gently over firmly attached fabric. Don't use the nozzle to pull the material downward or force the brush into seams. Work around handles and visor edges without dragging the attachment across loose trim.
Pause after vacuuming and reassess. Some apparent staining is loose dust, and removing it may be enough. There's no prize for adding cleaner to a surface that already looks acceptable.
For remaining isolated marks, use this controlled sequence:
- Prepare the cloth. Apply a little mild upholstery cleaner to the microfibre, following the label. The contact area should be lightly damp, not dripping.
- Approach the mark gently. Blot it or use short, light wiping strokes. Work towards the centre rather than pushing contamination into a wider patch.
- Change the cloth face. When the working face picks up soil, fold to a clean section instead of rubbing it back onto the roof.
- Absorb the residue. Follow promptly with the dry microfibre. Use light contact rather than grinding the cloth into the fabric.
- Reassess before continuing. Check whether the mark is improving and whether the surrounding material still looks unchanged.
Let the result decide the next move
Suppose there's a coffee mark above the rear seat. Treat that as a small spot-cleaning job, not an excuse to wet the whole rear roof panel. If light blotting transfers contamination to the cloth, continue cautiously; if nothing changes, don't assume more pressure will solve it.
A remaining shadow can be the safer outcome. Chasing it with repeated wet applications risks turning a small blemish into a much larger problem.
For stains elsewhere in the cabin, the GP Mobile Car Wash carpet tips from GP Mobile Car Wash & Detail provide a separate resource for floor-fabric care. Keep the surfaces distinct: a method suitable for carpet shouldn't automatically be carried overhead.
Finish each small zone before moving on. The residue should be absorbed, the fabric should remain attached, and you should see no expanding wet edge. If you can't meet those conditions, pause rather than spreading the job across the ceiling.
Controlling Moisture to Protect Adhesive and Foam
A faint stain on secure fabric is preferable to spotless fabric hanging above your passenger's head. That's the trade-off to keep in mind when a mark refuses to disappear.
The headliner isn't just cloth. Its fabric is bonded to foam or a backing structure, so cleaning affects a layered assembly. Moisture management matters more than maximum stain removal.
What too much liquid can damage
Saturation can leave water marks, separate fabric from its foam substrate, deform the backing, and contribute to sagging. AutoZone's headliner-cleaning guidance explains these risks and the importance of cautious cleaning and drying.
This is why an apparently stronger approach can produce a worse result. When liquid reaches material behind the visible surface, you can't wipe it back out with another pass.
| Do | Don't |
|---|---|
| Keep the working cloth lightly damp | Spray cleaner overhead |
| Absorb residue as you work | Leave visibly wet fabric untreated |
| Use ambient airflow | Aim concentrated heat at the roof |
| Accept a mark that won't lift safely | Increase pressure to force a result |
| Check the roof before closing up | Seal a damp cabin and hope for the best |
Steam deserves particular caution on aged, loose, or already sagging headliners. Heat and water can soften the adhesive and increase separation risk. It isn't a sensible rescue method for fabric that's already failing.
Drying starts during cleaning
Don't save drying for the end of the entire roof. Use the dry-cloth step immediately, then allow air to circulate through the cabin.
Open doors or windows when conditions allow, or use ambient air circulation. Avoid a heat gun or other concentrated heat source. A cold, wet GTA driveway may be a poor place to start a job that requires the cabin to stay open.
Don't start a wet-cleaning task unless you also have a workable drying plan.
Before closing the vehicle, check the treated zones with a clean, dry microfibre and light contact. Inspect for residual dampness, uneven shading, and developing tide marks. Surface appearance alone doesn't prove that the backing is dry, particularly if the area was accidentally saturated.
If the fabric remains damp, stop adding product and continue drying. If the roof begins to loosen, the cleaning job is over. More work at that point increases the risk without addressing the failure.
Tackling Odours and Tracing Hidden Moisture Sources
A sour smell that returns after cleaning calls for investigation, not a stronger air freshener. The roof may be where you notice the problem without being the only place holding moisture.
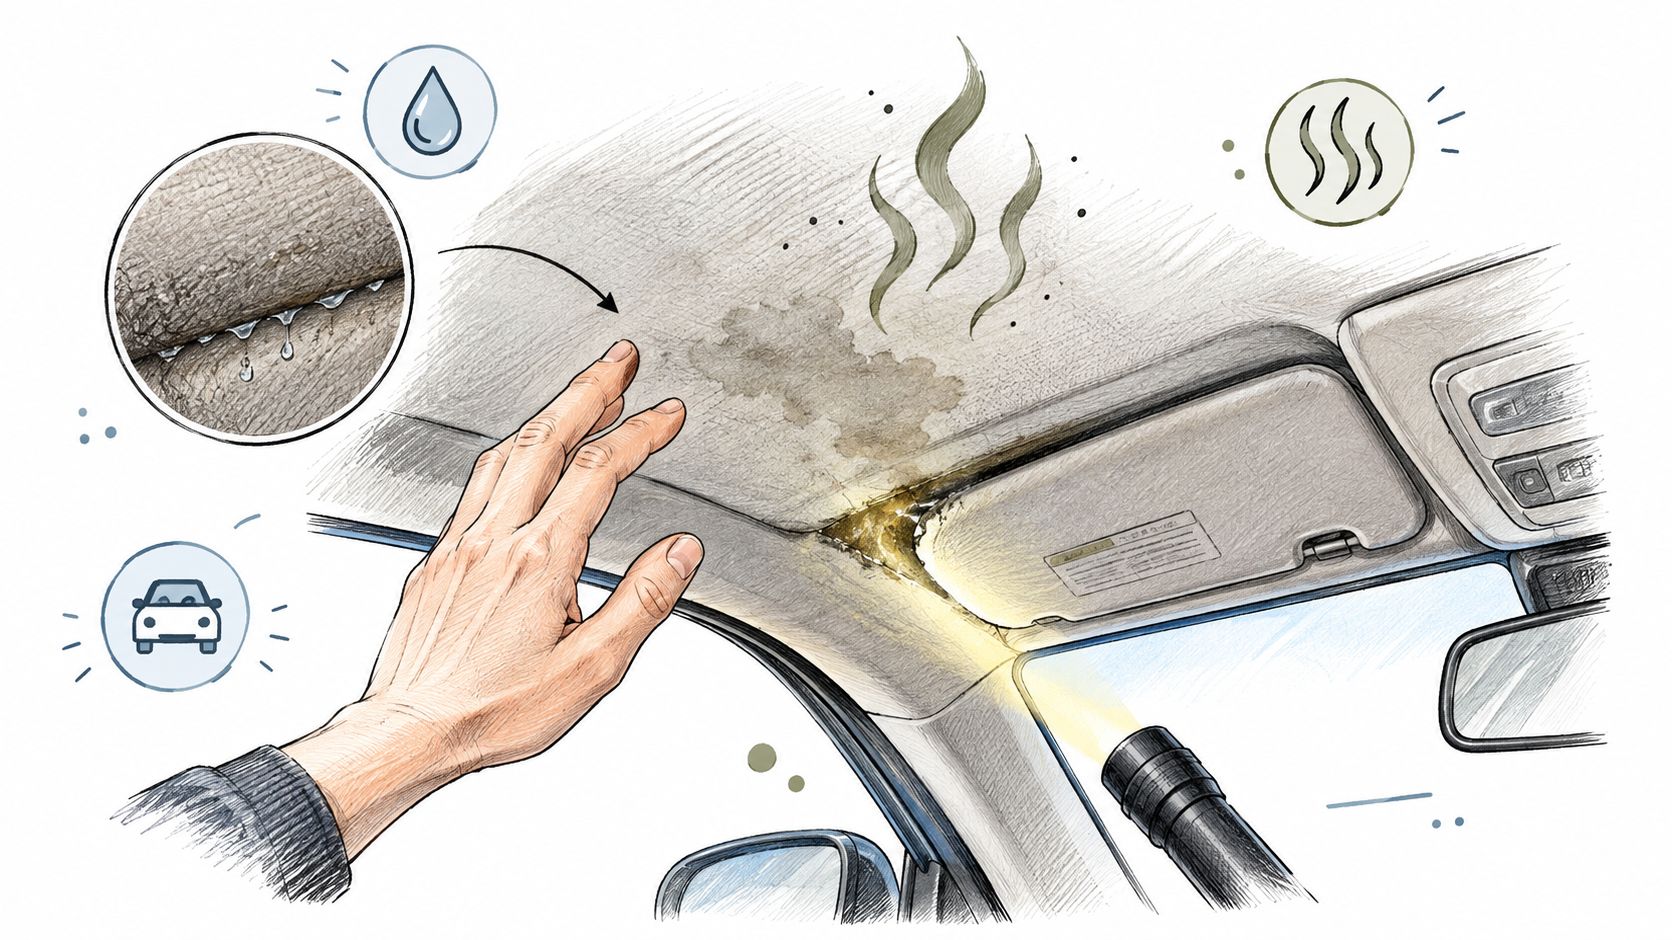
Leaks, spills, humidity, and wet belongings can all contribute. Detailing Experts' vehicle mould-remediation guidance identifies these moisture sources and notes that mould can occur in headliners and HVAC areas.
Visible spotting combined with a water stain deserves a cautious approach.
Follow the moisture, not the fragrance
If there's no extensive visible growth or occupant irritation, note the smell when you first open the parked vehicle. Don't keep sitting inside trying to identify it by taking deeper breaths. Look for clues that help a technician locate the source.
- Under the mats: Check for dampness rather than assuming the visible mat surface tells the whole story.
- After rain: Note whether the smell or roof stain returns following wet weather.
- Around openings: Look for moisture near weather seals and the sunroof area.
- During ventilation use: Record whether the odour changes when the fan operates.
- Among stored belongings: Remove wet umbrellas, clothing, and other damp cargo.
Recurring symptoms can justify inspection of sunroof drains, weather seals, evaporator drainage, and cabin-filter condition. These are inspection targets, not a diagnosis you can make from smell alone.
Know when deodorising misses the point
Fragrance, ozone, or repeated shampooing won't repair a leak. They're not substitutes for locating and correcting the moisture source.
The same distinction matters in larger vehicles. For owners dealing with a motorhome rather than a passenger car, Class A RV Repairs' motorhome water damage restoration resource is relevant to the repair side of the problem. Don't treat a water-damaged vehicle interior as merely an upholstery stain.
Minor surface contamination on otherwise dry, sound material may be suitable for cautious cleaning. Widespread visible growth, repeatedly wet fabric, quickly returning odour, or occupant irritation are stop points.
Avoid disturbing extensive suspected mould with a brush or vacuum. Arrange source inspection and professional remediation, particularly if you can't fully dry the vehicle. The sensible finish line is a dry, corrected cabin, not a smell temporarily covered by perfume.
Deciding When to Clean or Call for Repair
Choose the job according to the symptom, not the cleaning equipment you already own. A vacuum and upholstery cleaner can address surface contamination. They can't reconnect failed layers or repair a leaking seal.
A water ring also doesn't prove that a leak is active. It might reflect an old incident or previous over-wetting. What matters is whether the area is currently dry, whether it returns, and whether the surrounding fabric remains secure.
Headliner Symptoms and the Right Next Move
| Symptom | Likely Cause | Recommended Action |
|---|---|---|
| Loose surface dust | Settled cabin contamination | Gently dry-vacuum sound fabric and reassess |
| Greasy handprints near handles | Repeated hand contact | Test first, then use targeted low-moisture cleaning |
| An isolated, dry water ring | Past moisture exposure or cleaning saturation | Inspect cautiously and establish whether moisture returns |
| A recurring stain near an opening | Possible seal or drainage problem | Arrange a leak inspection before further cleaning |
| Mildew-like spotting | Possible moisture-related growth | Investigate the source and assess remediation needs |
| Bubbling, sagging, or loose edges | Possible adhesive or backing failure | Leave the area untreated and seek repair assessment |
Cleaning and repair solve different problems
A detailer can assess whether a surface mark is a reasonable cleaning candidate. A repair specialist needs to address failed attachment, while an appropriate technician should investigate water entry. Those roles may overlap, but don't assume an interior-cleaning booking includes leak diagnosis.
Ask clear questions before authorising work. Is the fabric still bonded? Is the stain dry? Has it returned after previous cleaning? Will the provider stop if the material changes?
A useful boundary: Cleaning removes contamination. Repair addresses the reason the roof is wet or coming apart.
Ventilation belongs in the process, but it isn't a substitute for source repair. A regional transportation report recommends increasing vehicle airflow through open windows when weather permits and using high fan speed without recirculation. That supports airing the cabin, not ignoring a recurring wet patch.
If you're booking general interior detailing, separate the requests. Carpets and seats may need cleaning while the headliner needs assessment only. Tell the provider about previous leaks, recurring odours, and any area you've already treated.
You don't need to solve every interior issue in the same appointment. Leaving a suspect roof untouched while arranging the right inspection is often the most useful decision you can make.
Building a Seasonal Headliner Care Routine
Make the headliner part of your seasonal inspection, not a surface you automatically shampoo whenever the seats get cleaned. That keeps routine care proportionate to the condition of the fabric.
After winter, look for the marks that become easier to see as the cabin dries. During spring detailing, check whether they're still dry, whether anything has changed, and whether the earlier cleaning held up. An inspection doesn't have to become another cleaning session.
Keep everyday prevention simple
A few practical habits make the next check less of a surprise.
- Keep a dry microfibre handy: Use a clean cloth for suitable small wipe-ups rather than reaching for a dirty towel.
- Reduce incoming moisture: Shake out wet umbrellas and knock loose snow from boots before getting in.
- Remove damp belongings: Don't leave wet clothing or winter gear stored in the closed cabin.
- Watch familiar trouble spots: Recheck previously stained areas after rain instead of repeatedly treating them.
- Leave sound fabric alone: If the roof is clean, dry, and secure, there's nothing to gain from unnecessary product.
During humid summer weather, pay attention to whether the cabin dries between uses. A roof that repeatedly feels damp deserves investigation even if the visible stain is modest.
Record condition rather than chasing perfection
Rideshare drivers and fleet operators can add a roof-condition note to routine vehicle checks. Record loose areas, recurring smells, customer complaints, and any cleaning that needs rework. Photos help distinguish an existing mark from a new problem without relying on memory.
Judge the result by more than stain disappearance. Check for tide marks, secure attachment, a dry surface, and whether the original complaint returns. A clean-looking roof that develops sagging isn't a successful result.
The routine is straightforward: inspect, make the least aggressive suitable intervention, and verify the outcome. When the symptom points beyond surface dirt, spend the effort on diagnosis rather than another bottle of cleaner. That's how headliner care stays maintenance instead of becoming an avoidable repair.
Nanak Car Wash offers interior detailing, including carpet and seat shampooing, salt and stain removal, and vent and crevice cleaning. Visit Nanak Car Wash to arrange interior service and flag any headliner stains, recurring odours, or loose fabric before work begins, so you can discuss what's suitable for cleaning and what needs repair assessment.



 6600 Finch Ave W, Etobicoke, ON M9V 3Z6

 647-703-8515
 MON – SUN 8 AM to 7 PM