
You slide into the driver's seat after a slushy GTA commute and notice a pale mark on the bolster, grit beside the stitching, and a shiny patch where your winter coat rubs. The tempting fix is a generous spray of cleaner and an enthusiastic scrub. A better leather-care routine starts with less liquid, a vacuum, and a closer look at what your seat is made of.
Table of Contents
- Why Leather Care Matters After Winter
- Know What You Are Cleaning
- Clean Seams Without Spreading Grit
- Choose the Right Cleaning Level
- Condition Leather Only When Compatible
- Avoid Shortcuts That Damage Leather
- Build a Leather Care Routine That Sticks
Why Leather Care Matters After Winter
Winter dirt doesn't stay politely on the floor mat. Wet boots, gloves, bags, and clothing carry contamination through the cabin, including onto seat edges and lower door panels. When you wipe a gritty bolster without removing loose particles first, you can move that debris across the finish instead of lifting it away.
Ontario's road-treatment figures explain why this deserves attention. During the 2023–2024 winter season, reporting organizations used 1,679,395 tonnes of road salt, according to Environment and Climate Change Canada's road-salt management data. That measures roadway treatment, not salt deposited inside individual vehicles, but it establishes the scale of the regional exposure.
Everyday vehicles need attention too
Leather care isn't reserved for a luxury sedan that spends winter under a cover. Ontario had approximately 8.8 million registered light-duty vehicles in 2024, according to Statistics Canada's vehicle registration report. Family SUVs, work pickups, and ride-hailing vehicles all belong in the maintenance conversation.
Consider a family vehicle after a wet school run. The driver is outer bolster may need attention while the rear seat centre remains clean and the fabric side panels need a different approach altogether. Treating everything with the same product because it is attached to the same seat misses those differences.
Practical rule: Judge the material and its condition before deciding how much cleaning it needs.
Good maintenance controls grit, moisture, and residue. It doesn't depend on the strongest cleaner or the heaviest conditioner coat. Routine care handles fresh surface contamination; deeper detailing becomes relevant when dirt, staining, or dampness extends beyond what a careful surface clean can address.
The useful question isn't whether your interior deserves more product. It's whether you can remove what's there without creating another problem.
Know What You Are Cleaning
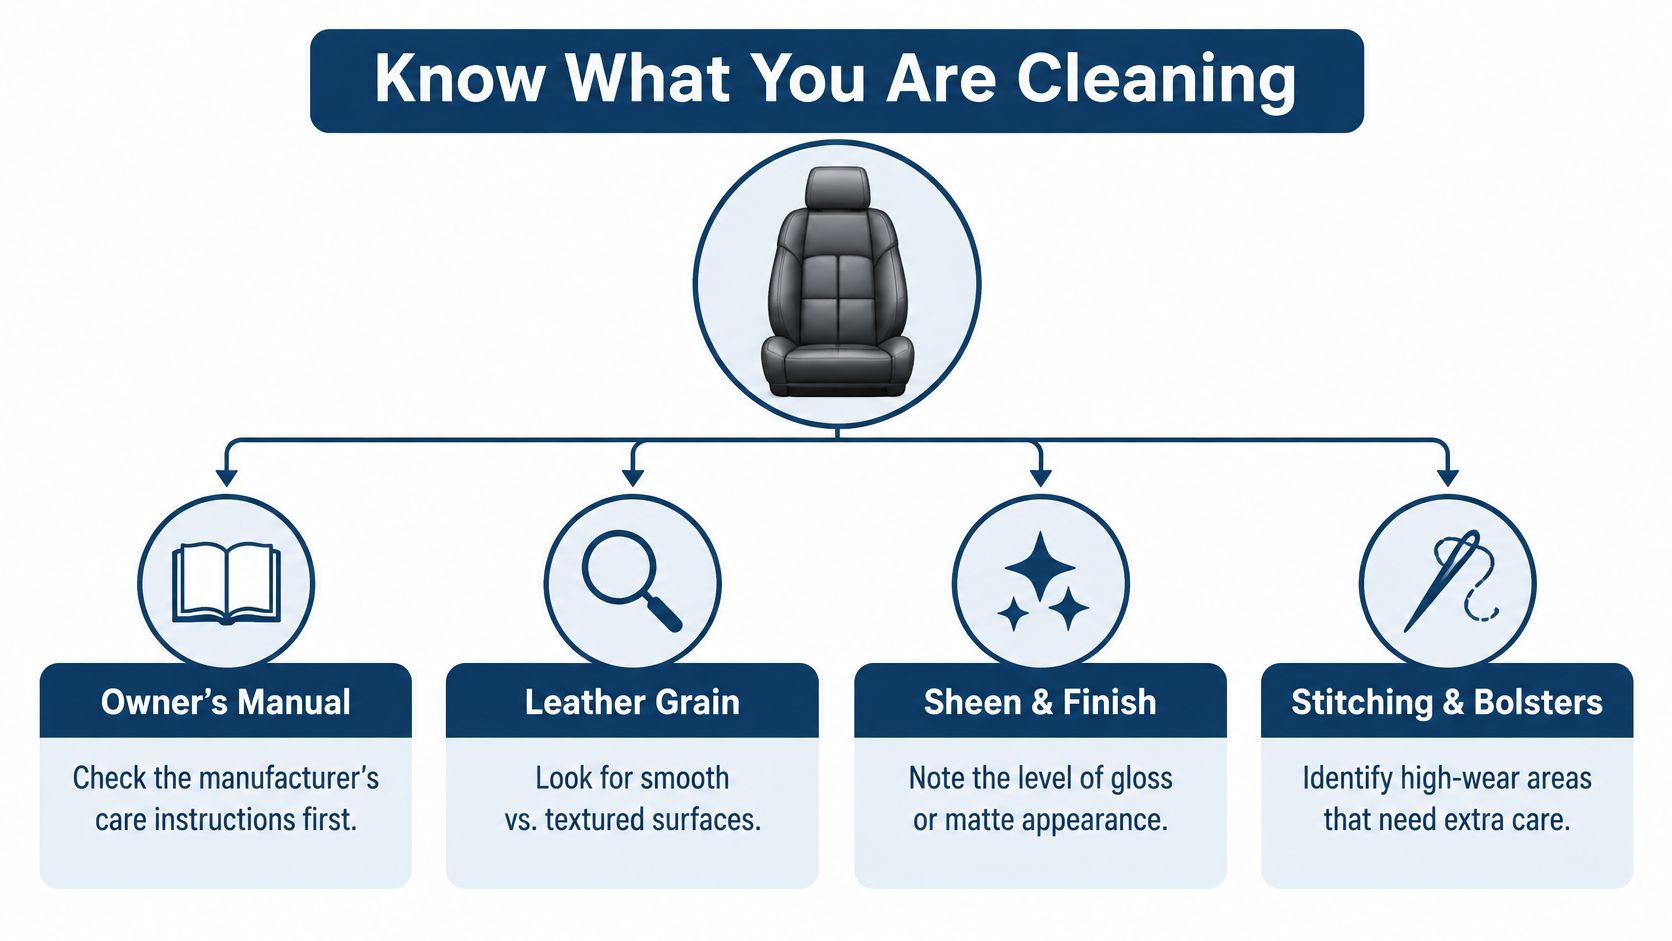
A seat can look uniformly leather while combining coated leather, synthetic upholstery, vinyl, and fabric. Perforated centres and smooth bolsters may also require different handling, even when their colours match. Appearance is a clue, not proof of composition.
Start with the owner's manual and any manufacturer upholstery-care instructions. Look for the specified trim material and restrictions on cleaners or treatments, rather than relying on the vehicle's model name or a broad “leather interior” description.
Follow the material, not the colour
Use this inspection sequence before opening a bottle:
- Check the documentation. Confirm what the manufacturer permits for the seat surfaces you intend to clean.
- Inspect the panels. Compare grain, sheen, stitching, side sections, and bolsters. Differences help you map the seat, but don't reliably identify the material by themselves.
- Locate openings and controls. Note perforations, ventilation areas, switches, and nearby electronics so you can keep application away from vulnerable gaps.
- Treat accessories separately. Removable items have their own materials and care requirements.
That last point matters for pet owners. An accessory such as Nandog Pet Gear's black vegan leather dog car seat belongs in your material check too. Don't assume a treatment suitable for the vehicle's upholstery is also suitable for a removable pet seat.
Make the spot test meaningful
Choose an inconspicuous area of the same panel material you plan to treat. Apply a small amount of the proposed product to a cloth, test gently, and let the area dry before judging the result.
Stop if colour transfers, the finish changes, or the surface becomes tacky. Don't interpret a bad reaction as a request for more scrubbing. This material-first approach addresses the mixed-surface concerns discussed in car interior cleaning guidance, while giving you a clear stopping point before treating a visible area.
Clean Seams Without Spreading Grit
The seam beside your thigh is a good place to begin inspecting, but a poor place to begin spraying. Remove the loose contamination before introducing cleaner. Otherwise, you're asking a wet cloth to collect grit while dragging it across the surrounding finish.
Gather a vacuum with a soft brush attachment, clean microfibre cloths, a soft detailing brush, and a pH-balanced automotive-leather cleaner compatible with the identified surface. Keep a fresh cloth available for residue removal rather than trying to complete every task with the same dirty face.
Lift loose particles first
Vacuum stitching channels, bolster creases, perforated areas, and the accessible gap beside the seat. Use the soft brush gently to loosen particles towards the vacuum opening. If dirt remains lodged in a perforation, don't turn the brush into a digging tool.
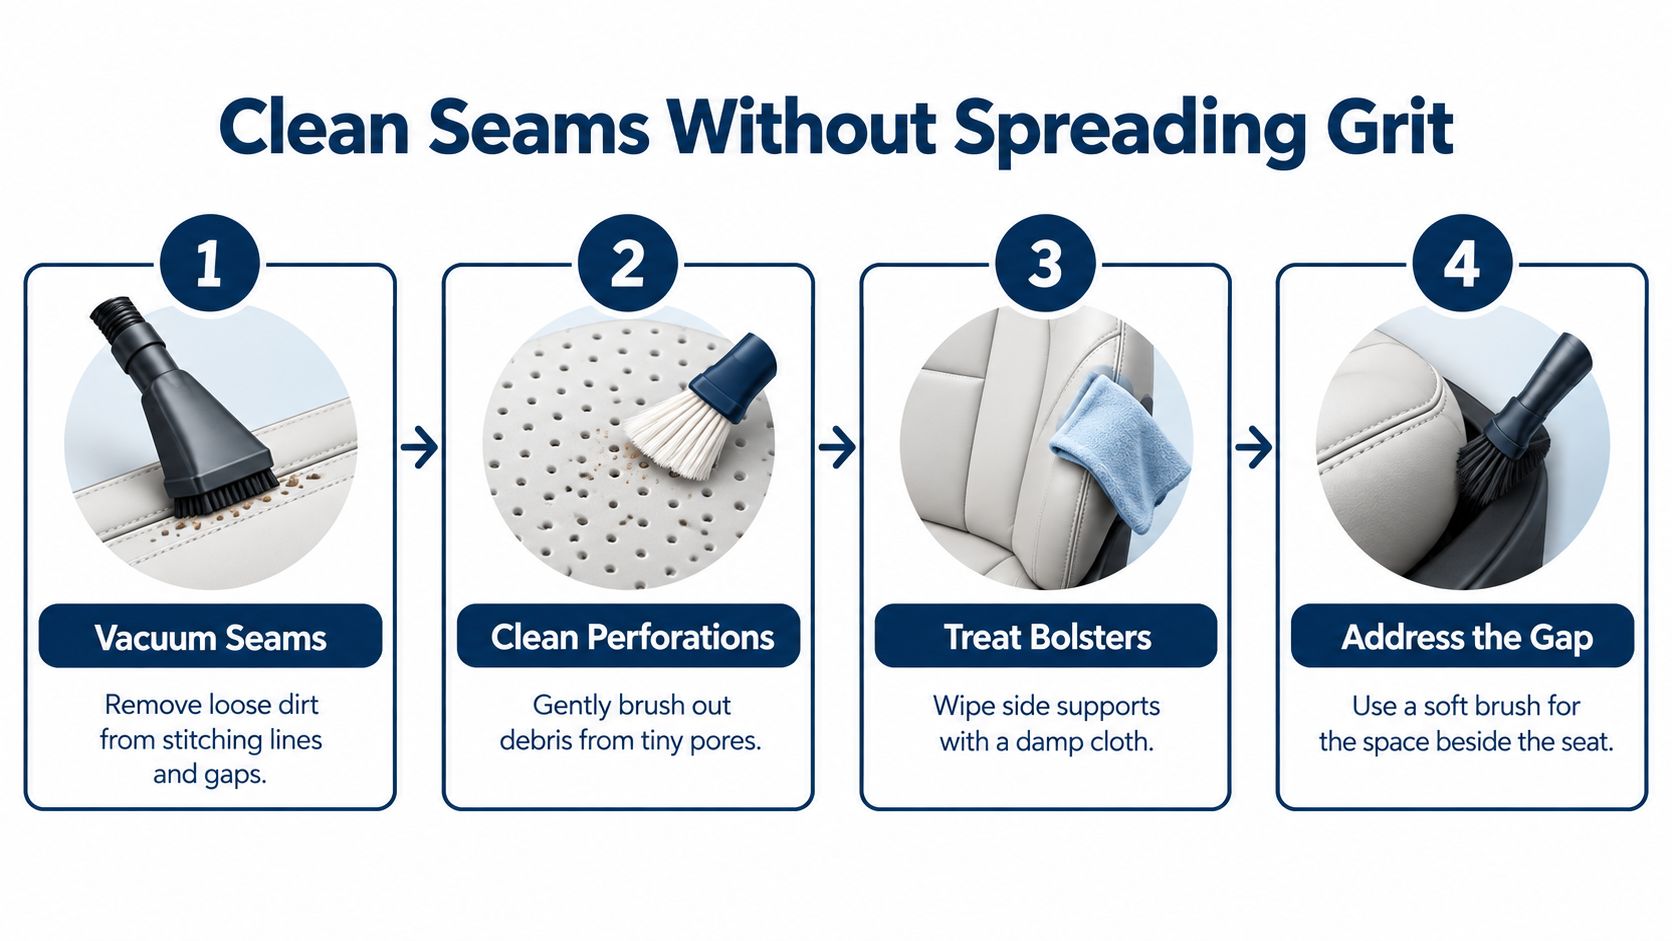
After vacuuming, complete the compatibility test described above. Then work through a controlled cleaning sequence:
- Apply to the tool. Put cleaner on the microfibre cloth or soft brush, not directly onto the seat.
- Work panel by panel. Keep the treated area manageable so you can remove residue before it dries.
- Respect the label. Where the product permits, allow approximately 30–60 seconds of dwell time, following the controlled workflow supported by Canadian leather-care guidance.
- Agitate lightly. Use gentle movement rather than pressure, particularly around stitching and bolster edges.
- Remove the residue. Lift away loosened soil with a clean cloth, changing to a fresh face as it becomes dirty.
Let the result dry before judging it
A damp panel can make it difficult to assess the final finish. Let the surface dry fully before deciding whether it needs further attention or a compatible conditioner. If a mark persists, reassess it rather than automatically increasing pressure or wetness.
The steering wheel deserves its own compatibility check. Repeated hand and wet-glove contact can concentrate grime there even when the seats look acceptable, so cleaning priorities shouldn't depend only on the largest visible surface. Keep product application controlled and away from switches.
A successful cleaning pass removes contamination. It doesn't need to leave the upholstery noticeably wet.
If your cloth is becoming dirty, you're collecting soil. If the seat is becoming wetter while the mark barely changes, pause. More liquid isn't necessarily more cleaning.
Choose the Right Cleaning Level
A short winter commute and a week of wet passengers don't call for identical treatment. Condition-based maintenance means responding to what you find, rather than putting every surface through a deep clean whenever you open the car-care cupboard.
Start by checking whether the problem is loose dust, a fresh salt mark, embedded grime, or a change in the finish. Also ask whether the surface is already damp. A cleaning decision that ignores drying conditions can turn a manageable job into an unfinished one.
Choosing a Leather Cleaning Level
| Surface condition | Likely need | Best response |
|---|---|---|
| Light dust or a fresh surface salt mark | Maintenance clean | Remove loose particles, then use a lightly dampened microfibre where appropriate |
| Visible grime in seams or on bolsters | Targeted deeper cleaning | Use the tested, panel-by-panel method |
| Shiny or tacky areas | Cleaning and residue assessment | Review contamination and previous product use before adding treatment |
| Clean, dry, unchanged finish | Observation | Leave it alone and inspect again after further use |
| Persistent dampness or deep staining | Professional assessment | Stop repeating surface treatment and discuss deeper service |
Match the job to the available time
A five-minute maintenance clean is a limited task, not a race to detail the cabin. After a short commute, use it to deal with accessible loose grit and a fresh mark. Leave a more involved cleaning session for a time when you can finish residue removal and allow drying.
A family vehicle after a wet week may need attention in several distinct places: a passenger bolster, a lower door panel, and the floor area beneath the mats. Don't let the relatively clean seat centre distract you from those concentrated trouble spots.
For ride-hailing or delivery use, inspect contact areas rather than automatically increasing the amount of product. A frequently handled surface can need targeted cleaning while adjacent upholstery needs nothing.
The result should be a routine you can repeat without overworking the interior. Clean when the condition calls for it, and stop when the surface is clean, not when you've used everything in the kit.
Condition Leather Only When Compatible
Conditioner isn't an automatic reward for finishing the cleaning. It's a separate treatment decision that depends on the material, protective finish, manufacturer guidance, and product instructions.
Some coated surfaces need cleaning rather than repeated oil-based treatment. Synthetic upholstery shouldn't inherit a leather-conditioning routine because it looks similar. If you can't confirm compatibility, postponing the application is more sensible than experimenting across the whole seat.
Apply less, then assess
For compatible leather, begin only after cleaning is complete and the surface has dried fully. Apply a thin, even layer, follow the product's stated curing and reapplication instructions, and gently buff away excess.
These condition-based practices, along with avoiding household oils and heavy grease, are outlined in leather restoration and protection guidance. Use the directions for your actual product rather than borrowing a curing interval from a different bottle.
- Keep the application restrained. More product doesn't automatically mean better care.
- Watch the finished surface. Residue or tackiness calls for reassessment, not another coat.
- Separate cleaning from conditioning. A shiny, dirty bolster needs its contamination addressed before you consider treatment.
- Confirm each material. Don't carry the applicator from leather onto vinyl or fabric without checking suitability.
Less can be the correct amount: The aim is a compatible treatment without excess left on the surface.
Prevention doesn't have to come from a bottle
Shaded parking and a windshield sunshade are useful preventive measures against sun exposure. They complement material-appropriate maintenance without adding another layer to the upholstery.
Don't confuse a glossy appearance with successful conditioning. Judge the result against the original finish and the product instructions, not the shine of an unrelated interior.
There's also no reason to promise a precise increase in lifespan from a home routine. The practical objective is simpler: keep the surface clean, avoid incompatible treatments, and respond early when its appearance or feel changes. A restrained routine is easier to maintain than repeatedly correcting an over-applied product.
Avoid Shortcuts That Damage Leather
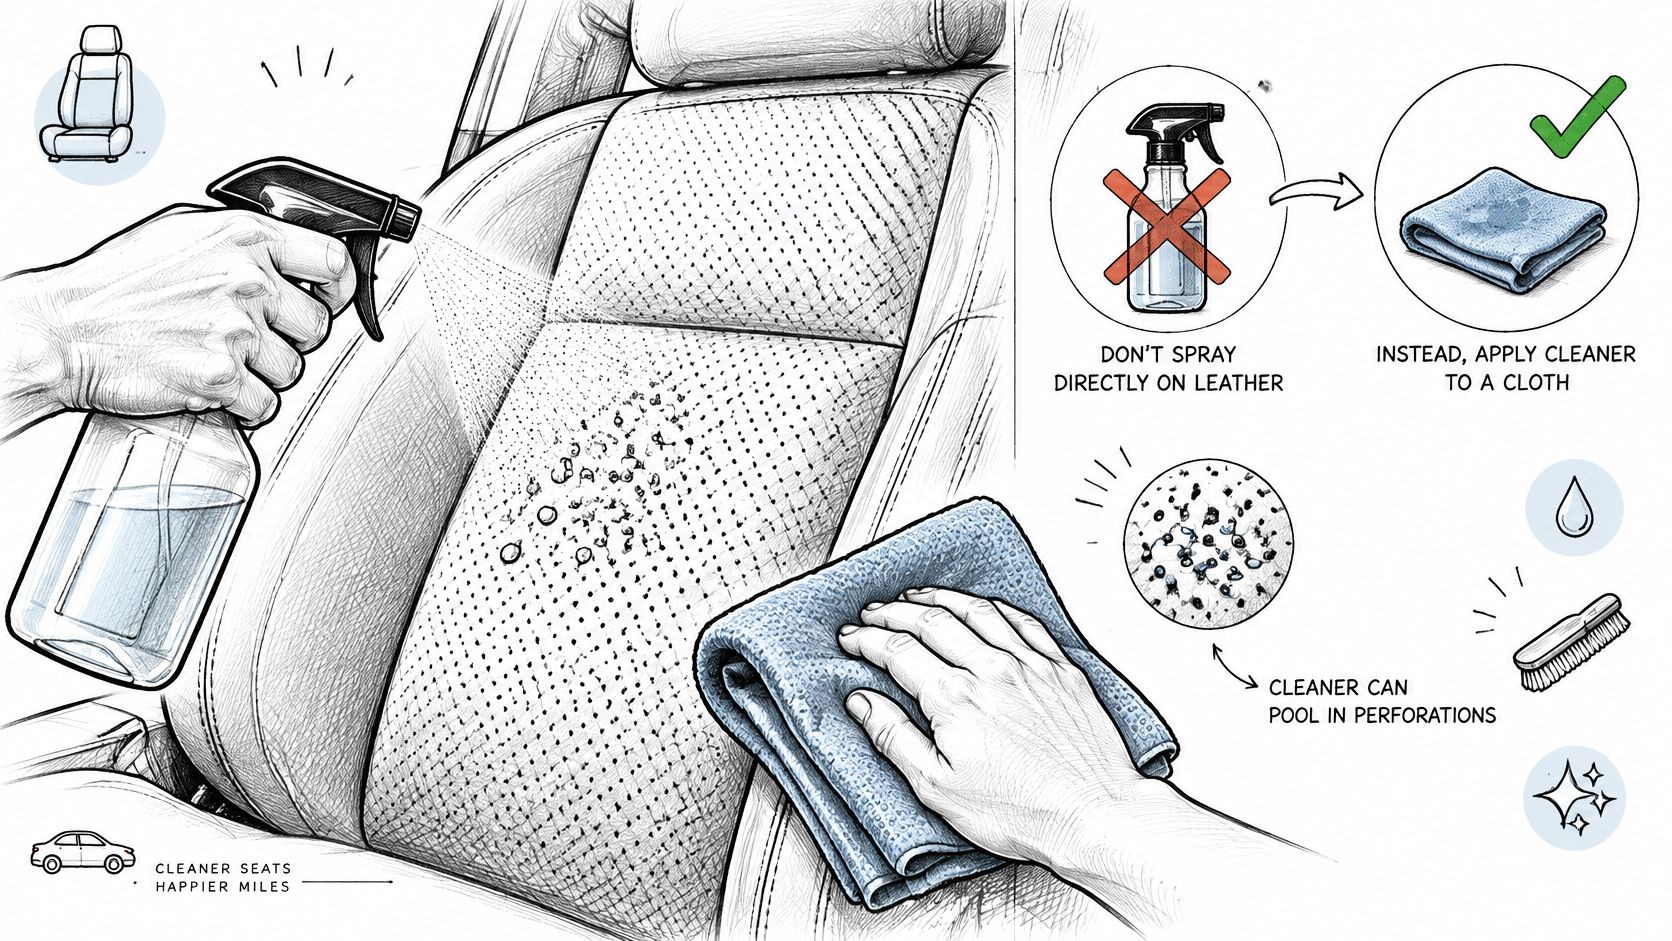
The shortcut that causes trouble is often the one that feels most productive. Spraying a seat until it's wet, scrubbing harder, or adding another coat gives you something obvious to do. None of those actions proves that you're treating the right problem.
More effort is not always a safer method. Ontario winter care needs particular restraint when seams, perforations, and surrounding textiles may already be damp. Controlled application and full drying are central to GTA leather-protection guidance.
Replace the shortcut with a stopping rule
- Direct spraying: Put product on the applicator so you can control where it goes.
- Flooded perforations: Stop adding liquid and allow drying. Don't chase a mark deeper into the seat.
- Scrubbing salt: Return to loose-particle removal instead of increasing pressure.
- Household substitutions: Leave bleach, ammonia, household oils, and boot or tack grease out of the upholstery routine.
- Changing colour or texture: Stop treatment if you see colour transfer or a worsening finish.
Stiffness, persistent tackiness, or grime that returns quickly deserves a closer assessment. Those symptoms aren't a reliable instruction to condition again. Equally, a mark that survives gentle cleaning may need professional evaluation rather than a more aggressive home attempt.
When the cabin won't dry
If you're heading straight back to work, choose a limited maintenance clean rather than beginning a wet deep clean you can't finish. Remove accessible contamination now and save the more involved job for suitable drying conditions.
Use ventilation rather than aggressive high heat as a drying shortcut. Persistent dampness in seams, beneath mats, or around the seat base is a reason to stop introducing moisture.
Ask a detailer to assess whether professional extraction is appropriate for affected carpets or fabric areas, and how the surrounding leather or synthetic trim should be protected. Extraction isn't a blanket instruction to saturate a leather seat. The point of professional help is to identify where moisture and contamination remain, then choose a method suited to those materials.
Build a Leather Care Routine That Sticks
The leather care car owners can sustain is usually straightforward: inspect the interior, choose the smallest suitable job, and finish it properly. A crowded shelf of bottles won't compensate for uncertain material identification or a rushed drying stage.
Keep your tools organised so a fresh mark doesn't become an excuse for an improvised household cleaner. Separate clean microfibre cloths from used ones, and keep the product instructions available. The easier the correct method is to start, the less tempting the shortcut becomes.
Keep the routine small enough to repeat
Use this compact check before treating a seat:
- Identify: Confirm the material and product compatibility.
- Remove: Vacuum loose grit before wet cleaning.
- Control: Treat manageable panels and lift away residue.
- Finish: Allow complete drying and condition only where appropriate.
- Reassess: Decide whether anything still needs attention before repeating treatment.
DIY care makes sense for manageable surface contamination when you can work safely and allow drying. Persistent salt deposits, heavily soiled seams, deep staining, odour, or a cabin that remains damp warrant a different decision.
A professional detailing assessment is one option, particularly when the problem involves both upholstery and surrounding carpets. Explain what you've already applied, where moisture persists, and whether the finish changed during cleaning. That's more useful than asking for the strongest available treatment.
Preventing a build-up is usually a better maintenance goal than repeatedly attempting a dramatic rescue.
The standard isn't an interior that never sees winter. It's an interior you can inspect calmly, clean selectively, and leave dry without adding unnecessary residue. Once that becomes the habit, leather care stops feeling like a restoration project every time you open the door.
Nanak Car Wash offers professional detailing that includes leather deep cleaning, carpet and seat shampooing, vent and crevice blowout, salt and stain removal, and machine buff and polish. If winter contamination has moved beyond a controlled surface clean, visit Nanak Car Wash to discuss detailing for your upholstery and the surrounding interior.




 6600 Finch Ave W, Etobicoke, ON M9V 3Z6

 647-703-8515
 MON – SUN 8 AM to 7 PM