

You open the driver's door after a GTA winter commute and see the usual evidence: white salt dust along the bolster, slush marks near the pedals, and a seat that feels harder than it did in autumn. Then summer arrives, the cabin heats up, and the same leather feels dry, sticky, or oddly shiny. That cycle is exactly why a leather protector car routine needs to involve more than an occasional wipe.
Cleaning removes contamination. Conditioning helps restore softness. A dedicated protector adds a surface barrier against stains, body oils, UV exposure, and everyday abrasion. It won't rescue neglected leather on its own, but used at the right stage, it can help your seats cope with Ontario's freeze-thaw weather and road salt.
Table of Contents
- Why Your Car Leather Feels Like Sandpaper
- Choosing and Applying Your Leather Protector
- Sprays, Liquids, or Wipes, Which Format Fits Your Routine?
- Scheduling Protection Around GTA Seasons
- When to Call in Professional Detailers
- Troubleshooting Common Application Mistakes
Why Your Car Leather Feels Like Sandpaper
The warning often appears before a crack. You slide into the car on a cold morning, and the driver's bolster feels stiff under your leg. The surface may look clean, yet it no longer has the smooth, slightly supple feel it had when the vehicle was new. After a hot drive, the same seat can feel dry and tacky, especially where clothing and skin contact the leather repeatedly.
That change isn't dirt. Leather upholstery is exposed to salt, moisture, friction, cabin heat, and sunlight. Ontario's automotive-care guidance recommends using a cleaner made for automotive leather, followed by a leather conditioner, while warning against excess water because trapped moisture can contribute to mould. The sequence matters in a region where winter slush repeatedly enters the cabin. CAA North & East Ontario guidance on automotive interior care supports the basic rule: clean first, condition second, and control moisture throughout.
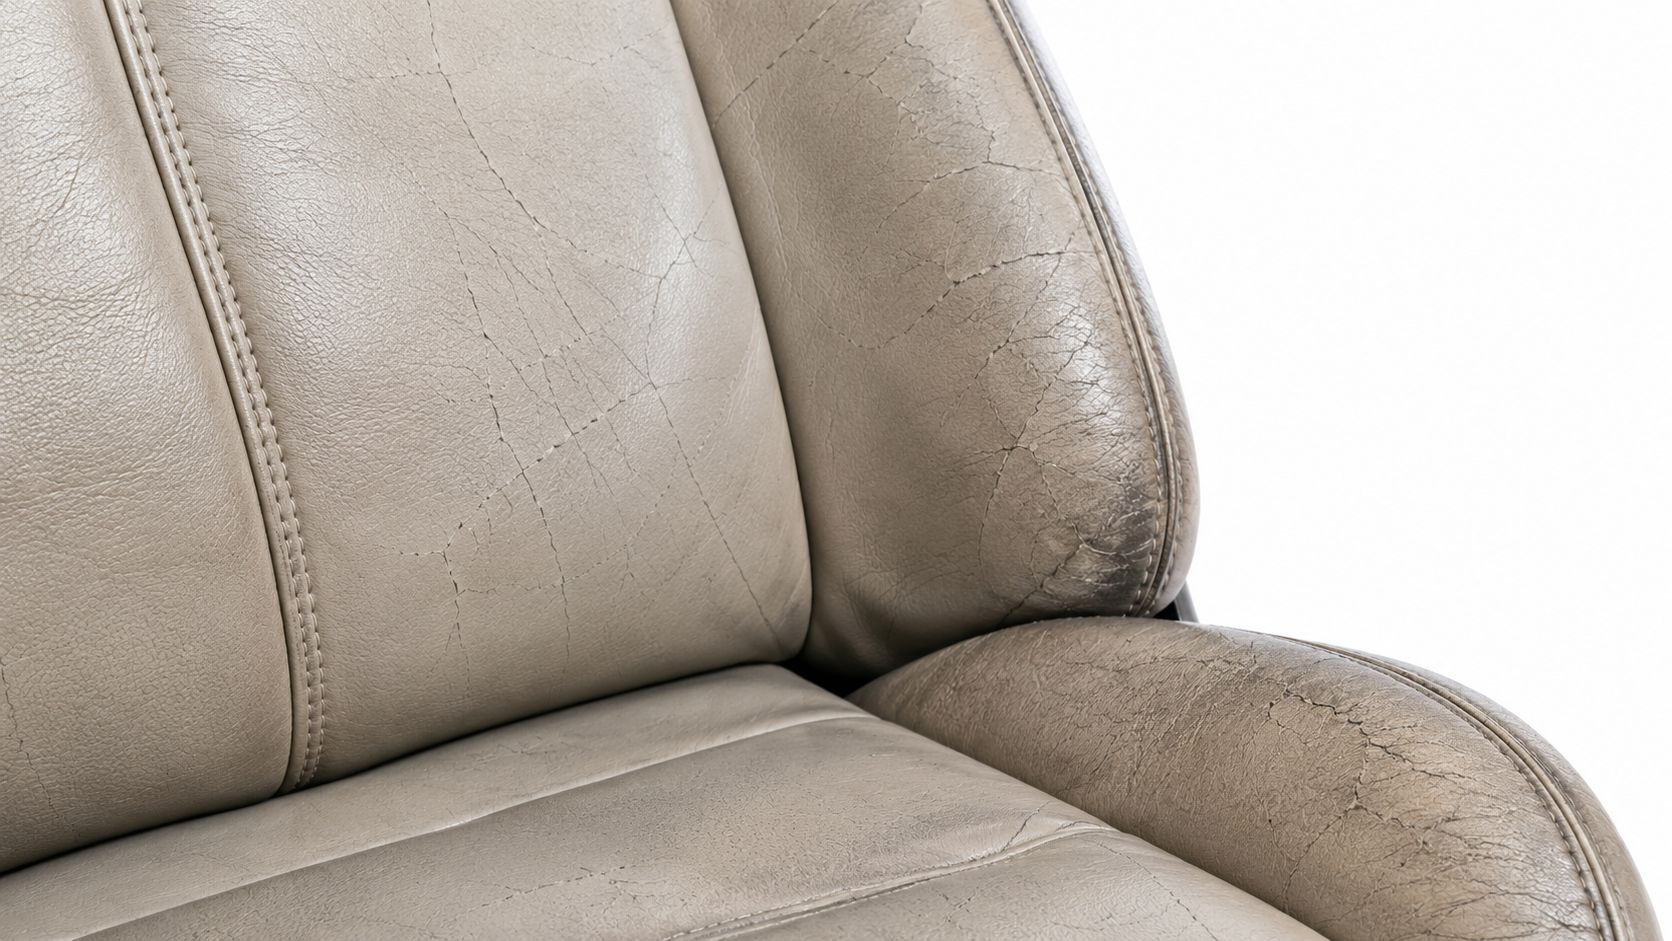
Salt and sunlight create different problems
Road salt is abrasive and persistent. It settles on seat edges, lower door panels, floor mats, and the areas you touch while getting in and out. If you rub those particles across the leather with a dry cloth, you can turn routine cleaning into unnecessary surface wear.
Summer creates a different strain. Parked vehicles absorb heat, while UV exposure can contribute to fading, premature ageing, and cracking. Canadian product guidance for Meguiar's Gold Class leather cleaner and conditioner describes UV inhibitors and protection against spills and stains, which shows why a protector has a role beyond making the seat look glossy.
Practical rule: A protector helps defend a clean surface. It can't make salt, body oil, or embedded grit disappear.
A rough texture is a useful prompt to inspect the whole seat, not a reason to pour on more conditioner. If the leather has deep cracks, missing colour, or a hardened finish, surface treatment may improve its appearance but won't reverse the underlying damage. At that point, the right routine shifts from preservation to professional assessment.
Choosing and Applying Your Leather Protector
The product matters, but application order matters more. A protector spread over dust and salt can form a gritty film, while heavy application can leave the seat greasy and attract more debris. The safest home process is controlled, light, and deliberately unhurried.
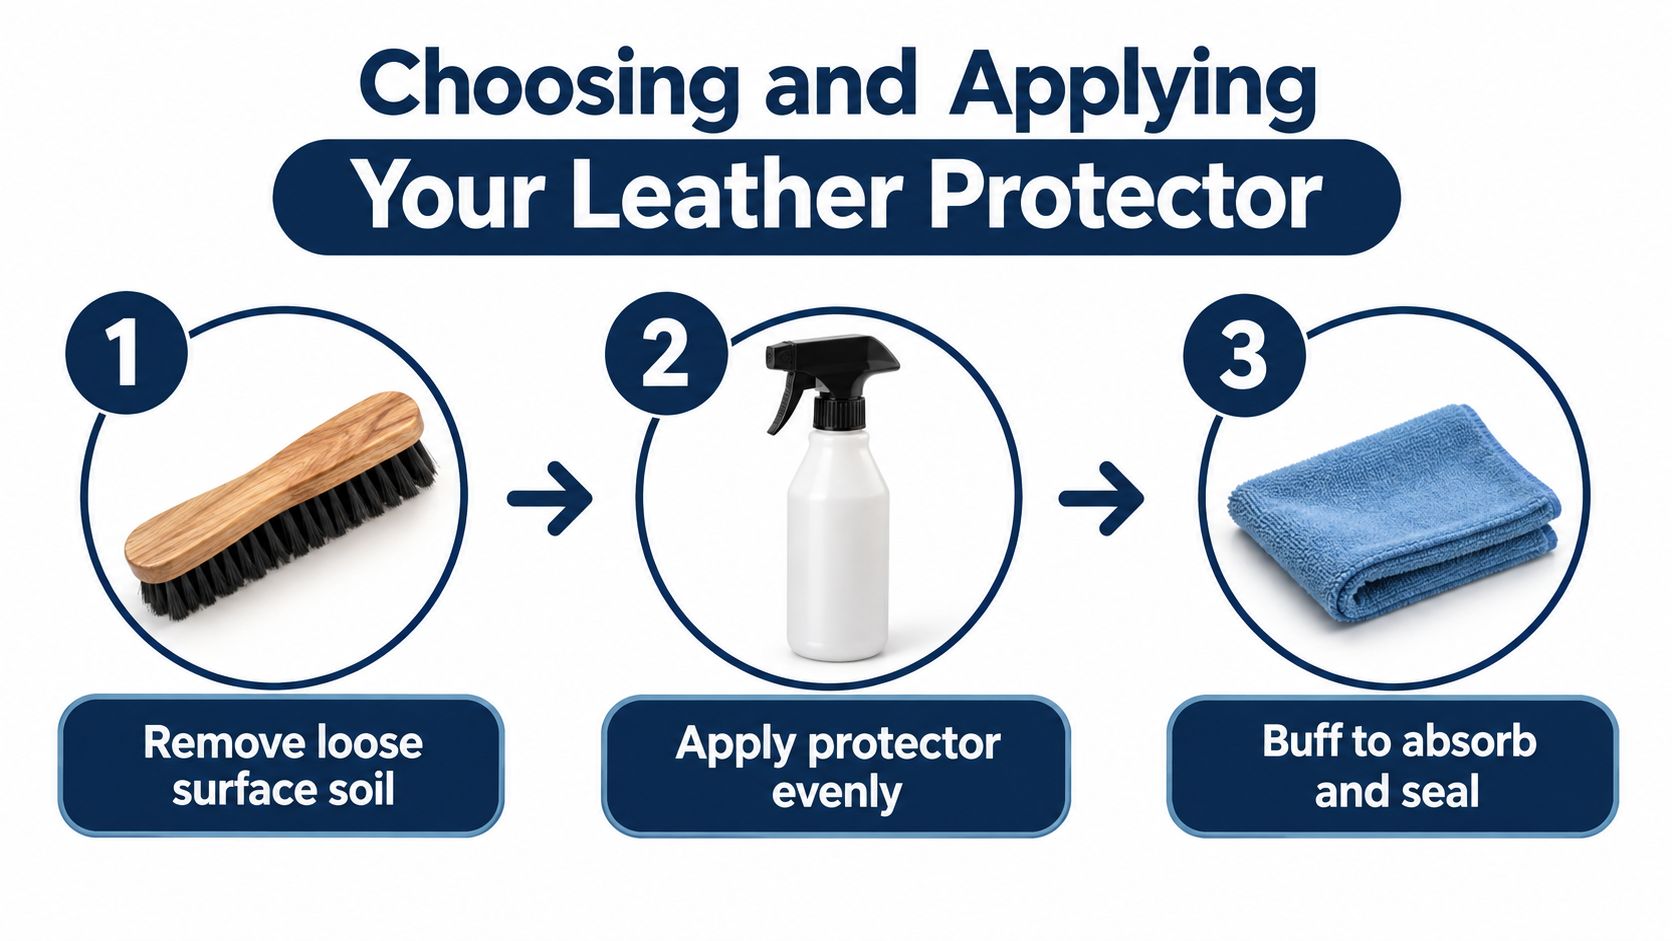
Start with dry removal
Vacuum the seat, seams, piping, and the gap around the bolster. Use a soft detailing brush around stitching and perforations. Loose grit is the first thing to remove because it can scratch the finish while you work.
Next, use a leather cleaner formulated for automotive upholstery. Apply it to a brush or microfibre cloth rather than flooding the seat. Work in small areas, lift the residue, and use a separate clean cloth to remove remaining product. Canadian leather-care guidance consistently supports cleaning before conditioning, and Canadian Tire's Armor All leather wipes listing illustrates the category's focus on cleaning into the grain while helping defend against stains, cracking, and fading.
Apply less than you think
Once the surface is clean and fully dry, place a small amount of protector on a microfibre applicator. Spread it evenly across flat panels, bolsters, and frequently touched areas using gentle overlapping motions. Don't spray directly near screens, glass, dashboard plastics, seat controls, or open perforations.
Allow the product to dry according to its label. Then buff away residue with a fresh cloth. The finished surface should feel clean and natural, not wet, slippery, or mirror-like. If the leather still looks uneven, add a little product only where coverage is missing instead of coating the entire seat again.
Match the formula to the upholstery
Check whether your seats are smooth, perforated, heated, ventilated, coated, or synthetic leather before choosing a product. Test an inconspicuous area first, especially on pale upholstery or older finishes. A protector designed for one material may leave another with an unwanted sheen or feel.
Application standard: Clean the grain, let the surface dry, apply a light coat, and buff until no residue transfers to your hand.
Sprays, Liquids, or Wipes, Which Format Fits Your Routine?
The best format is the one you can apply evenly without rushing. Sprays and liquids offer broad coverage and work well when you're treating an entire cabin, but they demand control. Wipes are faster and more contained, though they can make it tempting to clean only the areas you can see.
| Format | Where it works well | Main trade-off |
|---|---|---|
| Liquid | Full-seat treatment with an applicator pad | Requires measured application and careful buffing |
| Spray | Fast coverage across larger smooth panels | Overspray can reach glass, plastics, and controls |
| Wipes | Steering wheels, shift knobs, bolsters, and quick touch-ups | Coverage can be less uniform across a complete interior |
Liquid products are useful when you want to control the amount on the applicator. That control helps on older or drier seats, where the temptation to saturate the surface can be strong. Use a small amount, spread it thinly, and keep a dry microfibre cloth nearby.
Sprays can be efficient, but don't aim them directly at the upholstery unless the label specifically permits it. Spray onto a cloth or pad, then work panel by panel. This reduces mist on neighbouring trim and gives you a better view of how much product you're applying.
Wipes make sense for regular upkeep between more thorough cleans. They're handy for high-touch areas and for drivers who need a quick routine after a busy week. Canadian retail guidance presents wipes as a repeatable maintenance option, with products designed to clean into the grain and help resist stains, cracking, and fading. Their limitation is consistency. A dry section of wipe can drag soil across the surface, so use a fresh one when it becomes dirty.
For perforated, heated, or ventilated seats, every format requires restraint. Too much liquid can collect in the holes or create an uneven tactile finish. A cloth-applied product is usually easier to control than a direct spray.
Scheduling Protection Around GTA Seasons
Leather care works better as a calendar habit than as a response to visible damage. GTA drivers face different contamination and drying pressures throughout the year, so the schedule should change with the conditions rather than remain fixed.
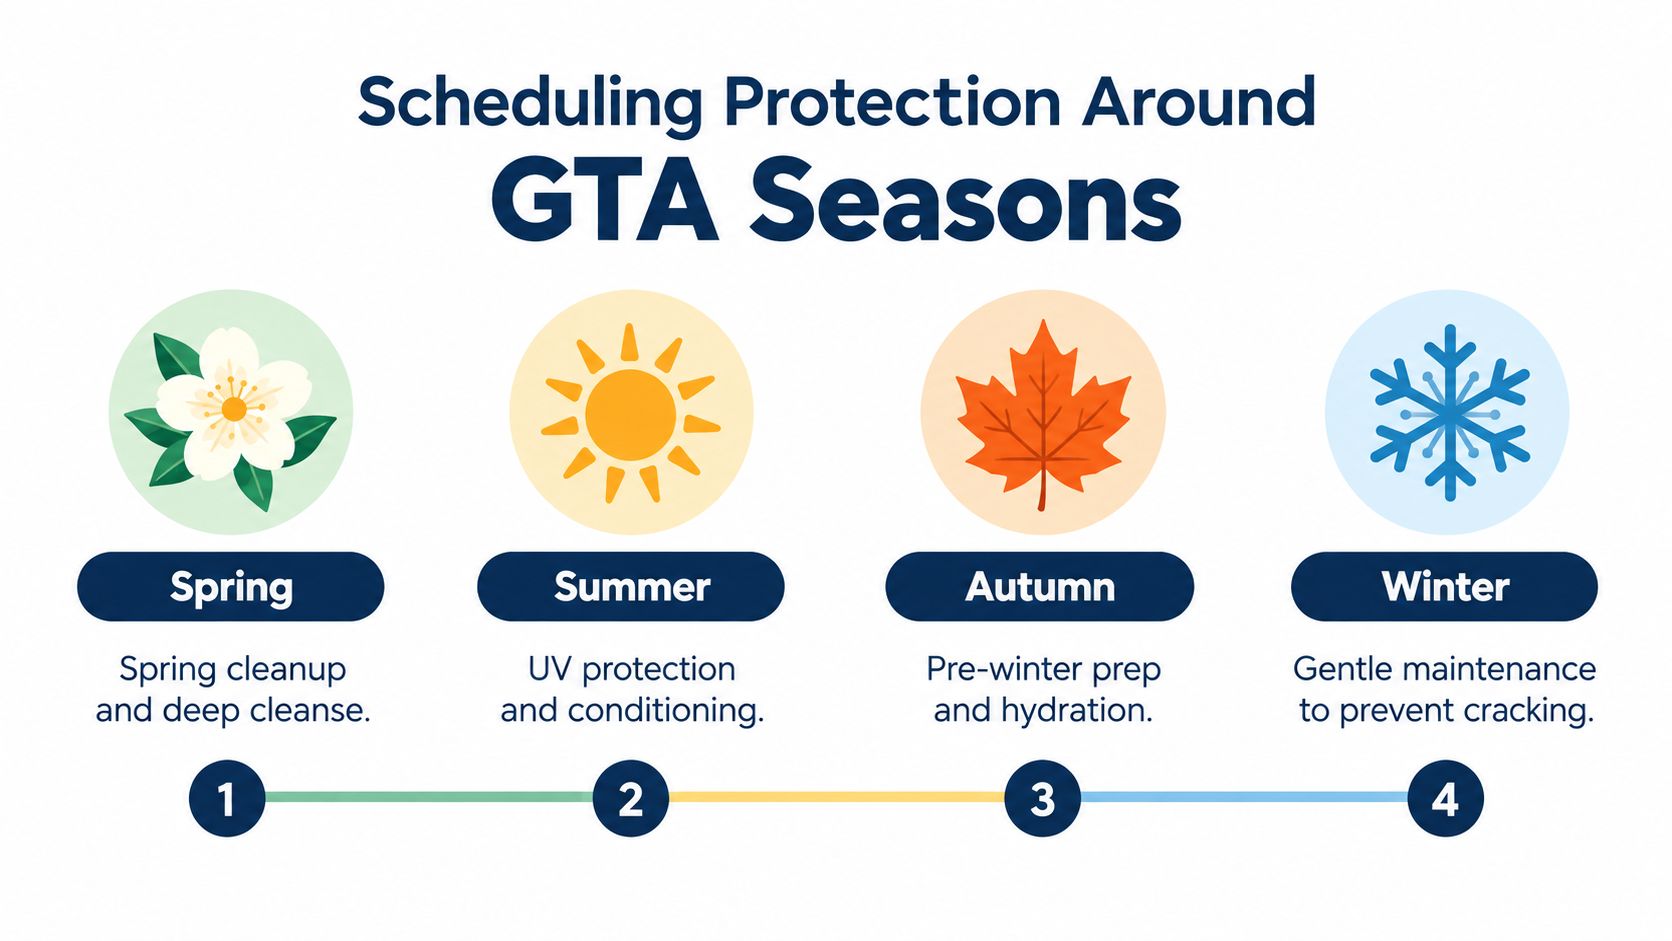
A GTA interior-care guide recommends a maintenance rhythm of every 3 to 6 months for drivers, as outlined by Nanak Car Wash's leather-care guidance. Another Ontario guide suggests every 2 to 3 months for rideshare or delivery vehicles and every 3 to 4 months for daily commuters, with seasonal checkpoints in spring, summer, autumn, and winter. Those intervals are practical starting points, not a substitute for inspecting the seats.
Adjust for use and exposure
A delivery driver who enters the car repeatedly, carries wet clothing, and tracks in winter residue needs more frequent cleaning than someone who drives mainly on weekends. A family vehicle with children, pets, or pale seats also faces more staining and friction.
Use the seasons as inspection points:
- Spring: Remove winter salt and moisture residue with a thorough interior clean before applying protection.
- Summer: Prioritise a clean, even UV-focused protectant before prolonged heat and sunlight exposure.
- Autumn: Prepare the upholstery before slush returns, especially around bolsters and lower panels.
- Winter: Remove salt promptly and avoid soaking the leather in an attempt to clean it quickly.
Ontario winter-care guidance shows why frequency advice can vary. One source recommends cleaning every one to two weeks during salt season, while another suggests every three to four weeks. The shared lesson is more useful than choosing one rigid interval: protectant doesn't replace salt removal, and visible residue deserves prompt attention. Ontario winter car detailing guidance explains that a protector can't correct contamination already sitting in the grain.
When to Call in Professional Detailers
Home protection is preservation work. It keeps a reasonably healthy surface cleaner, softer, and easier to maintain. Professional detailing becomes necessary when the seat needs correction rather than another layer of product.
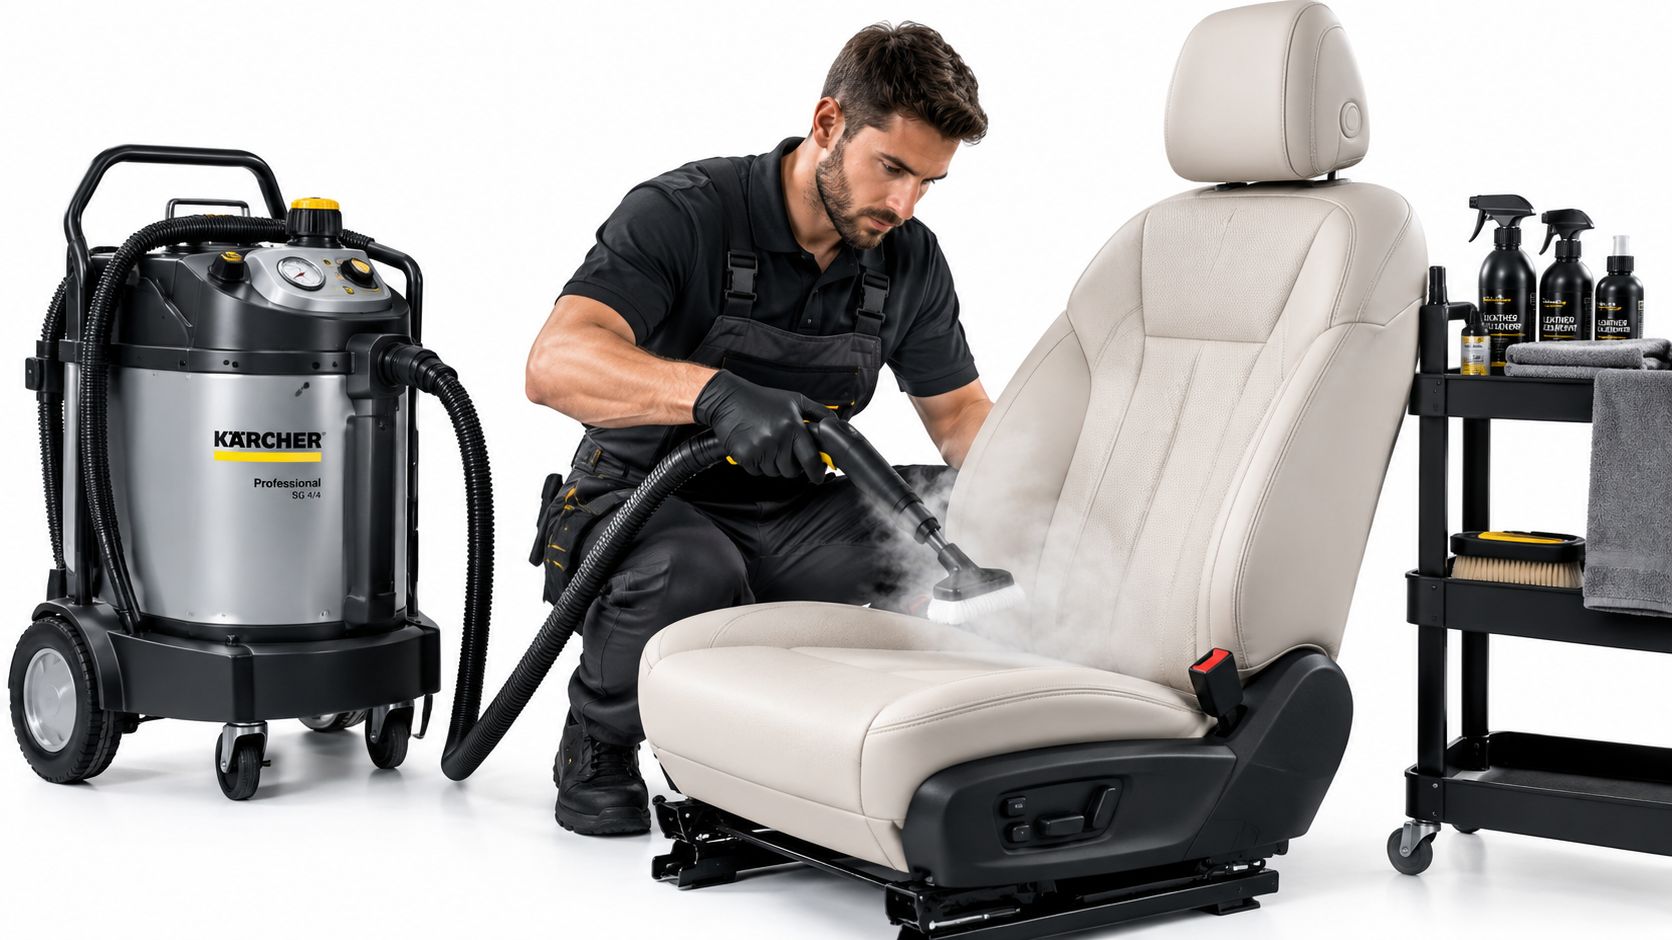
Deep staining, severe cracking, dye transfer, unpleasant odours, and pronounced colour loss can all exceed what a consumer protector is designed to handle. A professional may use controlled steam, extraction equipment, specialised cleaners, colour-matched repair products, and a more durable finish system. The objective is to remove contamination and restore the surface before applying protection.
Know what DIY products can't fix
A protector can reduce future staining on sound leather, but it won't rebuild a split bolster. Conditioner can improve feel, but it won't replace missing pigment. More product often makes a damaged seat look darker or shinier without addressing the structural problem.
Ask for an assessment when:
- Cracks have opened: Surface dressing won't reconnect separated leather.
- Colour has worn away: Restoration may require preparation and colour matching.
- Salt has reached seams: A careful deep clean may be safer than aggressive home scrubbing.
- The finish feels sticky: Residue may need controlled removal before any new treatment.
- Perforations are blocked: A professional can clean the area without forcing excess liquid into the seat.
Professional interior detailing can also be worthwhile before selling a vehicle, returning a lease, or preparing a high-use car for continued service. If exterior adhesive or old branding is part of the same cleanup, RedAppy's guide to removing car decals offers a useful reference for handling decals without rushing into abrasive scraping.
Nanak Car Wash lists interior detailing that includes leather deep cleaning, salt and stain removal, upholstery work, and leather conditioning. That type of service differs from a quick DIY application because it addresses the condition of the surface first, then selects the appropriate finishing step.
Troubleshooting Common Application Mistakes
Most failed leather-protector applications aren't caused by a bad bottle. They come from applying too much, skipping preparation, or choosing a finish that doesn't suit the upholstery.
A sticky or cloudy surface usually means excess product remains on the seat, or the product wasn't buffed properly before it dried. Start by testing a clean microfibre cloth on a small area. If residue lifts, work gently across the panel and replace the cloth as soon as it becomes loaded.
Use this quick diagnosis
- Sticky feel: Remove excess residue with a suitable leather cleaner, then let the surface dry fully.
- Uneven sheen: Buff the area with a clean cloth. If the finish remains glossy, the product may not match the factory surface.
- Dark marks around perforations: Stop adding product and clean carefully around the holes without flooding them.
- Gritty texture: Re-clean the panel because dust or salt may have been sealed into the film.
- Patchy absorption: Check whether the panel was uniformly cleaned and dried before application.
- Fresh stains after treatment: Remember that protection helps resist contamination, but it doesn't eliminate the need for prompt cleaning.
Never use the same applicator on a heavily soiled bolster and a clean seat panel. Abrasive particles can transfer back into the leather grain. Heated and ventilated seats deserve extra restraint because heavy application can affect the feel of the surface and may leave product in the perforations.
Finish test: Your treated seat should feel smooth and natural, not greasy, wet, or unusually glossy.
If a mistake happens, don't cover it with another layer. Remove the residue carefully, allow the upholstery to dry, and reassess the material in natural light. Once the surface is clean and even, choose a lighter application and keep the protector focused on prevention rather than shine.
For GTA drivers dealing with salt, slush, and seasonal cabin wear, Nanak Car Wash offers interior detailing with leather deep cleaning, salt and stain removal, and leather conditioning. Visit Nanak Car Wash to arrange a professional interior service or build a practical maintenance routine for your vehicle.



 6600 Finch Ave W, Etobicoke, ON M9V 3Z6
 647-703-8515
 MON – SUN 8 AM to 7 PM