
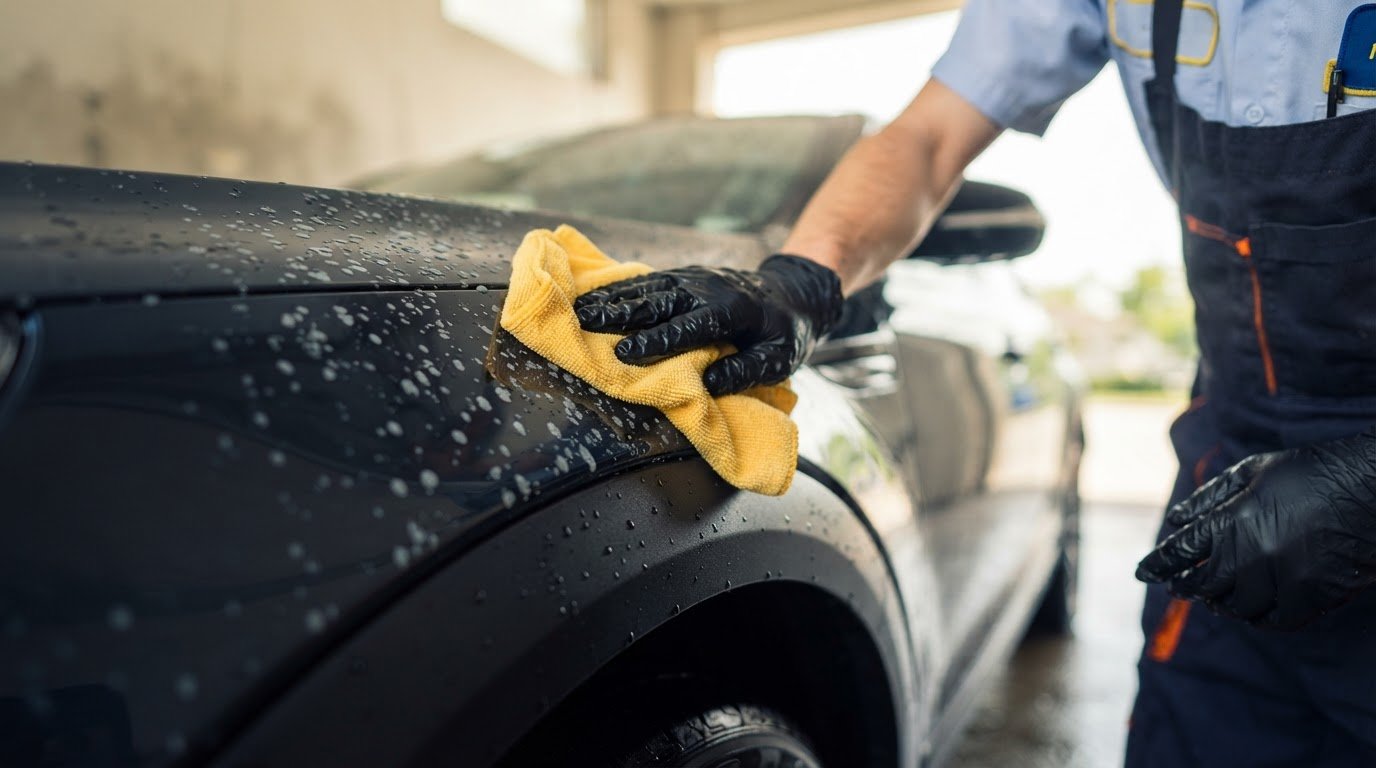
To learn how to remove cement splatter from car paint, rinse away loose dirt, inspect the paint and trim, then patch-test an automotive-safe cleaner in a hidden spot. Let the cleaner soften the cement before gently lifting it with a soft microfibre cloth, then rinse away residue. Never scrape or rub hardened splatter while it’s dry.
It’s tempting to reach for a household cleaner or a tool that can chip the cement off quickly. But the wrong product or too much force can mark paint or trim. Start with a pH-neutral presoak or diluted vinegar, and use a stronger option only if needed and only after a patch test. This guide walks through inspecting the affected surfaces, choosing a cautious cleaning approach, and removing softened splatter without unnecessary abrasion. You’ll also learn which shortcuts to avoid and what to do after the cement is gone.
Key Takeaways
- Inspect the paint, trim and plastic first so you can choose a cautious approach for each affected surface.
- Patch-test an automotive-safe cleaner in a low-visibility spot before treating visible areas.
- Let the cleaner soften the cement, then wipe gently with a soft microfibre cloth instead of scraping dry splatter.
- Skip abrasive shortcuts such as a clay bar, spatula or dry wiping, which can add damage rather than remove the stain.
- Rinse away cleaner after treatment and consider professional detailing when cement remains difficult to remove safely.
Choosing and patch-testing automotive-safe chemicals
Choose a cleaner intended for automotive surfaces, not simply one labelled for concrete. Cement can bond firmly as it hardens, so use a suitable product and test it cautiously first.
Choose Automotive-Safe Chemicals
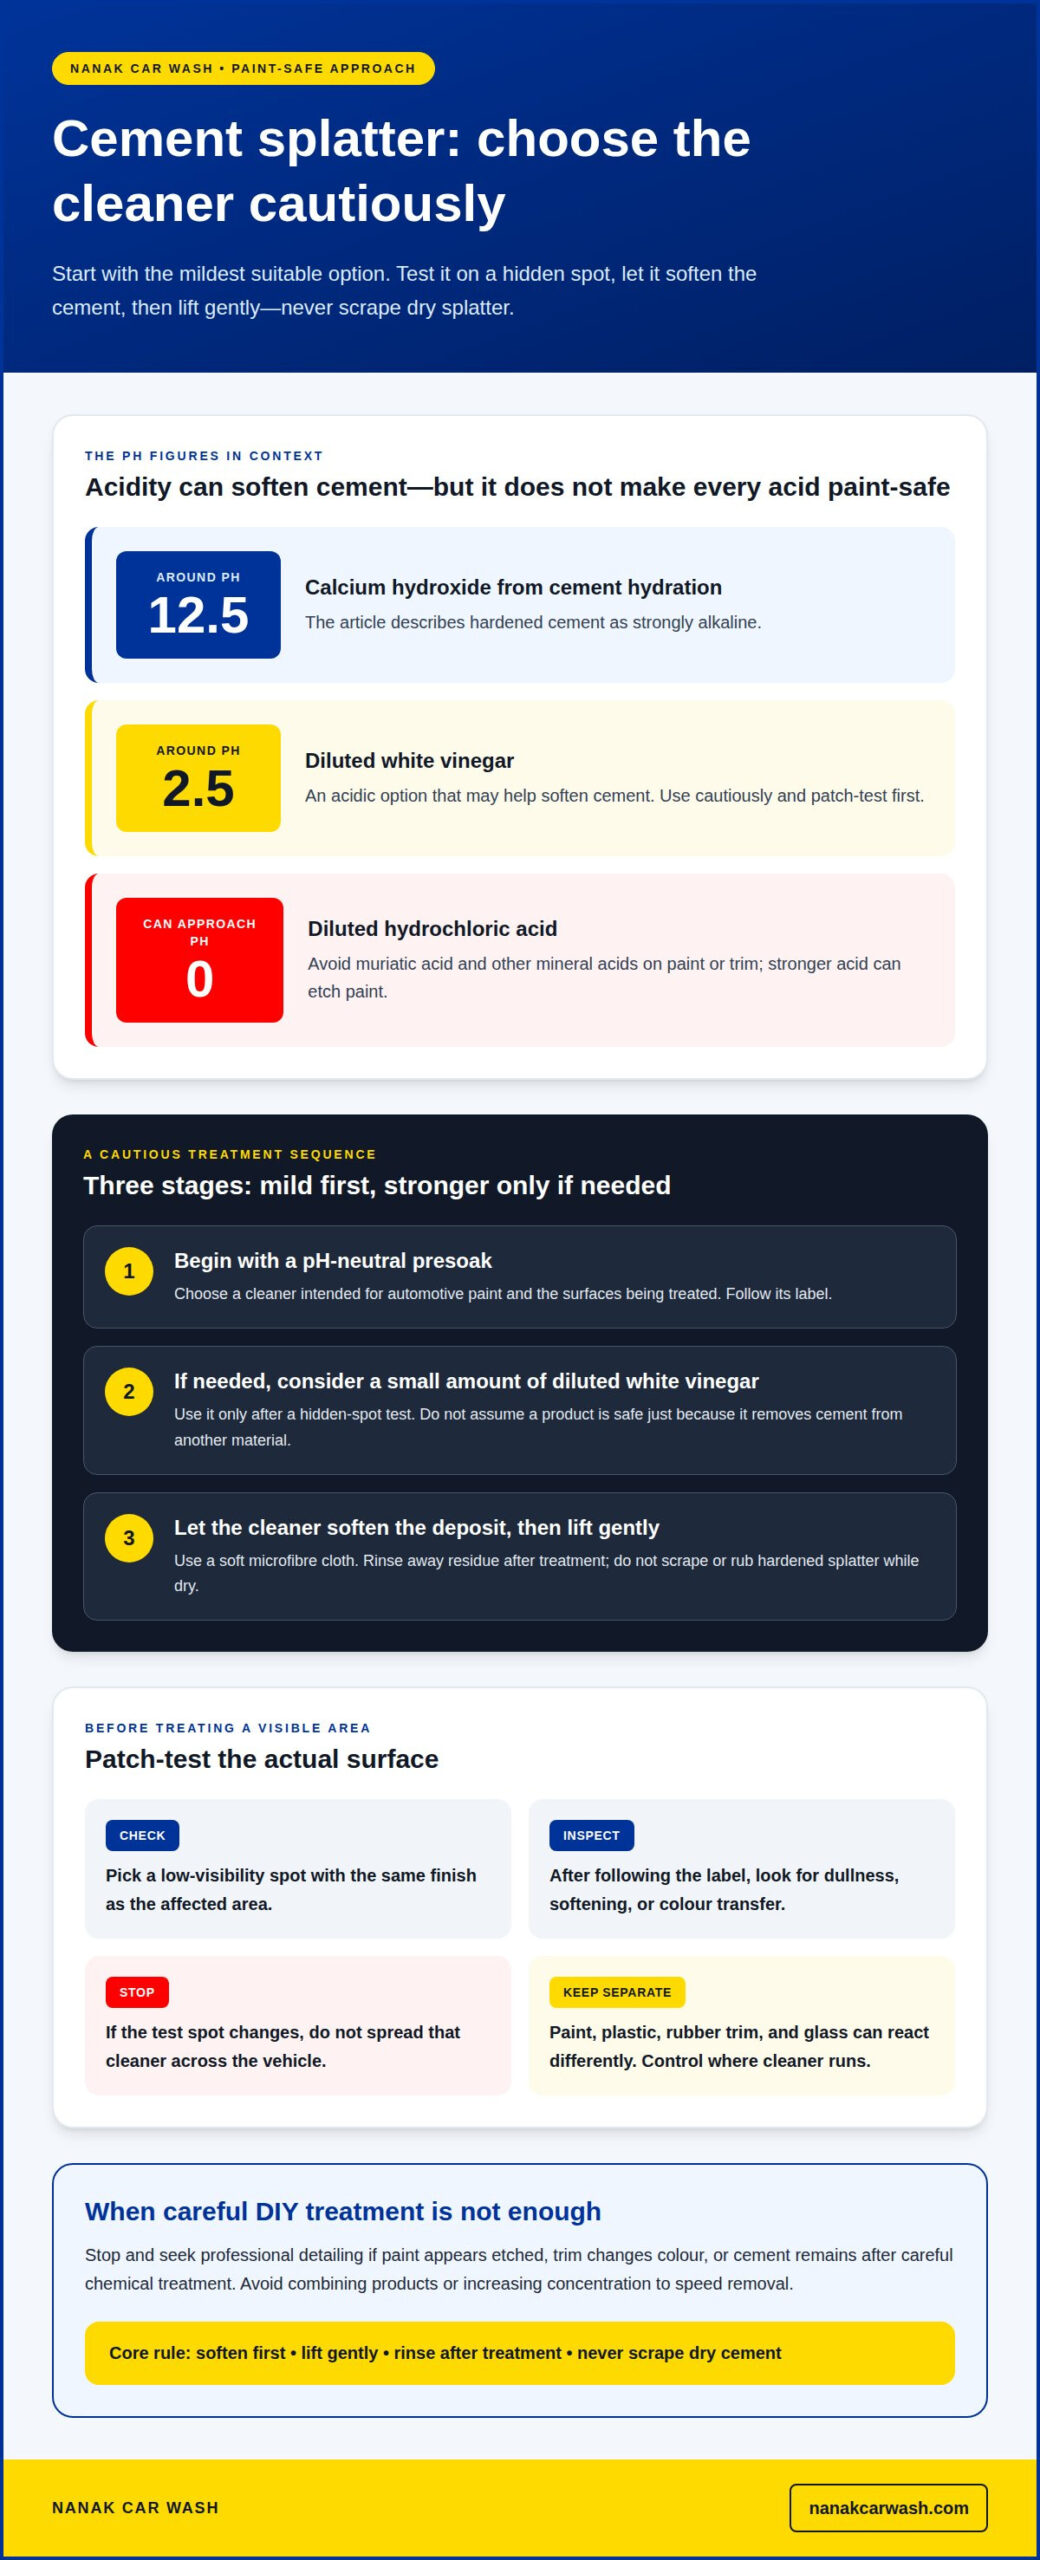
Start with a pH-neutral presoak, then consider diluted white vinegar if the first option needs support. Cement hydration forms calcium hydroxide, with a pH around 12.5; diluted white vinegar is around pH 2.5. That difference helps explain why an acidic solution can soften cement, but it doesn’t make every acid safe for paint.
- Read the label. Choose a cleaner intended for automotive paint and the surfaces you’ll treat. A product for masonry or concrete may be too aggressive for clear coat, painted trim, plastic, or rubber. Don’t assume a cleaner is suitable just because it removes cement from another surface.
- Start with the milder option. Use a pH-neutral presoak first. If needed, try diluted white vinegar in a small amount. Avoid muriatic acid and other mineral acids on paint or trim; dilute hydrochloric acid can approach pH 0.
- Match the product to the surface. Paint, plastic, rubber trim, and glass can react differently to chemicals. Keep the cleaner on the cement-affected area, and avoid letting it run across surrounding trim. Follow the product directions for application and removal.
Assess Chemical Damage Risks
Test a cleaner on an inconspicuous spot before treating visible paint. Older cars can have solid-base cellulose or 2-Pack acrylic paint, which are more prone to acid damage than clear-over-base paint. A patch test helps reveal an adverse reaction on the actual surface before you treat a larger area.
- Apply a small test amount. Pick a low-visibility area with the same finish as the affected panel. Follow the cleaner’s label, then remove the product as directed. Look for changes such as dullness, softening, or colour transfer before proceeding.
- Stop if the surface changes. Don’t spread a cleaner across the vehicle if the test spot reacts. Avoid combining products or increasing concentration to speed up removal. A stronger acid can etch paint, while a solution that’s too weak may not soften cement effectively.
- Arrange professional detailing when damage remains. Seek detailing if paint appears etched, trim changes colour, or cement remains after careful chemical treatment. To protect paint from splatter, park away from active cement work where possible and cover the vehicle before nearby work begins. Don’t rub fresh deposits across the surface.
Inspecting affected paint, trim, and plastic
Concrete dust is loose powder; cement splatter forms raised, bonded spots on a surface. Check the location and texture before deciding how to treat it.
- Map each affected area. Work around the vehicle in good light, checking the hood, roof, doors, wheel arches, windows, and lower panels. Note whether deposits appear on painted panels, black plastic, rubber trim, or glass. This surface-by-surface inventory helps prevent treating every material as if it had the same finish.
- Look at the deposit without rubbing it. Loose concrete dust usually appears as a powdery film and shifts with air or water. Splatter is more likely to sit in distinct raised spots or thin crusts that remain attached. Don’t drag a finger or cloth across either deposit; rubbing can carry grit over the paint.
- Check the edges and texture. View each spot from the side, using light to reveal its height and outline. A bonded splash may have a raised centre and a hard-looking edge, while dust may collect evenly around trim or panel seams. Record where deposits meet badges, gaps, or textured plastic, where wiping can catch material.
- Identify the paint finish before treatment. Cars made in the last 25 years probably have clear-over-base paint, which is more resistant to chemical damage from hardening concrete or acid products. Older vehicles may have different paint systems, so age alone cannot identify the finish. Treat uncertain or previously repainted panels cautiously.
- Watch for signs of a solid-colour finish. A solid-colour paint job can be identified when polishing transfers colour onto the polishing cloth. Don’t polish a cement-covered area just to test it. Instead, note whether the vehicle has a known solid-colour finish and keep that information in mind before cleaning.
- Separate paint concerns from trim concerns. Inspect plastic and rubber for chalking, fading, cracks, or a change in texture. Check painted trim separately from unpainted plastic, and note any exposed edge or damaged coating. If a deposit crosses two materials, mark where each surface begins so treatment can be controlled.
- Record existing marks before cleaning. Photograph close views of scratches, dull patches, and cement spots under consistent light. Compare a painted door with a nearby unaffected panel, then note the same details on plastic trim. These examples help distinguish pre-existing wear from changes that appear during cleaning.
Testing the cleaner on an inconspicuous area
Test the cleaner on a hidden spot with the same finish before treating a visible panel. Follow the product label during the test and treatment.
- Choose a representative test spot. Select a discreet painted area, such as a lower door edge, that matches the affected panel’s finish. Avoid testing on a different material or a panel with visibly different paint. A result on plastic trim won’t show how the cleaner behaves on painted metal.
- Clean the test spot first. Rinse away loose grit and let the area become clean enough to inspect. Dirt trapped beneath a test application can cloud the result or scratch the surface during handling. Keep the test area small, and don’t rub dry cement to prepare it.
- Use the product as labelled. Apply only the amount and dilution stated on the cleaner’s instructions. Don’t increase the concentration, combine it with vinegar, or mix it with another product. A controlled test shows how one cleaner affects the finish; mixing products makes that result harder to assess.
- Keep the application contained. Use a clean applicator to place the cleaner on the chosen spot. Prevent drips from reaching rubber seals, textured plastic, or a different paint finish. If the test is near a panel edge, apply carefully so the product doesn’t travel into a seam.
- Follow the stated contact time. Leave the cleaner on only for the period given on its label, then remove or rinse it as directed. Don’t let the product dry on the test area. If the label gives no suitable direction for automotive paint, don’t guess at a longer exposure.
- Inspect the dry finish. After rinsing, allow the spot to dry before comparing it with the surrounding paint. Look for a change in gloss, colour, texture, or clarity. Check it from more than one angle, since a cloudy patch can be easier to see under reflected light.
- Test plastic and rubber separately. If cement also touches trim, use a separate hidden spot on each material. A cleaner that leaves painted metal unchanged may still affect textured plastic or rubber. Keep each test small, and rinse each surface according to the product label.
- Decide whether to proceed. Treat the affected panel only if the test area shows no visible change after drying. Stop if the finish looks dull, softened, discoloured, or uneven. Don’t try a stronger mixture on the same spot; reassess the product choice before any wider application.
Applying and wiping away dissolved cement
For wet cement splatter, don’t wipe or scrape it across the paint. Apply an automotive-safe cleaner as directed, let it soften the deposit, then lift it gently and rinse the surface.
-
Apply Cleaner to Wet Cement
Keep the deposit wet with the selected automotive-safe cleaner, following its label. Work on a small section so the solution stays where needed and doesn’t run over trim or plastic. An acidic solution can help neutralize cement’s alkalinity, but a strong acid can etch paint. A solution that’s too weak may not dissolve the cement effectively.
Leave the cleaner on for the contact time stated on its label. Don’t scrub, press or drag wet cement across the finish. If the splatter spreads, stop and rinse the surrounding surface with water before continuing. Keep the cleaner away from materials it isn’t intended to treat.
-
Wipe Away Dissolved Cement
Use a clean, soft microfibre cloth to gently lift cement once it has softened. Fold the cloth to expose a clean section for each pass. Use light pressure and short, controlled movements; don’t grind residue into the paint. If a deposit remains firm, apply the cleaner again according to its label instead of forcing it loose.
Keep the cloth used on paint separate from trim and plastic. Cement residue caught in the fabric can scratch another surface as you wipe. Use a fresh section or a clean cloth for each area, especially where splatter crosses a panel edge or seam.
- Rinse away cleaner and residue. Flush the treated area with water after wiping. Rinsing removes loosened cement and leftover cleaner, limiting contact with paint and adjacent trim. Check panel edges and seams for residue, then rinse carefully without rubbing them with a dry cloth.
- Wash and neutralize after acidic treatment. After removing cement with an acidic solution, wash the treated area and neutralize the remaining acid. Follow the cleaner’s directions for neutralizing and rinsing. Don’t leave vinegar or another acidic product on the paint after treatment.
- Inspect the finish before repeating. Once the surface is rinsed and dry, check the paint under reflected light. Look for remaining raised cement, dullness, or uneven gloss. Repeat the gentle softening process only when the product instructions allow it. Stop if the paint or trim changes appearance, and don’t use a spatula or abrasive tool to force off remaining deposits.
An acidic solution is recommended to neutralize cement’s alkalinity, but its strength matters: an acid that is too strong can etch paint, while one that is too weak may not dissolve cement effectively. Treat these as limits when choosing and applying a cleaner, rather than assuming that a stronger solution will work better. Keep the product within its intended use and follow its directions for contact time and rinsing.
If softened residue doesn’t lift gently, don’t compensate with extra pressure or a more aggressive wipe. Reapply the cleaner only as its label permits, then check the finish after rinsing and drying. Stop if the paint or trim changes appearance rather than escalating treatment. Softening the cement first helps prevent residue from being dragged across the finish.
Removing hardened concrete or cement splatter from car paint
Hardened concrete needs chemical softening before gentle lifting. A safe approach to how to remove cement splatter from car paint avoids scraping dry deposits across the finish.
-
Remove Hardened Cement Splatter
Rinse the vehicle first to remove loose dirt and contaminants. Keep the automotive-safe cleaner on the cement deposit, following its product directions. Let the cement soften before attempting to lift it. Use a steamer or plastic razor blade only after chemical softening, never on dry, bonded splatter.
Use a soft microfibre cloth to wipe away dissolved residue gently. Don’t scrub, use a spatula, or drag a tool over the paint. WD-40 has no chemical effect on cured concrete, so don’t apply it for this purpose. A clay bar shouldn’t be used to remove concrete from paint.
- Work in small areas. Treat one deposit at a time, especially where splatter reaches plastic trim, rubber or panel seams. Keep cleaner off surfaces it isn’t intended to treat. If a deposit stays hard, stop wiping and reapply cleaner only as its label directs. Careful, controlled treatment is central to how to remove cement splatter from car paint without adding scratches.
- Rinse away residue. After lifting the softened cement, rinse the area with water to remove remaining cleaner. Wash the car after treatment, and neutralize any acid used according to its product directions. Check edges and seams for residue, where deposits can remain after the main spot looks clean.
-
Address Remaining Cement Etching
Inspect dry paint under reflected light after the concrete is gone. A dull outline or mark may be etching rather than leftover cement. Don’t repeat chemical treatment or scrape the mark from the paint.
After cement removal, consider clay, polish and resealing as later surface-care steps. A clay bar is not a concrete-removal tool. If etching remains, stop before adding abrasion and have the finish assessed by a detailing professional.
- Know when to stop. Stop home treatment if the paint changes gloss, colour or texture, or if the cement won’t soften. Repeated chemical exposure and forceful tool use can worsen surface damage. Avoid further rubbing while deciding on the next step.
Choosing a substitute does not make removal safer or more dependable. WD-40 has no chemical effect on cured concrete, so applying it to splatter on car paint is not a useful treatment. White vinegar may sometimes remove concrete, but it will not work consistently; salt solutions are described as ineffective for this purpose. These limitations are a reason not to keep trying household products when a deposit remains bonded. The page also advises against wiping the splatter or using a spatula, so neither should be treated as a fallback when a product fails.
Once the concrete has been removed, wash the car and follow the cleaner’s directions for any required neutralizing or rinsing. Don’t assume rinsing alone is enough if the product label specifies another step. Washing helps clear remaining cleaner from the treated area. If a method isn’t working, don’t use it to force the deposit away. If the cement won’t soften, avoid further wiping or using a spatula.
Nanak Car Wash
Nanak Car Wash offers Car Detailing Packages for vehicle cleaning after cement splatter has been safely removed. If cleaner residue or loose dirt remains, a Full-Service Car Wash can help with general washing. These services support keeping the vehicle clean, but washing won’t remove paint etching or repair a damaged finish. Avoid treating an etched mark as leftover cement; further scraping or chemical use can worsen the surface.
Choose the cleaning option that fits the vehicle’s condition and the work already completed. For persistent cement or visible paint damage, stop rubbing the area and keep further treatment separate from routine washing. Contact Nanak Car Wash to discuss the cleaning service that suits your vehicle.
Protect the finish with a careful next step
Knowing how to remove cement splatter from car paint is only part of caring for the finish. Keep the vehicle clean without treating leftover etching as removable dirt. If cement remains bonded or the paint looks changed after cleaning, avoid more scraping and repeated chemical applications. Choose the next step based on the surface’s needs: cleaning, not paint repair.
Nanak Car Wash offers Car Detailing Packages, Full-Service Car Wash, and Express Car Wash. These options support vehicle cleaning and ongoing care; washing alone won’t correct etched or damaged paint. If you want help choosing a suitable cleaning option for your vehicle, contact Nanak Car Wash. Take the next step carefully and keep your vehicle looking its best.

 6600 Finch Ave W, Etobicoke, ON M9V 3Z6

 647-703-8515
 MON – SUN 8 AM to 7 PM