
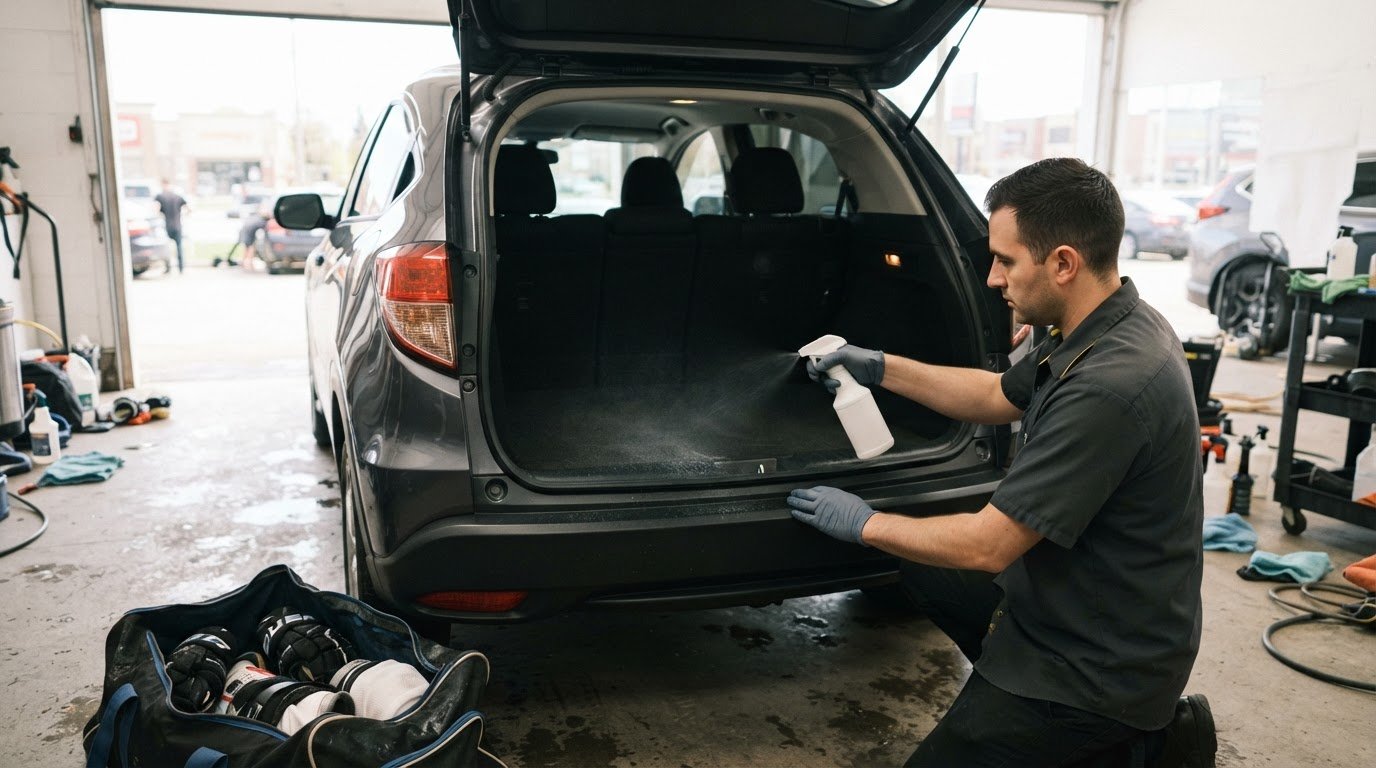
A deodorizing spray may reduce hockey odour, but lasting improvement also depends on removing damp gear from the car and airing out the interior. If you’re considering how to clean hockey equipment smell from your car professionally, look for a service that cleans the affected interior instead of simply masking the smell with fragrance.
A sharp, lingering odour can make every drive unpleasant, especially when wet equipment is left in a sealed bag or trunk. Fragrance spray may change the scent temporarily, but it won’t address the damp gear and stale air contributing to the problem.
This guide explains why hockey equipment smells, which deodorizing sprays and household remedies may help, and how ventilation and storage habits can reduce odours in your car. You’ll also learn when professional car detailing can help if the interior still smells after you remove the gear.
Key Takeaways
- Choose deodorizing products based on the affected surface and odour source, not just the fragrance they leave behind.
- Removing hockey gear from a hot car or trunk and storing it with airflow can help limit lingering smells.
- Damp gear can develop odour after one use, so drying and ventilation matter alongside cleaning.
- Baking soda may reduce odour temporarily, but the smell can return within 48-72 hours if its source remains.
- When the car interior still smells after the equipment is removed, professional detailing can help address the vehicle’s surfaces.
How professionals apply deodorizing and antibacterial sprays to remove hockey equipment smell from a car
Effective treatment matches the product to the surface and odour source. To understand how to clean hockey equipment smell from your car, consider both the gear and the interior surfaces it has touched.
-
Compare Professional Deodorizer Products and Methods
Ask for a method that treats the affected gear and vehicle surfaces, then compare what each treatment includes. Products used on hockey equipment include Clorox wipes, rubbing alcohol, Febreze, and Lysol. Professionals should choose products suited to the material and follow the product directions.
Sprays and wipes aren’t interchangeable across every surface. Pricing depends on the case and is given after a quote request; cost factors include the affected areas, cleaning method, and interior condition. A useful plan should explain which surfaces are treated, rather than promise a result based only on fragrance.
-
Have Gear and Interior Surfaces Treated by Material
Professionals can apply deodorizer to gloves, pads, and helmet liners, paying attention to fabric and padding. The gear protocol recommends one pump per major piece after every session, or 3-4 pumps per piece during a deep clean. Treated equipment needs to dry completely before it’s worn.
For car seats and carpets, the affected fabric areas need to be identified before choosing a suitable cleaning method and deodorizing product. Cleaning upholstery addresses odour held in the material instead of simply adding another scent. A treatment suitable for fabric may not be appropriate for every interior material, so match the method to the surface.
-
Professional Odor Removal from the Car Trunk
Point out the trunk as an affected area so it can be included in the cleaning plan. The floor, carpet, and other affected surfaces can be cleaned using methods suited to each material, with attention to dampness or residue.
Removing hockey gear from the trunk matters, too. If damp equipment goes back into an enclosed space, the smell can return. When planning how to clean hockey equipment smell from your car, include the trunk if you stored gear there, not just the passenger cabin.
-
Choose Odour Treatment with Safety in Mind
Ask what the plan involves, such as sprays or surface cleaning. Ozone generators differ from deodorizing sprays: professional use requires controlled procedures and keeping people away during treatment. They aren’t a casual substitute for cleaning.
Prioritize cleaning affected surfaces and addressing the equipment that caused the odour. A fragrance-only treatment changes the scent but doesn’t clean upholstery or gear. The best approach to how to clean hockey equipment smell from your car starts by identifying what needs treatment, then choosing a method suited to those materials.
Avoiding storage in a hot car or trunk
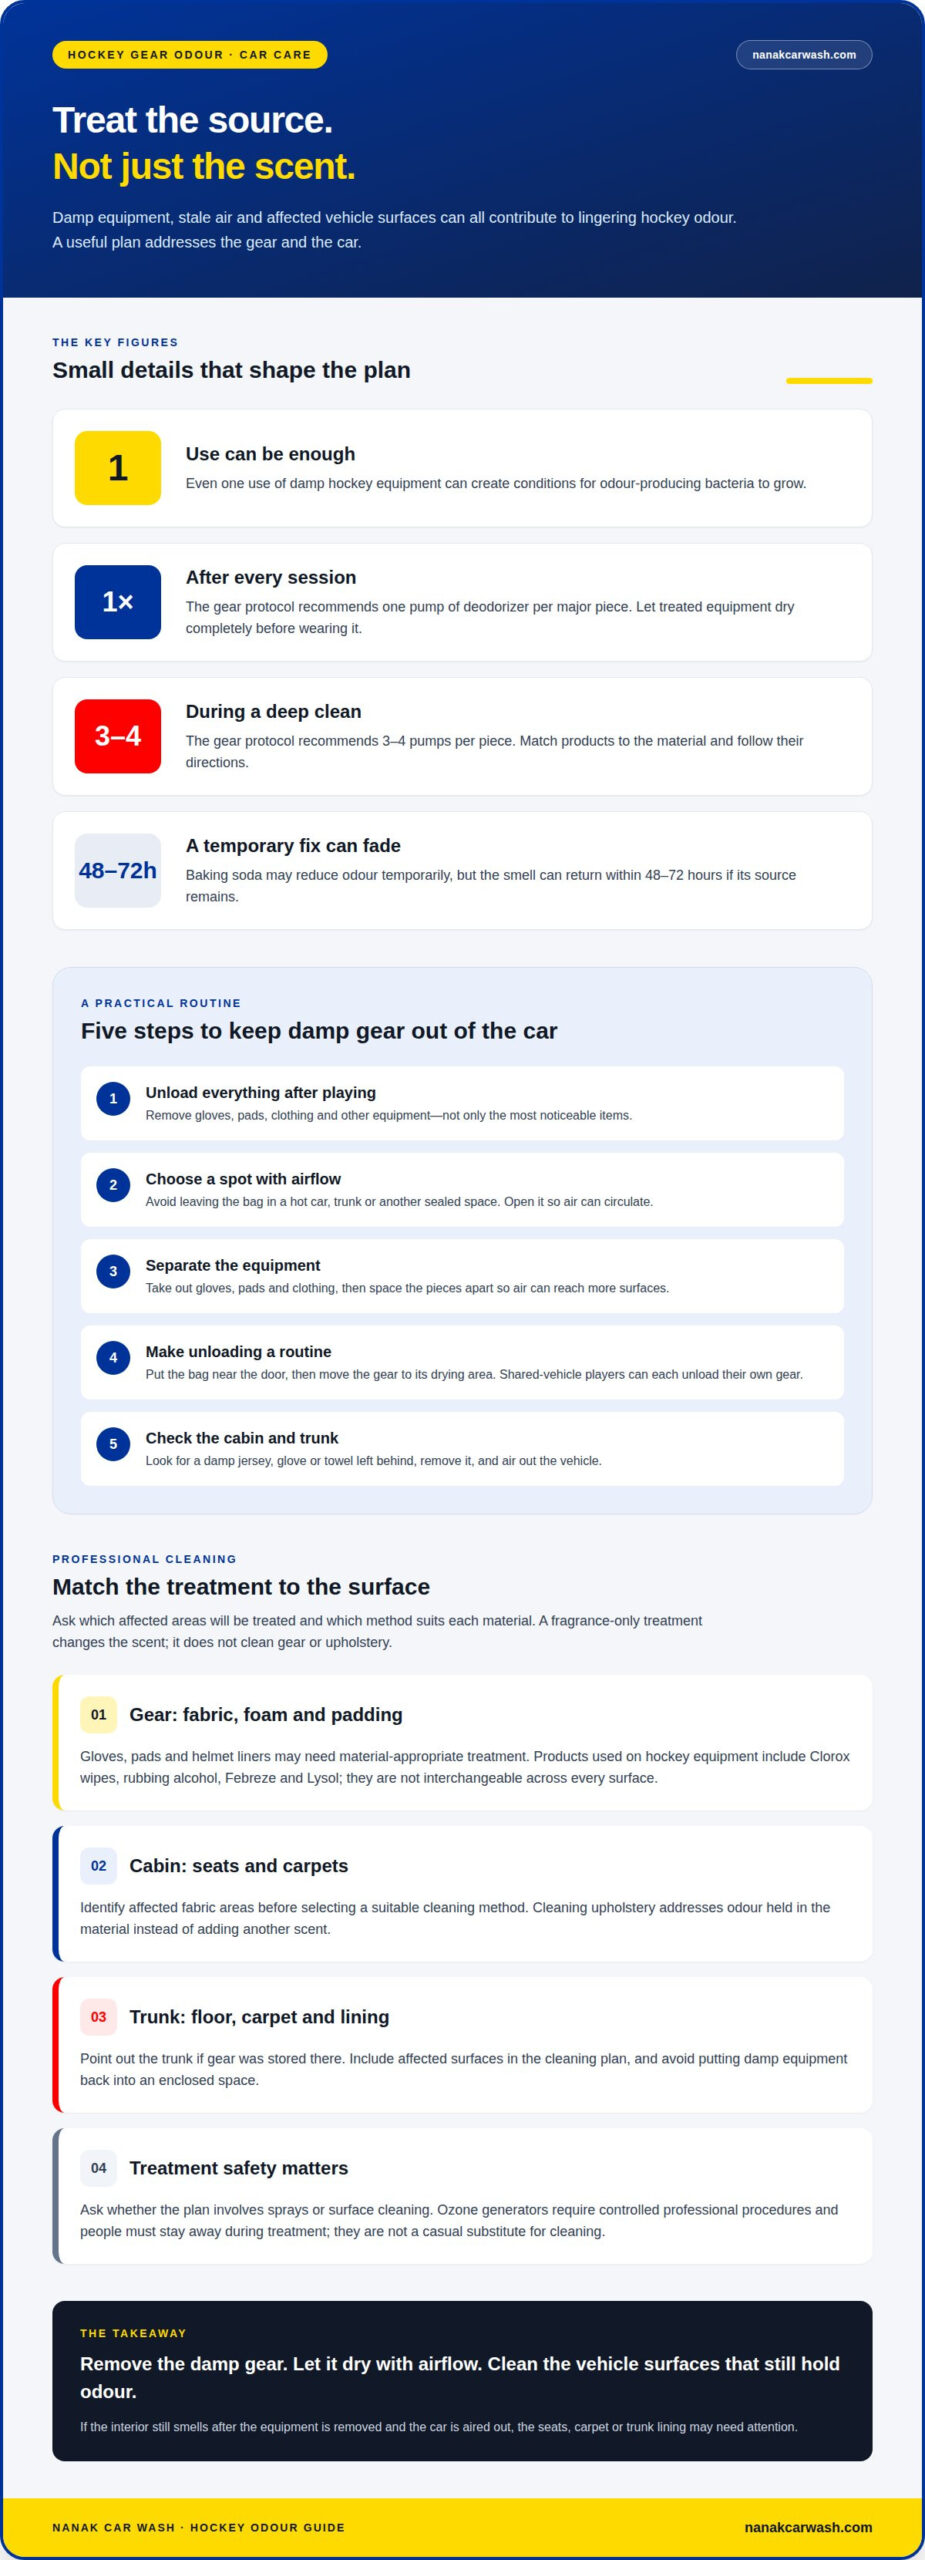
After playing, remove hockey equipment from a hot car or trunk and store it somewhere with airflow. This reduces the time damp gear stays enclosed in the vehicle.
- Remove all the equipment from the vehicle after playing, not just the most noticeable items. Gloves, pads, and clothing can all hold moisture, so leaving part of the load behind leaves an odour source in the car.
For example, after practice, carry the bag indoors instead of leaving it in the trunk until the next skate. A bag left in the vehicle keeps damp equipment enclosed and can spread the smell through the cabin.
- Choose an airy storage spot rather than a closed trunk or tight locker. Set the bag where air can circulate around it, and open it so the equipment isn’t packed together. This gives moisture a chance to escape instead of staying trapped against the gear.
A garage floor or another open area can work as a temporary spot if you spread out the equipment instead of piling it up. Don’t move the closed bag from the car straight into another sealed space.
- Separate the contents before storing them. Take gloves, pads, and clothing out of the bag, then space the pieces apart. This helps air reach more of each item, including glove interiors and fabric surfaces pressed together during transport.
Leave the bag open while the gear dries. Don’t zip it shut around damp contents or put it back in the trunk for convenience. Pack the pieces for the next trip only once they’re dry.
- Make unloading part of your routine after returning from the rink. Set the bag near the door, then take the equipment to its drying area before putting other things away. A consistent routine makes it less likely that a tired player leaves the bag in the car overnight.
If several players share a vehicle, have each person unload their own gear. This helps prevent a forgotten bag from keeping damp odours in the car or spreading them to other equipment.
- Check the car after removing the gear. Look in the trunk and passenger area for a damp jersey, glove, or towel left behind. Remove those items, then air out the vehicle. Taking out the bag alone won’t help if wet gear remains inside.
Before the next drive, keep equipment out of the hot trunk and transport it only when needed. If the interior still smells after you remove the gear and air out the car, the seats, carpet, or trunk lining may need attention.
Bacteria and odour-producing compounds
Even one use of hockey equipment can create conditions for odour-producing bacteria to grow. That helps explain why fragrance alone may not solve a lingering smell.
- Damp equipment is a likely source. Sweat and moisture collect in fabric, foam, and padding during a skate. Used gloves, shoulder pads, and clothing can retain moisture, creating conditions for bacteria to grow. If gear sits in the car, the odour can transfer to the seats, carpet, or trunk.
Consider both the equipment and the surfaces it touched. Treating only the vehicle may leave the source untreated, while cleaning only the gear can leave odour in the car’s interior.
- Use the timing of the smell to guide the assessment. Bacteria reach peak odour production within 12-24 hours on damp gear. That makes equipment left after a game or practice a useful clue, especially when the smell becomes stronger after the bag has been closed.
Describe when you notice the odour and where the gear was stored. A smell near the trunk, for example, points to different affected surfaces than one strongest around a seat where a bag rested.
- Distinguish odour removal from adding fragrance when planning treatment. A scented spray can change how the car smells without removing residue or addressing damp material. Deodorizing or antibacterial products, including rubbing alcohol, Febreze, and Lysol, are used on hockey equipment to reduce odour and bacteria.
Choose products to suit the material. Gloves, fabric pads, and a carpeted trunk have different surfaces, so assess each separately rather than applying one product indiscriminately.
- Address the vehicle surfaces exposed to moisture or residue. Upholstery, floor carpet, and trunk lining can be inspected, then affected areas cleaned with a method suited to each surface. This matters because odour can linger in fabric even after the hockey bag is gone.
For example, if a damp bag rested on the rear seat, include that area in the assessment as well as the trunk. Treating only the air may leave odour on the surface the bag touched.
- Pair treatment with prevention after the odour source is addressed. Spraying hockey equipment after every session targets the period before bacteria reach peak odour production. A weekly schedule can leave 3-6 bacterial growth cycles between treatments, while one pump per major equipment piece after each session is a recommended routine.
Let treated equipment dry completely before wearing it. If damp gear goes back into a closed bag or car, the conditions that support odour can return.
Keeping a hockey bag open and ventilated
Open the bag after each skate and give damp equipment room to dry. Sealed, moist storage can accelerate bacterial regrowth by 10-20 times.
- Unpack the bag after every skate. Set aside about 10 minutes to remove the equipment and open every compartment. Take out gloves, pads, jerseys, and socks instead of leaving them packed together. This lets air reach damp surfaces and prevents moisture from staying trapped inside the bag.
Include equipment used during practice, a game, or a morning skate. A forgotten pair of gloves can keep a closed compartment damp even after the larger pads are removed.
- After every skate, spread out the equipment to air-dry for a few hours. Separate items instead of stacking shoulder pads over gloves or folding damp clothing into the bag. Leave the bag open so air can move through its compartments as the gear dries.
For example, lay out gloves and pads with space between them. Close the bag only after the equipment dries, rather than using it as a drying space.
- Use a fan to move air across the gear when you need a quicker drying option. A fan pointed at hockey equipment can dry it in an hour or two. Arrange gloves, pads, and clothing so air reaches more than one exposed surface.
Keep the bag open while the equipment dries. Direct airflow toward the gear, not into a zipped bag where damp air would remain trapped.
- Repeat the drying routine after every practice, game, and morning skate. Moisture left inside gear can support odour-producing bacterial growth, while a closed bag limits airflow. Regular airing also helps prevent damp equipment from sitting untouched for weeks, when mould can develop.
Make unpacking part of your routine when you get home: open the bag, remove each item, and leave it to air. That’s more useful than airing equipment only after a strong smell appears.
- Check the bag before packing dry equipment again. Open its pockets and compartments, and let damp areas air out. If the bag still feels moist, leave it open instead of putting it back in a car or storage space.
Pack the equipment only once it has dried completely. This simple order, unpack, air-dry, then repack, reduces the chance of sealing moisture inside after the next skate.
Make drying a regular part of putting equipment away. Air-dry hockey equipment for a few hours after each skate before putting it back in the bag. Keep the bag open during that time, and repack the gear only once it’s dry. The routine is simple: dry the equipment first, then pack it.
Follow the same routine after every type of skate. Dry hockey equipment after every practice, game, and morning skate. Treating each as a reason to air out the gear makes drying a consistent step, rather than something you do only when equipment feels damp. Once it’s dry, put it back in the bag and repeat the routine after the next skate.
How professionals assess vinegar, baking soda and fragrance sprays for car odours
Baking soda may temporarily reduce hockey odour, and activated charcoal can help absorb odours in enclosed spaces. Neither replaces cleaning affected car surfaces when the smell lingers there.
- Work out whether the smell is coming from a surface or the surrounding air. Check areas where hockey gear rested, such as the carpeted trunk or a rear seat. This helps distinguish odour held in fabric from a general stale smell inside the vehicle.
That distinction guides the approach. An odour absorber may help with the air, while a soiled or damp contact area needs surface cleaning.
- Assess baking soda as a temporary aid, not a complete treatment. The odour can return within 48-72 hours after baking soda is used because the bacterial source remains untreated. A professional plan should address the affected surface and the gear-related source instead of relying on powder alone.
For example, if a bag sat on the trunk carpet, treating only the cabin air leaves that contact area untouched. A surface-focused approach gives the cleaning a clear target.
- Consider activated charcoal for odour in the air, while keeping its role in perspective. It may absorb smells in an enclosed space, but it doesn’t clean hockey residue from upholstery or carpet. Assess whether air treatment makes sense alongside cleaning surfaces exposed to the equipment.
Let the source guide the approach. A persistent smell around one seat suggests a different need from a smell spread throughout the cabin after transporting gear.
- Use vinegar cautiously as a household remedy. Its own sharp smell can become noticeable inside a closed vehicle, and applying liquid directly to car upholstery may leave the material damp. Professionals assess the surface and the source before choosing a cleaner or deodorizer.
Fragrance sprays have limits, too. Febreze or another scented product can change the smell people notice, but fragrance alone doesn’t remove odour trapped in a seat or carpet.
- Choose a treatment based on the affected area. Upholstery or carpet can be cleaned, followed by a suitable deodorizing method instead of layering fragrances. Keep the plan focused on the trunk, seat, or other surface carrying the smell.
For persistent hockey odour in the interior, explore car detailing options for a vehicle-focused cleaning approach.
Spraying each major piece of hockey equipment takes under two minutes, so equipment care can be part of a broader odour-control routine. Treat it as a complement to cleaning the car surfaces where gear rested: spraying equipment doesn’t replace cleaning upholstery or carpet when hockey odour remains. Addressing both helps target the source instead of masking it.
Nanak Car Wash
Nanak Car Wash offers Car Detailing Packages for drivers whose vehicle needs more than a quick freshening after hockey gear is removed. If odour remains around the seats, carpet, or trunk, detailing can help clean the vehicle’s interior. The right service depends on which areas need attention and the car’s overall condition.
A Full-Service Car Wash or Express Car Wash can suit general vehicle cleaning, but persistent interior odour calls for attention to the affected surfaces. Keeping gear out of the car and airing it after each skate can also help reduce recurring smells.
For help choosing a vehicle cleaning option, contact Nanak Car Wash.
Make your next drive more comfortable
Set a simple plan for your next trip to the rink: keep hockey gear separate from your car’s regular use, and notice whether any odour remains after the equipment is removed. If a seat, carpet, or trunk lining still smells, share that detail when arranging cleaning. It helps focus on the areas that affect your everyday drives. Knowing how to clean hockey equipment smell from your car means considering the vehicle interior as well as the gear.
Professional cleaning can be a useful next step when the smell affects your comfort or keeps returning. Describe where it’s strongest and what you’ve already tried, such as a fragrance spray or airing out the vehicle. Those details help establish a practical starting point without relying on another scent to mask the problem.
Contact Nanak Car Wash to discuss a suitable cleaning option. A fresher interior can make your next drive to the rink more enjoyable.
Frequently Asked Questions
Which Professional Deodorizing Methods Actually Work?
Cleaning the source is more effective than relying on fragrance alone. Assess whether the smell is concentrated in upholstery, carpet, or the trunk, then choose a treatment for those surfaces. Hockey equipment may also need attention, since it can carry odour back into a freshly cleaned vehicle. For example, a smell limited to the cargo area calls for a different focus from one noticeable throughout the cabin.
How do professionals remove hockey equipment smell from a car interior?
Professionals inspect the interior, identify affected materials, and clean the areas that absorbed odour. Tell them whether the smell is strongest near a seat, under a mat, or in the trunk, and whether wet equipment was stored there. Those details help direct attention to likely contact points. Removing loose gear before the vehicle is assessed also makes it easier to locate any overlooked clothing or equipment.
What products do professionals use to neutralize sweat and hockey equipment odours in cars?
Products used on hockey equipment include Clorox wipes, rubbing alcohol, Febreze, and Lysol. The product and application depend on the surface being treated; a product used on equipment shouldn’t automatically be applied to car upholstery. Choose an approach suited to the affected vehicle material instead of adding fragrance indiscriminately. Baking soda may temporarily reduce odour, but it doesn’t address the underlying source by itself.


 6600 Finch Ave W, Etobicoke, ON M9V 3Z6

 647-703-8515
 MON – SUN 8 AM to 7 PM