
You sprayed the seats. You hung the little tree. You cracked the windows on the 401. Your car still smells like wet hockey bag, old drive-thru fries, and a mystery you'd rather not solve with your bare hands.
That's normal. Clean the air and ignore the source. Odour in a car usually isn't floating around waiting to be perfumed into submission. It's buried in carpet backing, seat foam, headliners, cup holders, and the HVAC system that keeps reheating yesterday's bad decisions.
In the GTA, winter makes this worse. Slush, salt, wet boots, damp mats, and a cabin that stays closed for months turn your interior into a slow cooker for mildew and residue. If you want the best car interior odor eliminator, stop shopping by scent. Shop by what removes the contamination.
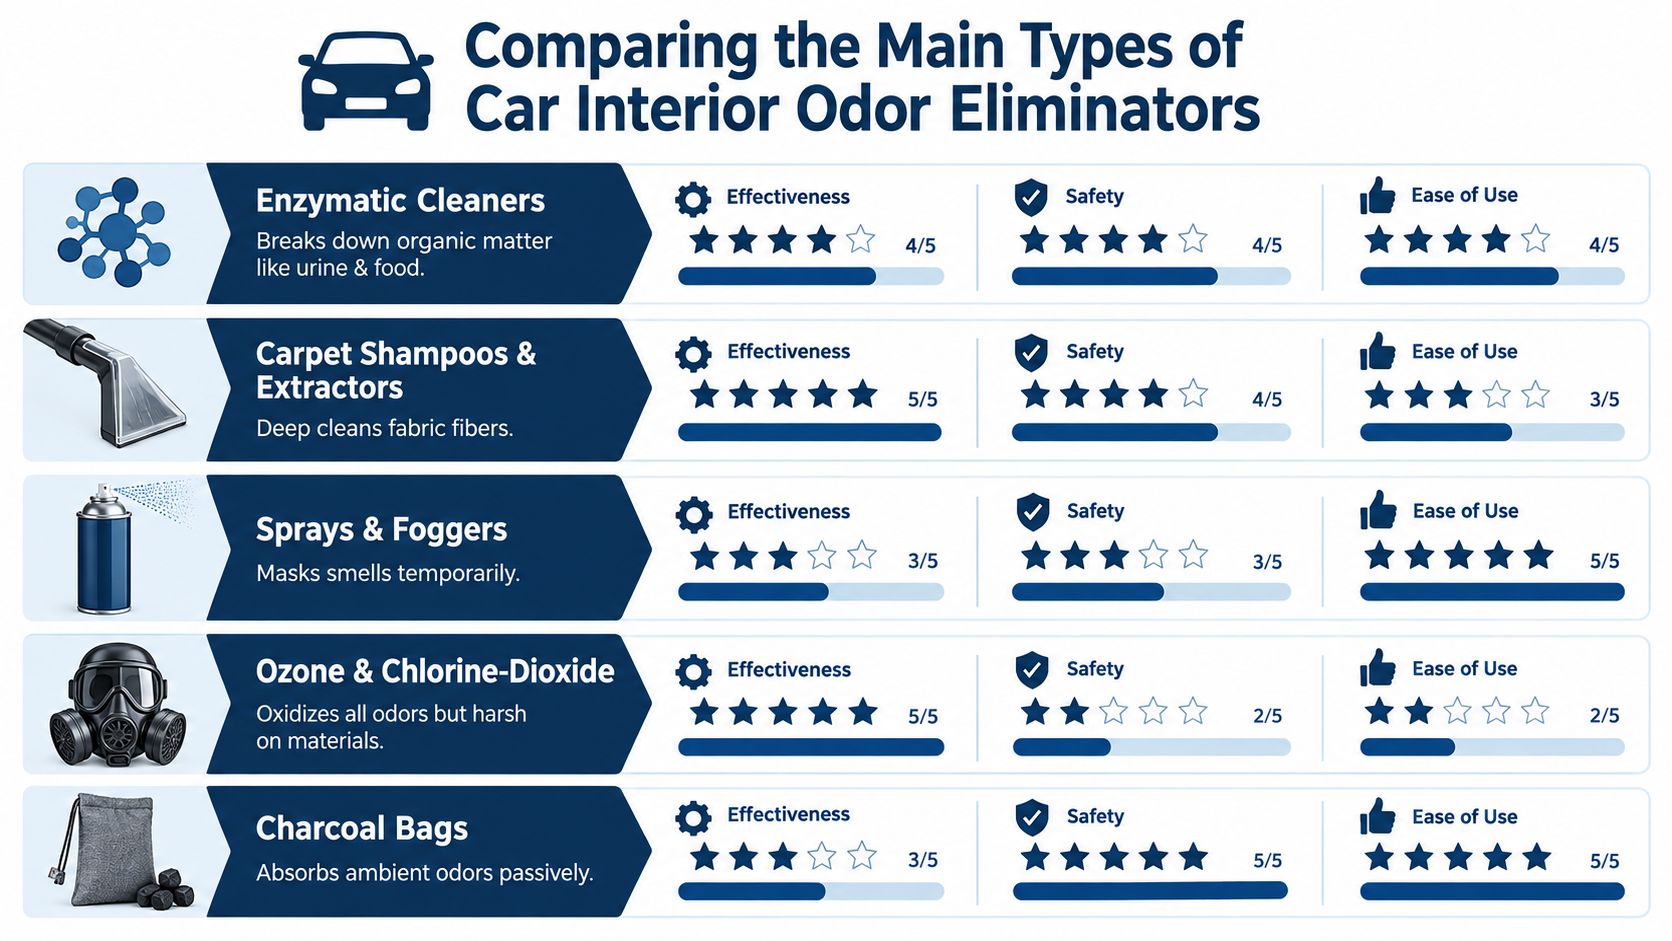
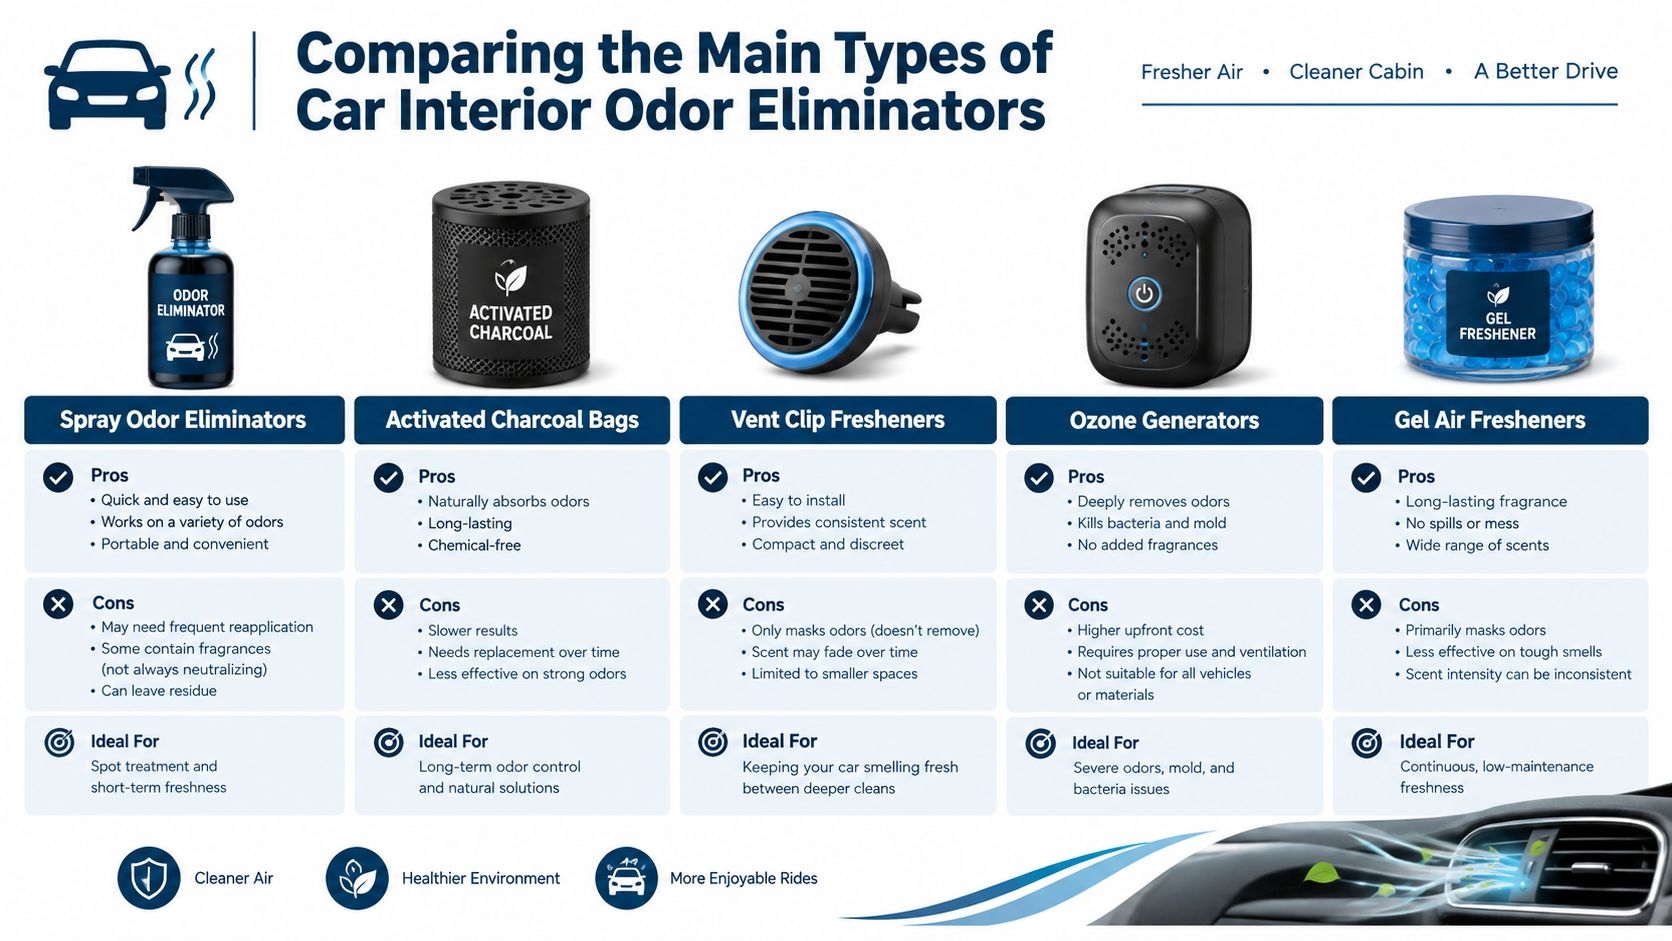
| Odor eliminator type | Best for | What it actually does | Where it fails |
|---|---|---|---|
| Enzymatic cleaner | Food, pet mess, milk, organic spills | Breaks down organic residue on contact | Weak if the mess reached deep foam and padding |
| Shampoo and extraction | Wet carpets, salt residue, general funk | Flushes contamination out of fabric and carpet | Takes work, and poor drying can bring the smell back |
| Spray or fogger | Light, broad cabin odours | Distributes product quickly through the cabin | Often masks more than it removes |
| Ozone or chlorine-dioxide style treatment | Severe smoke or stubborn odours after cleaning | Oxidizes odour molecules | Overkill for many cars, harsh if used carelessly |
| Passive absorbers like charcoal | Maintenance between deep cleans | Helps absorb ambient odours | Won't fix embedded contamination |
Table of Contents
- Why Your Car Still Smells After You Clean It
- What Actually Causes Lingering Car Interior Odors
- Comparing the Main Types of Car Interior Odor Eliminators
- Which Odor Eliminator Fits Your Situation Best
- How to Apply Odor Eliminators So They Actually Work
- Ozone Foggers and Strong Chemicals When to Avoid Them
- When to Book Professional Detailing at Nanak
Why Your Car Still Smells After You Clean It
A classic GTA scenario. You vacuum the floor, wipe the dash, maybe even hit the mats with a quick spray. The car looks cleaner. Then the heat turns on the next morning and the cabin smells like a damp basement wearing cheap cologne.
That happens because visible dirt and odour residue are not the same thing. The smell isn't sitting politely on top of the carpet waiting for a towel. It's down in the backing, in the seams, under the seats, inside the vents, and sometimes inside the foam where a spill disappeared months ago and started fermenting in peace.
Winter turns small messes into stubborn odours
Ontario cars live hard lives. Snow melts off boots, road salt gets ground into mats, coffee splashes into console gaps, and rear footwells stay damp longer than people realise. Then everyone keeps the windows up because it's freezing outside.
That combination matters. Moisture plus trapped residue equals recurring smell. You can remove the top layer and still leave the problem underneath.
If the smell gets stronger when the cabin warms up, you probably didn't remove it. You woke it up.
A lot of drivers buy the wrong thing because they ask the wrong question. They ask, “What smells strongest?” The better question is, “What reaches the source without leaving more residue behind?”
Most “fresh” products are glorified cover bands
Air fresheners have a role, but it's a tiny one. They're for maintenance after the interior is already clean. They are not remediation. If your car smells like smoke, sour milk, pet accidents, mildew, or old fast food, perfume won't win that fight. It just creates a second smell and now both of them annoy you.
Here's the blunt version:
- If the odour came from something organic, you need chemistry that breaks organic residue down.
- If the odour came from damp fabric, you need cleaning plus drying.
- If the odour keeps returning through the vents, you need to deal with the ventilation side too.
- If the spill soaked through, surface sprays aren't enough.
The best car interior odor eliminator is rarely one product. It's usually a sequence. Remove solids, clean the surface, flush the material, dry it properly, then use odour control if needed.
What Actually Causes Lingering Car Interior Odors
Odour doesn't cling to a car because the universe hates you. It lingers because vehicles are packed with porous materials and tight enclosed spaces. Fabric, carpet underlay, seat foam, headliners, and cabin vents all trap contamination, then slowly release it back into the air.
Ontario air-quality guidance treats contamination as a measurable issue, not just a comfort problem. Vehicles are a major source of air pollution in the province, and Ontario's roadside monitoring found 2 roadside stations above the annual reference level of 8.8 µg/m³ for fine particulate matter, while provincial rules also set numerical limits for contaminants including acetaldehyde at 500 µg/m³ over 24 hours and acrolein at 0.24 µg/m³ over a half hour according to the Ontario roadside air-quality pilot study in Toronto. That's why real odour removal starts with source removal, filtration, and ventilation, not a vanilla grenade from the gas station.
The main hiding spots
Some odours are obvious. Others hide where most DIY jobs never reach.
- Carpet padding: Spills wick downward and spread wider underneath than they look on top.
- Seat foam: Milk, pet accidents, and sugary drinks love disappearing into it.
- Headliners: Smoke and vapour rise, then settle there.
- HVAC system: Moisture and residue in vents can keep recirculating the same stale smell.
- Crevices and trim gaps: Food bits, wet salt sludge, and grime collect where wipes never reach.
Why smells keep coming back
The old benchmark for cabin odour is “new car smell,” and even that is basically off-gassing. A Canada-facing review cites studies finding between 30 and 250 volatile organic compounds in a single vehicle, with total concentrations reported as high as 14,000 µg/m³, and it notes that benzene, toluene, xylenes, and ethylbenzene were measured at higher levels in new vehicles than older ones by 12.89%, 103.54%, 123.14%, and 104.20% respectively. The same review also notes a study where odour concentration dropped from 304 ouE/m³ at delivery to 43 ouE/m³ after 14 to 23 weeks, while TVOC-FID fell from 100% at delivery to 14% by 23 weeks in the IQAir review on car interior off-gassing.
That matters for used cars too. If interior materials can keep releasing compounds on their own, imagine what happens when they're loaded with smoke residue, food proteins, pet oils, or mildew.
Practical rule: Judge an odour eliminator by penetration and residue, not by how “fresh” it smells in the first ten minutes.
Why Canadian VOC rules matter
A lot of older odour advice is basically “spray harder.” That's outdated thinking. Canadian federal VOC rules for certain products took effect on Jan. 1, 2024, with disinfectant-related limits effective Jan. 1, 2025 under the Volatile Organic Compound Concentration Limits for Certain Products Regulations. So if your whole strategy is built around blasting the cabin with high-VOC fragrance, you're solving one problem by adding another.
Comparing the Main Types of Car Interior Odor Eliminators
Some products remove odour. Some delay it. Some just make your car smell like “mountain thunder” and old mildew at the same time. Here's the honest breakdown.
Enzymatic cleaners
These are my first pick for organic messes. Think milk, pet accidents, food spills, vomit, and mystery goo in the third row of a family SUV. Enzymatic chemistry works by attacking the residue itself instead of perfuming over it.
Organic smell needs an organic cleanup. If the mess fed bacteria, fragrance won't starve them.
Use this when the contamination is localised and you can reach it directly. Saturate the affected surface properly, give it dwell time, then blot or extract. The weak spot is depth. If the spill soaked through to carpet backing or seat foam, a spray bottle alone may not get far enough.
Carpet shampoos and extractors
Real improvement usually starts here. Shampoo loosens grime. Extraction pulls it out. If you've got winter slush, salt film, sticky residue, or general “this car has seen things” odour, extraction is often better value than buying three different miracle sprays and getting nowhere.
This method works well because it does two jobs at once. It removes odour residue and removes the dirt that keeps trapping more of it. The catch is drying. If you over-wet the carpet and shut the doors, you've just booked yourself a mildew encore.
Sprays and foggers
Foggers are popular because they're easy. One product, broad coverage, quick hit through the whole cabin. They have a place, especially when you want cabin-wide contact after the main cleaning is done.
But let's not romanticise them. A fogger is not a substitute for physically removing contamination from fabric, foam, and vents. Independent Canadian retail listings show odour-control formats spanning roughly C$11.99 to C$62.00 at one pro-detail supplier, covering foggers, enzyme products, and dedicated odour-destroyer liquids in the Pro Detail odour-control collection. That spread reflects different jobs, not just different branding.
Use foggers for:
- Light broad odour
- Post-cleaning finishing
- Vent circulation after surface cleanup
Don't use them as your entire plan for milk, smoke saturation, or mildew.
Ozone and chlorine-dioxide style treatments
These can hit hard. They're designed for serious odour oxidation, and on severe cases they may be part of a professional process after source cleaning. The problem is that people jump to them way too early.
If the interior is still dirty, aggressive oxidation is often the wrong first move. You're treating symptoms while leaving the buffet in place. These methods also deserve caution around materials, re-entry, and ventilation.
If you're trying to understand broader air-treatment ideas before going nuclear in a small cabin, it helps to look at approaches that focus on air quality rather than brute-force fragrance. A useful primer is this piece on an ActivePure air purifier with NASA tech, especially for thinking about continuous treatment versus one-time shock treatment.
Professional deep cleaning
This is the answer when the smell has structure. Smoke in the headliner. Sour milk in seat foam. Mildew from wet carpets. Pet-heavy rideshare use. Repeated spills. Vehicles like that need a process, not optimism.
A Canada-based provider describes odour removal as using a “powerful oxidizing agent” to destroy odours at the source, and Toronto-area style service descriptions commonly separate smoke, pet, food, milk, and musty odours because each one needs different treatment logic, as outlined in this Ontario odour-removal service description.
One practical local option is Nanak Car Wash, which offers interior detailing built around vacuuming, shampooing, vent and crevice cleaning, and odour treatment. That matters because deodorising works better when the service already includes access to the fabrics and hidden surfaces causing the problem.
Which Odor Eliminator Fits Your Situation Best
Don't choose by product category first. Choose by what caused the smell, how deep it went, and how the vehicle gets used. A commuter sedan with damp mats needs a different fix than a rideshare car that's marinated in coffee, wet jackets, and takeout.
Quick decision matrix
| Odor Scenario | Recommended Approach | Why It Works |
|---|---|---|
| Wet boots, slush, damp mat smell | Remove mats, shampoo carpet, extract moisture, fully dry | The issue is trapped moisture and grime, not airborne odour |
| Small food spill caught early | Enzymatic spot treatment, light rinse, dry thoroughly | Targets organic residue before it spreads deeper |
| Sour milk or protein spill | Extraction plus targeted odour chemistry | Milk soaks deep and keeps souring if you only clean the surface |
| Pet odour in seats or cargo area | Enzymatic cleaner followed by extraction | Pet oils and accidents bond to fabric and backing |
| Light stale smell in an otherwise clean car | Ventilation, charcoal maintenance, optional light fogger | Best for low-level ambient odour, not deep contamination |
| Smoke smell throughout the cabin | Full interior cleaning, surface wipe-down, fabric treatment, vent attention | Smoke settles on nearly every surface, especially porous ones |
| Mildew after repeated dampness | Deep cleaning, moisture removal, controlled drying | Mildew returns if the cabin stays wet |
| High-turnover rideshare or family hauler | Routine vacuuming plus scheduled deep interior cleaning | Frequent use keeps reloading the same odour reservoirs |
My blunt recommendations by driver type
If you're driving a daily commuter, don't overcomplicate it. Keep mats dry, vacuum often, and treat small spills immediately with an enzymatic cleaner if they're organic. If the smell lives only near one spot, DIY is usually enough.
If you've got a family SUV, assume every cup holder is guilty until proven innocent. Food and milk odours spread fast in porous interiors. Once you can't pinpoint the source anymore, extraction becomes cheaper long term than trial-and-error spraying.
The cheapest fix is the one that stops you from buying four wrong products in a row.
If you run a rideshare or delivery vehicle, broad cabin freshness matters, but repeatability matters more. You need a process your interior can survive every week. Vacuum, wipe, vent clean, and reserve heavier chemistry for actual contamination, not every shift.
If you're dealing with post-spill recovery, ask one question. Did it soak through? If yes, stop pretending a scented aerosol is “good enough.”
DIY or pro
DIY is fine when:
- The smell is recent
- You know the source
- The affected area is small
- The material dried before contamination spread
Professional extraction makes more sense when:
- The odour returns after cleaning
- The spill reached padding or foam
- You've got mildew, smoke, or old protein spills
- The vehicle sees heavy use and downtime costs you more than the service
How to Apply Odor Eliminators So They Actually Work
Most odour products fail because people use them on dirty surfaces. That's like spraying cologne on gym socks and calling it a lifestyle. Application matters more than the label.
Step one is detective work
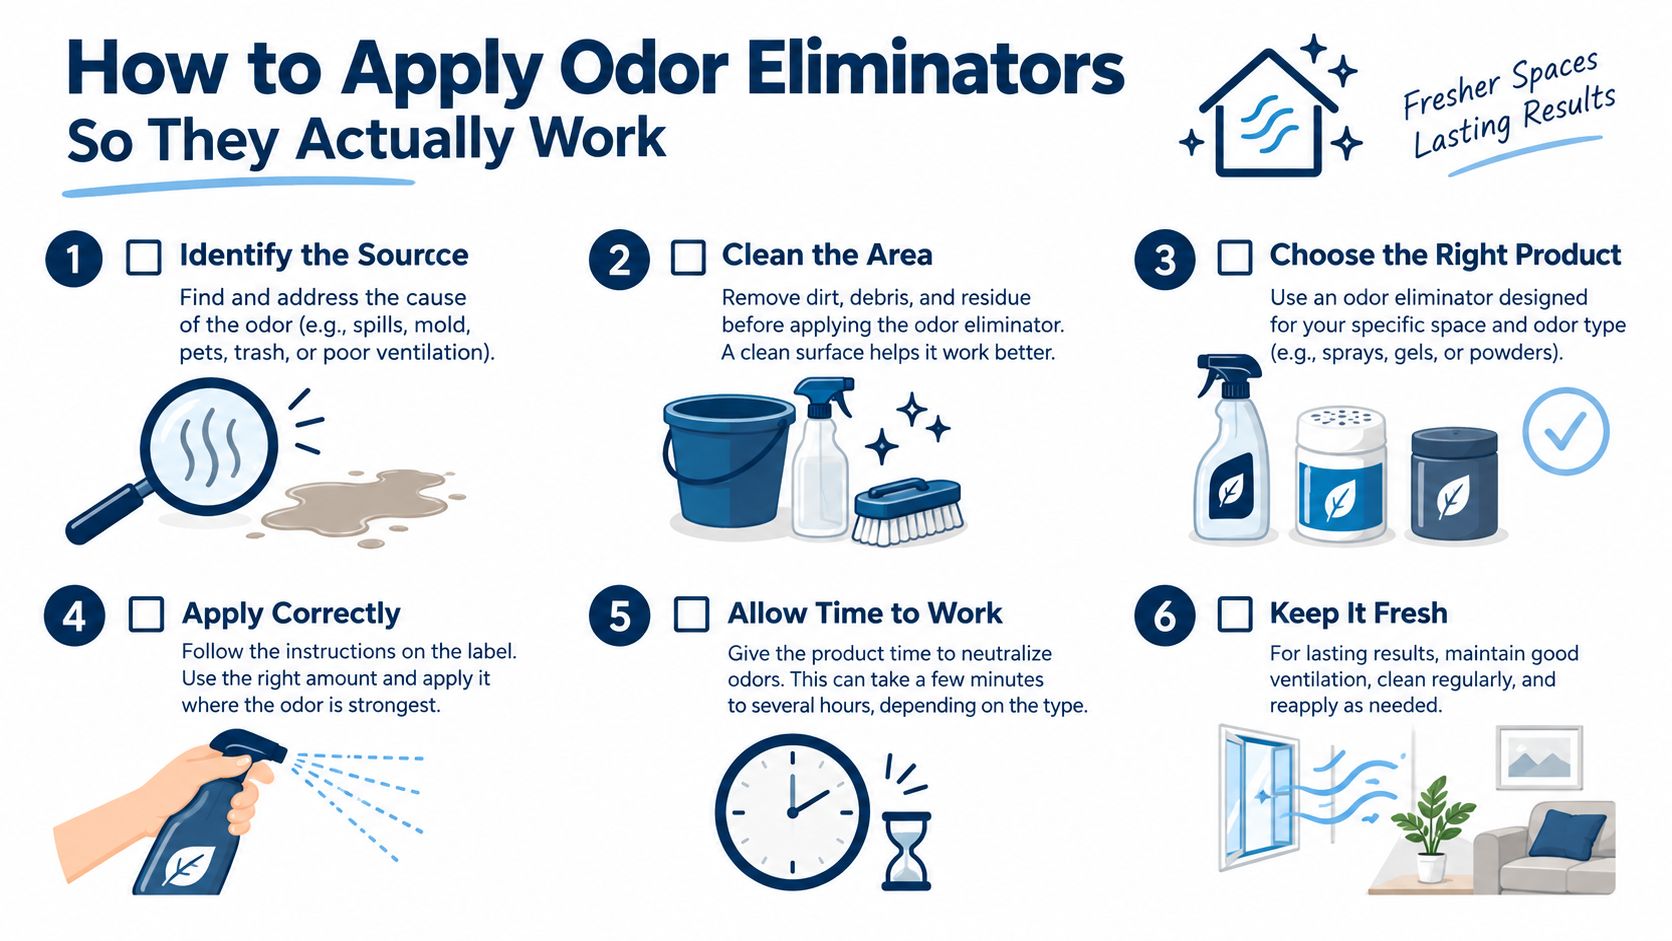
Before you spray anything, find the source. Pull the mats. Check under the seats. Smell the seatbelt webbing, the trunk floor, and the rear footwells. Open the console. If the odour spikes when the fan starts, pay attention to the vent side.
Then remove the obvious garbage. French fries under the seat don't need chemistry. They need retirement.
The sequence that actually works
Follow this order:
Dry vacuum first
Get out dirt, hair, salt, crumbs, and loose debris. Wet chemistry on dry grime just makes mud.Spot-treat the offender
Use an enzymatic cleaner for organic mess. Use interior-safe cleaning chemistry for general residue on hard surfaces.Shampoo or agitate fabric surfaces
Work seats, carpets, and mats where contamination sits.Extract what you loosened
If you don't remove it, you mostly relocated it.Clean vents and crevices
Blow out dust, wipe accessible slats, and address the cabin air path.Dry the cabin properly
Doors open, airflow moving, mats out if possible. Drying is not optional in Ontario.Reassess after drying
A lot of odours hide when everything's wet, then come back once the cabin settles.
Drying is where amateurs lose
People love the dramatic cleaning step and then rush the boring part. Bad move. Damp carpet backing and seat foam can keep feeding musty smells long after the visible surface feels “pretty much dry.”
Clean first. Dry fully. Judge later. Not the other way around.
If you want crossover ideas for keeping stale smells under control indoors too, this guide to fresher home tips is useful because the same logic applies. Remove the source, improve airflow, and avoid covering one smell with another.
Common mistakes that keep the stink alive
- Over-saturating the fabric: Too much liquid pushes contamination deeper.
- Skipping the hidden layers: The top looks clean while the backing still reeks.
- Using fragrance as step one: That's a finishing touch, not remediation.
- Closing the car too soon: Trapped humidity can restart the whole problem.
- Not checking after a day or two: Some odours only reveal themselves once the cabin warms up again.
The best car interior odor eliminator won't save a bad process. A decent product with proper cleaning and drying will beat a fancy spray used lazily every time.
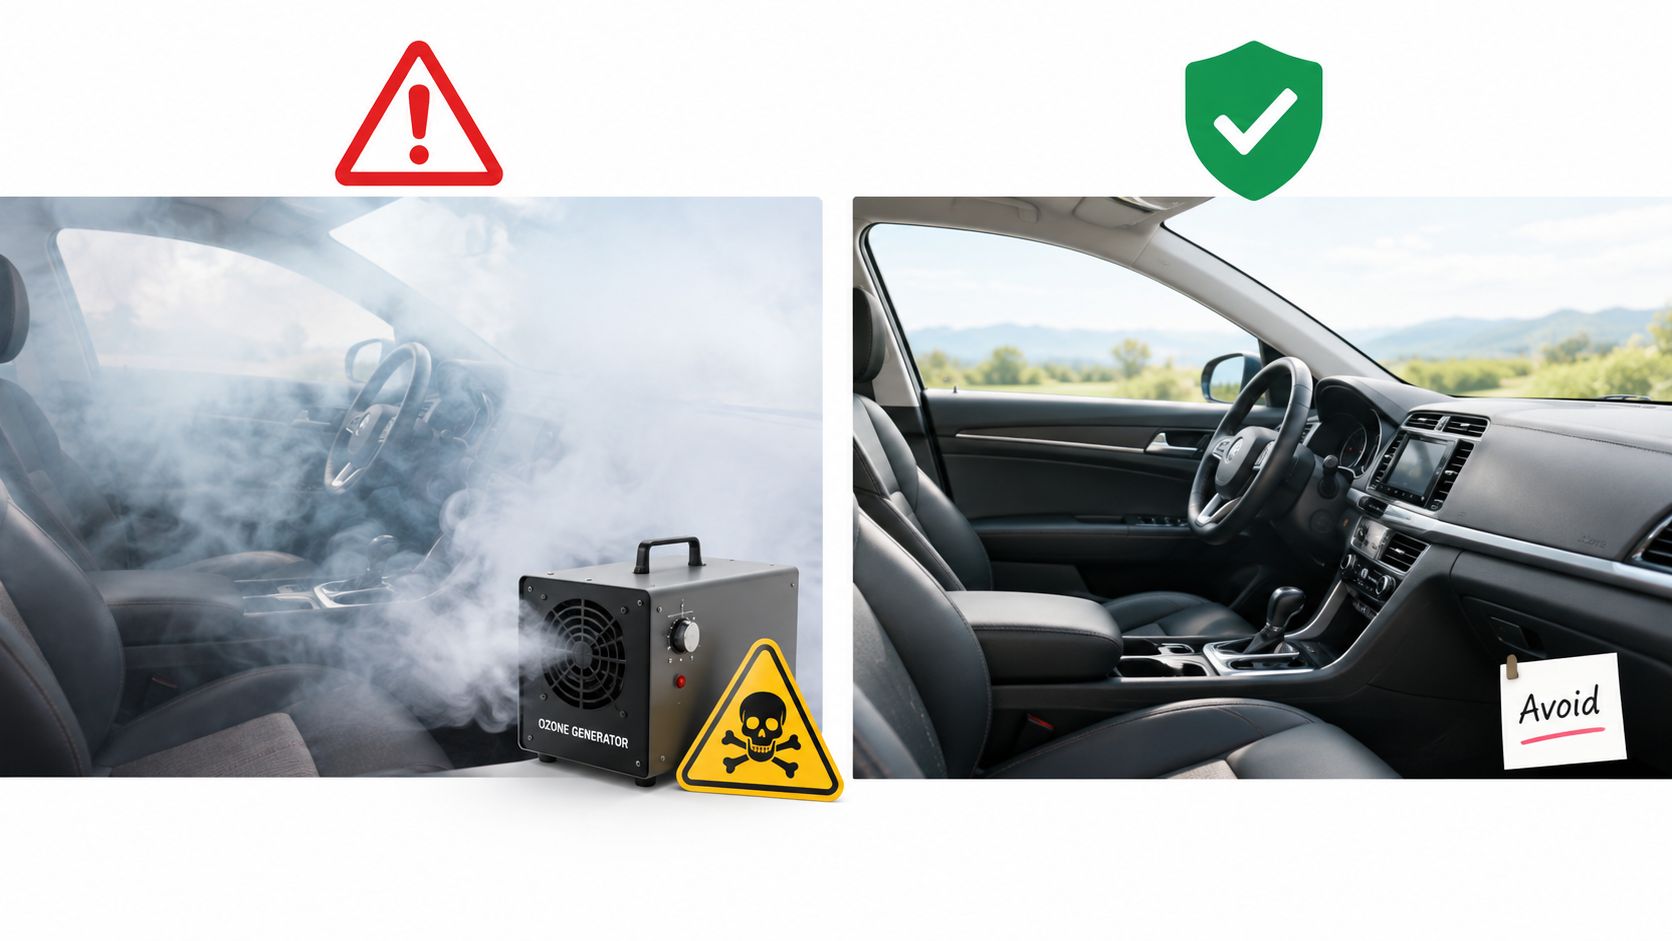
Ozone Foggers and Strong Chemicals When to Avoid Them
A lot of “best of” lists treat ozone like a magic cheat code. It isn't. For many everyday drivers, it's too aggressive, badly timed, or used as a shortcut around actual cleaning.
When to think twice
If the car just has winter dampness, light food smell, or general stale air, don't jump to ozone or heavy chemical bombs. Start with cleaning, moisture removal, and ventilation. Ongoing freshness is often better handled by charcoal and dry interior habits than by repeatedly shocking the cabin.
Research discussing vehicle cabins notes that tested vehicles can contain between 30 and 250 types of VOCs, which is one reason aggressive treatments deserve caution in a small enclosed space, as discussed in this Canadian open-access review on in-vehicle air quality. More chemistry is not automatically smarter chemistry.
When stronger treatment may make sense
After source removal, severe smoke or entrenched mildew may justify stronger treatment. That's the key phrase. After source removal. If you want a look at how restoration-focused providers frame those jobs, this overview of professional ozone odor removal is useful as a process reference, not as a reason to skip the cleaning.
Use strong treatments cautiously when:
- The interior has already been deep-cleaned
- The odour is severe and widespread
- The vehicle can be ventilated thoroughly before use
- You're treating remediation, not routine maintenance
For regular GTA drivers, low-emission products, dry carpets, clean vents, and disciplined maintenance are the smarter default.
When to Book Professional Detailing at Nanak
DIY is fine for light odours and fresh spills. Once the smell becomes recurring, widespread, or soaked in, professional detailing usually costs less than the parade of failed sprays in your trunk.
Book pro help when the car has any of these problems:
- Mildew that returns after rain or snow
- Smoke smell across the whole cabin
- Milk or protein spills that soaked into seats or carpet
- Pet-heavy interiors with hair, oils, and repeat accidents
- High-turnover use like rideshare, delivery, or family hauling
That's where extraction, shampooing, vent and crevice cleaning, and controlled drying make sense as one job instead of five half-jobs. Nanak's detailing packages are built around the parts that matter for odour control: vacuuming, carpet and seat shampooing, salt and stain removal, vent and crevice blowout, and leather cleaning where applicable. Typical appointment times range from 1 to 4 hours based on the service details provided by the business.
If you wash often, memberships and bundled services can also lower the pain of keeping the interior from sliding back into swamp mode. And if you're bouncing between work, kids, and winter mess, a scheduled deep clean is often the cheaper long-term move than waiting until the car smells like a curling locker room.
If your car still smells after you've “cleaned” it, the problem usually isn't bad luck. It's residue hiding where quick sprays can't reach. Nanak Car Wash offers interior cleaning and detailing that tackles carpets, seats, vents, salt, stains, and odour sources properly, so you're not just adding pine scent to a science experiment.

 6600 Finch Ave W, Etobicoke, ON M9V 3Z6
 647-703-8515
 MON – SUN 8 AM to 7 PM