
You get into the car after a GTA snowstorm, brush the salt from your coat, and notice the pale film on the driver's seat. The leather still looks respectable, so you tell yourself you'll clean it later. Then the heated seat dries the surface, the slush works into the seams, and the once-matte finish starts looking shiny where you slide in and out.
That's why the best leather seat treatment isn't the most expensive bottle. It's the right cleaner, protectant, technique, and schedule for Ontario driving. Salt, slush, UV exposure, low humidity, heated seats, body oils, and temperature swings all demand more than an occasional spring detail.
| Treatment approach | Best use | Main advantage | Main risk in GTA conditions |
|---|---|---|---|
| Leather-specific cleaner | Routine grime and salt film | Removes residue without relying on harsh household chemicals | Over-wetting perforations or seams |
| Dedicated conditioner | Preventive maintenance after cleaning | Helps maintain a flexible, even finish | Greasy residue if over-applied |
| UV protectant | Sun-exposed cabins and faded surfaces | Adds protection against sunlight-related wear | Unwanted sheen on some finishes |
| Low-residue spray protectant | Frequent-use vehicles and fleets | Quick application and easier buffing | May not address embedded grime |
| Professional leather deep cleaning | Salt buildup, dye transfer, and neglected seats | More controlled, even treatment | Requires booking and vehicle downtime |
Table of Contents
- Why Leather Seats Age Faster Than You Expect
- Know Your Leather Before You Treat It
- Comparing the Main Types of Leather Seat Treatments
- How to Choose the Right Treatment for Your Car and Lifestyle
- DIY Leather Care Versus Professional Deep Cleaning
- A GTA Seasonal Schedule That Keeps Leather Soft Year Round
- Our Top Recommendations by Driver and Budget
Why Leather Seats Age Faster Than You Expect
A Toronto commuter can wear out a leather interior through ordinary routines. Wet boots leave salt behind, winter coats and jeans rub the driver's bolster, grit works into contact points, and heated seats pull moisture from the surface. Sunlight then fades the same exposed areas day after day.
That makes leather care preventive maintenance, not cosmetic luxury. Clean and protect the seats on a regular schedule, then tighten that schedule during GTA winter. Cold air, low cabin humidity, salt, slush, and heated seats create more surface stress than summer driving, so waiting for cracks or stiffness means the easy prevention window has already passed.
The GTA trouble spots
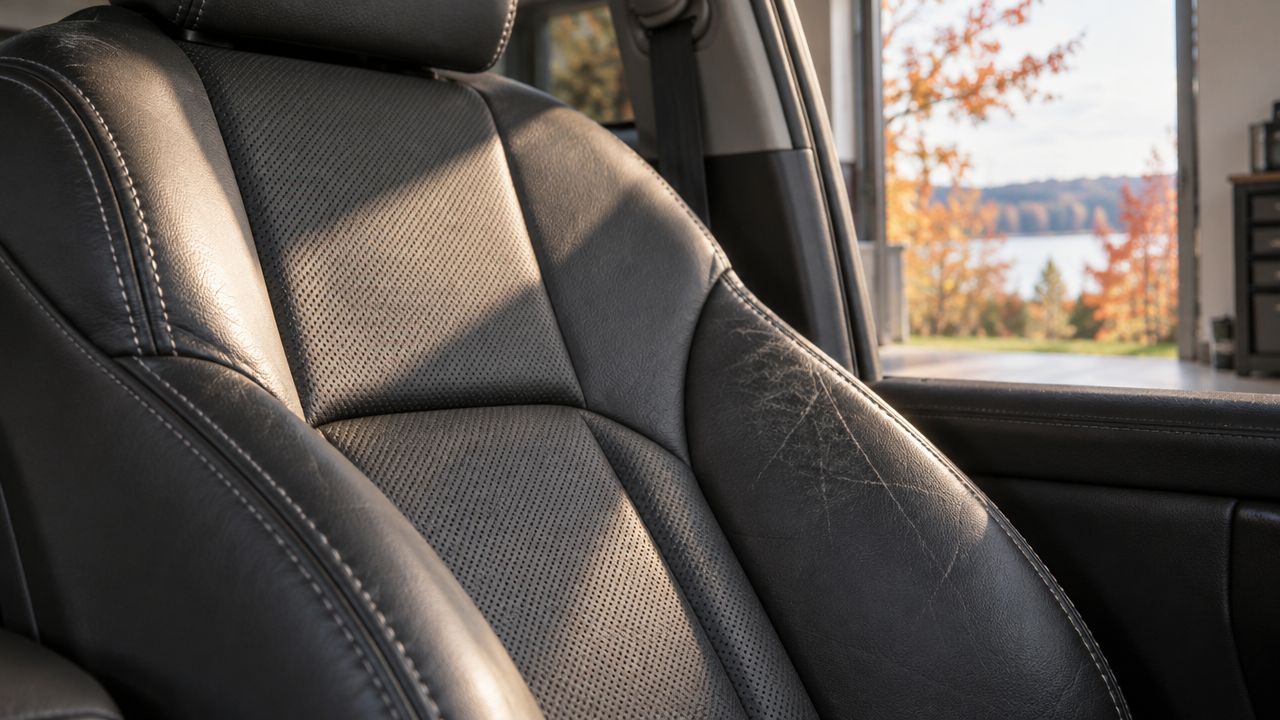
The driver's bolster usually shows wear first. Repeated entry and exit rub the edge, while clothing, body oils, winter grit, and salt spread across the finish. Perforated seats need tighter control because residue gathers around the openings. Flooding the panel can drive moisture and loosened grime deeper into the seat.
Salt dries into a gritty film and reacts badly when a cold cabin warms. Aggressive scrubbing can dull or mark the finish. Leaving the residue in place lets grime and dye transfer become harder to remove.
Practical rule: Treat the schedule as seriously as the product. A modest application done consistently beats a heavy rescue session after the finish has hardened.
Set the routine around GTA conditions, not the bottle's label alone. Use a leather-specific cleaner and low-residue protectant in thin layers, keep product controlled around perforations, and shorten the interval during salt season. DIY care suits light buildup. Embedded salt, set-in transfer, and neglected perforations need a detailer who can control moisture, agitation, and coverage.
Know Your Leather Before You Treat It
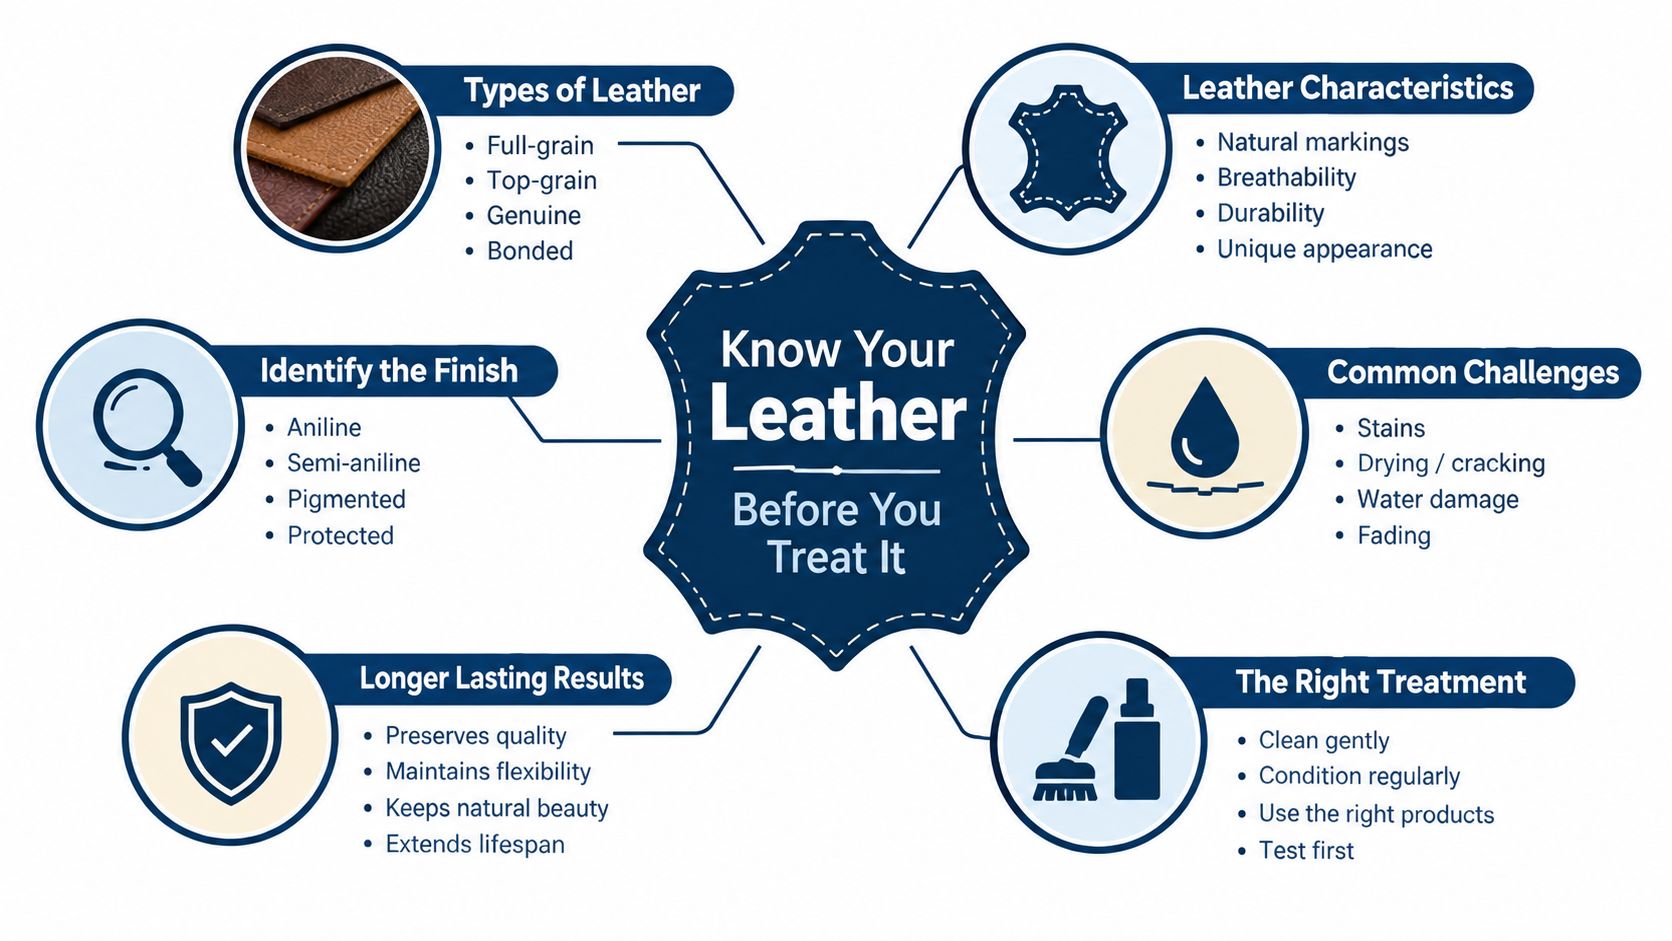
“Leather seats” doesn't tell you enough to choose a treatment. Modern cabins often combine coated leather, synthetic leather, perforated panels, vinyl, and synthetic suede. Those surfaces can look similar while reacting very differently to moisture, oils, cleaners, and conditioners.
Coated leather is common in automotive interiors. A protective finish sits over the leather, so a conditioner generally works more as a surface protectant than as a product soaking into exposed hide. Use a gentle automotive leather cleaner, avoid aggressive rubbing, and choose a formula that dries without leaving a slick film.
Aniline and semi-aniline leather have a more natural feel and less surface protection. They require a lighter touch because colour and finish can respond differently to moisture. Don't assume a product marketed for heavily coated seats is suitable because the label says “leather.”
Perforations change the technique
Perforated leather needs controlled application. Spray product onto a microfiber cloth or applicator rather than flooding the seat directly. Work in small sections, keep liquid away from excessive pooling, and wipe residue from the holes with a clean, soft towel.
Synthetic suede trims need a different approach again. A conditioner designed for leather can flatten the nap, create dark patches, or leave an uneven texture. Treat synthetic suede as its own material unless the vehicle manufacturer specifically approves a shared product.
Mixed cabins create the most common mistake. A single bottle may claim to work on leather, vinyl, and plastics, but that doesn't mean it produces the same finish on each surface. The safest method is to separate the materials, use the appropriate product for each, and test first in a hidden area.
A quick material self-check
Before buying anything, inspect the seat under good light:
- Look at the grain: A uniform, sealed appearance often indicates coated leather.
- Check the panel layout: Perforations require less liquid and more wiping control.
- Feel the texture: A soft, natural surface needs more caution than a smooth, heavily finished one.
- Inspect the side bolsters: These show colour transfer, shine, and abrasion before the centre panels.
- Read the owner's manual: Manufacturer guidance can override general detailing advice.
For broader leather-cleaning fundamentals, this safe DIY leather couch cleaning guide is useful for understanding gentle wiping, spot testing, and moisture control. Automotive seats still need automotive-specific products, but the underlying discipline is the same: don't saturate, don't scrub blindly, and don't skip the test patch.
Comparing the Main Types of Leather Seat Treatments
Product labels create confusion because “conditioner,” “protectant,” and “cleaner” often appear together. They aren't interchangeable. A cleaner removes contamination, a conditioner supports the desired feel and finish, and a protectant adds a barrier against future exposure. A 2-in-1 product trades some specialization for speed.
| Treatment Type | Best For | Residue and Finish Impact | GTA Winter Fit |
|---|---|---|---|
| Leather-specific cleaner | Salt film, body oils, light grime | Can preserve a factory-style finish when used lightly | Strong choice before every conditioning session |
| 2-in-1 cleaner-conditioner | Light maintenance between deeper cleans | Convenient, but may leave uneven protection | Suitable for lightly used vehicles |
| Dedicated conditioner | Dry-feeling coated leather after cleaning | Can soften the look, but overuse may create shine | Useful when applied thinly and buffed well |
| Cream | Small areas and deliberate application | More control, but easier to over-apply | Good for bolsters and targeted touch-ups |
| Lotion | Larger solid panels | Spreads evenly with moderate residue risk | Practical for family vehicles |
| Spray | Quick, frequent upkeep | Light coverage and easier dosing | Good for commuters and high-turnover interiors |
| UV protectant | Sun-exposed seats and dashboards | May change sheen, so test first | Valuable in summer and for outdoor parking |
| Low-VOC formula | Enclosed-cabin workflows and sensitivity to fumes | Often fits a lower-residue routine, depending on formulation | Sensible operational choice for regular detailing |
Cleaners versus conditioners
A cleaner should come first when the surface carries salt, dust, or body oils. Applying conditioner over grime doesn't preserve the leather. It traps contamination against the finish and can make the seat look patchy.
Use a pH-neutral, leather-specific cleaner on a microfiber cloth. Canadian owner's-manual guidance recommends cleaning spills promptly, starting with mild soap and water when appropriate, using automotive leather cleaner only when needed, and testing any cleaner in an inconspicuous area (Ford owner's manual guidance).
A dedicated conditioner makes sense after the surface is clean and dry. Choose it when the seat feels dry, looks uneven, or needs ongoing protection. Don't use it as a substitute for removing winter residue.
Creams, lotions, and sprays
Creams give you control on a worn bolster or a small section, but they're easy to apply too heavily. Lotions spread well across broad solid panels and suit a careful home routine. Sprays make sense for frequent maintenance because you can dose a cloth lightly and move quickly across the seat.
The right treatment should leave the seat clean and comfortable, not greasy enough to polish your jeans.
UV protectants deserve separate consideration. They can help on sun-exposed surfaces, but some alter the sheen. Test first, especially on matte interiors. Low-VOC options are also a practical filter for professional operations. Canadian federal rules cap leather-care products that clean or protect leather at 75% VOC concentration for aerosol formulations (Canada Gazette VOC rules). A low-VOC or VOC-free product can reduce unnecessary indoor-air exposure while fitting a regular detailing workflow.
How to Choose the Right Treatment for Your Car and Lifestyle
The right treatment depends less on the badge on your hood and more on how the cabin gets used. A lightly driven sedan parked indoors has different needs from a family SUV carrying wet boots, snacks, and a dog. A ride-hailing vehicle needs fast drying and low residue because passengers notice slick seats immediately.
Start with the material. Coated leather usually benefits from a mild cleaner and a restrained protectant. Perforated panels need low-moisture application. Synthetic suede should be handled separately, and vegan leather or vinyl may need a compatible interior product rather than a traditional leather conditioner.

Match the product to the cabin
| Your situation | Choose | Avoid |
|---|---|---|
| Daily commuter with coated leather | Leather-specific cleaner plus light protectant | Heavy oils that create shine |
| Family SUV with kids and pets | Cleaner that handles organic grime, followed by controlled protection | Saturating cushions and perforations |
| Ride-hailing or delivery use | Quick-drying, low-residue spray routine | Strong lingering scents and greasy finishes |
| Outdoor parking | Leather-safe UV protection tested on a hidden area | Untested products that change colour or sheen |
| Mixed leather and synthetic trim | Separate material-compatible products | One formula applied indiscriminately |
| Sensitive interior finish | Matte, low-residue formula with minimal scent | Gloss-enhancing conditioners |
Use this buying checklist
- Read the label: Look for automotive leather compatibility and clear application instructions.
- Prioritize pH-neutral cleaning: The aim is controlled soil removal, not maximum chemical strength.
- Check the finish claim: Matte, natural, satin, and glossy results aren't the same.
- Test discreetly: Apply to an inconspicuous area before treating the visible seat.
- Control the moisture: A damp cloth is useful. A soaked cushion is a problem.
- Skip household shortcuts: Alcohol solutions, solvents, and oil or petroleum-based conditioners are discouraged in Canadian automotive-care guidance.
Colour transfer deserves its own warning. A dark jacket or denim can leave marks that become more stubborn when repeatedly rubbed into a light seat. Clean transfer early with an appropriate automotive leather cleaner, and don't attack it with a kitchen degreaser or abrasive pad.
Your final choice should also reflect tolerance for maintenance. If you enjoy careful upkeep, a separate cleaner and conditioner gives you the most control. If you need speed, use a compatible low-residue product and book deeper cleaning when grime has moved into seams, bolsters, or perforations.
DIY Leather Care Versus Professional Deep Cleaning
DIY care works when the contamination is light and you can take your time. The safe routine is simple, but the order matters.
- Vacuum first: Use a soft brush attachment around seams, stitching, bolsters, and seat tracks. Loose grit can scratch the finish during wiping.
- Apply cleaner to the cloth: Don't spray heavily onto the seat. Work in a small section with gentle overlapping passes.
- Lift the residue: Use a separate damp microfiber cloth, keeping moisture controlled and avoiding soaked cushions.
- Dry the surface: Allow the seat to dry naturally with the vehicle ventilated. CAA North & East Ontario warns against excess water because trapped moisture can contribute to mould (CAA interior-cleaning guidance).
- Condition sparingly: Apply a thin coat only after cleaning, then buff off anything that remains slick or visibly wet.
Don't forget the steering wheel, armrests, and door pulls. They collect hand oils and can develop a polished sheen even when the seats look clean. Use the same material check and test-patch discipline before treating them.
Know when DIY has reached its limit
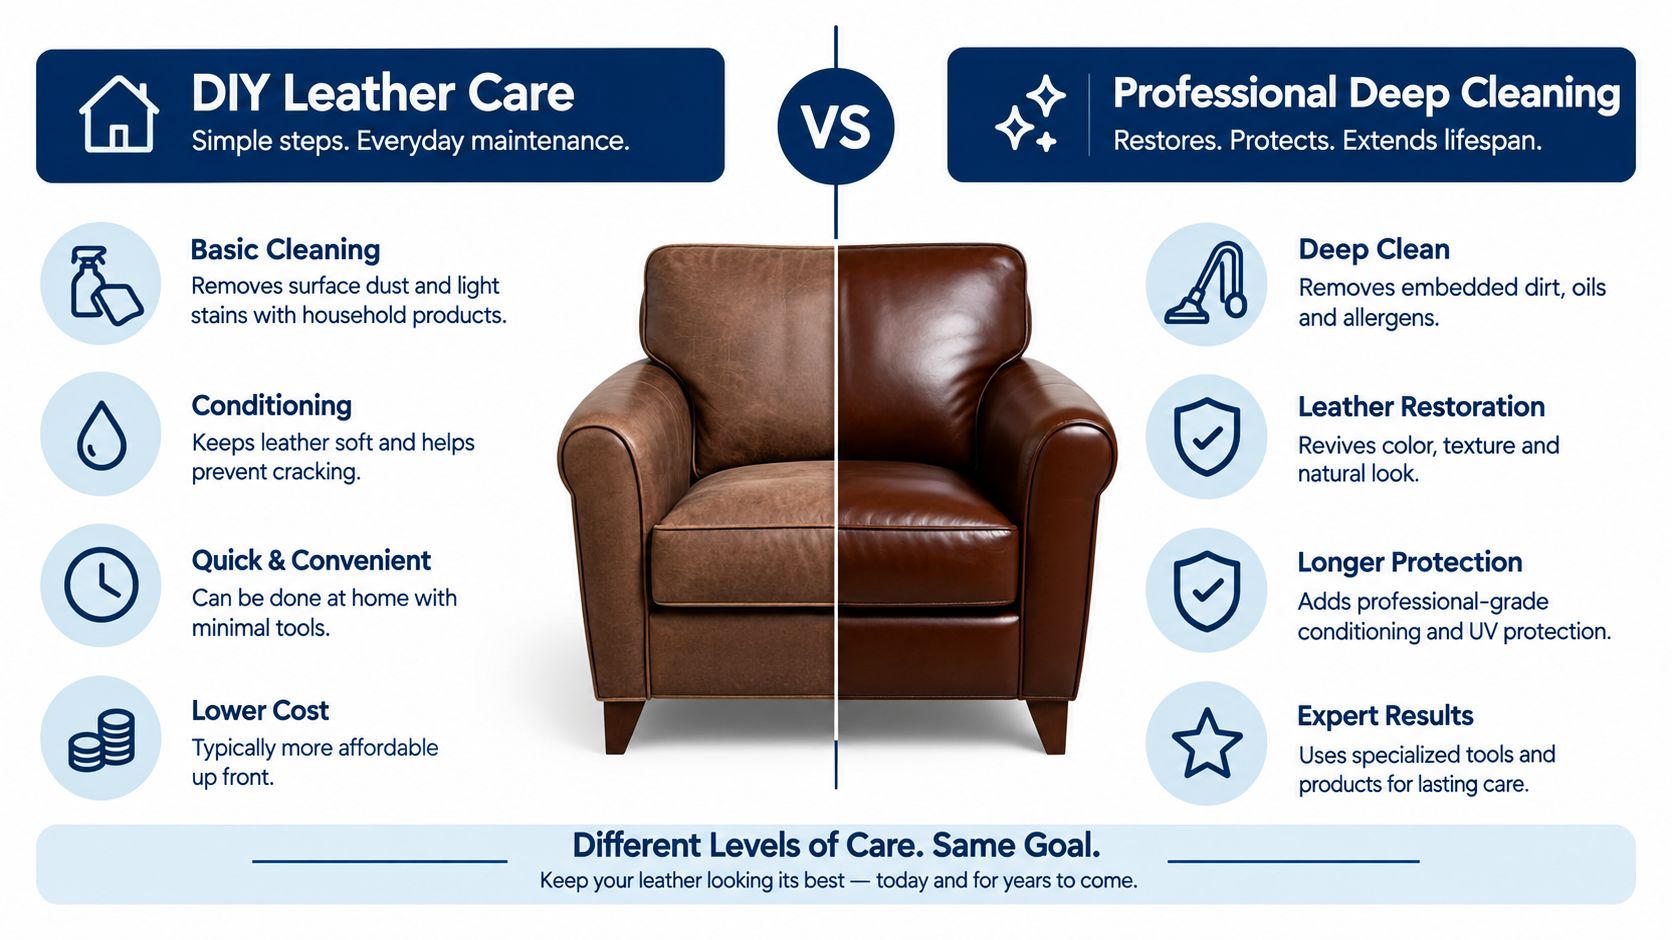
A home routine is enough for a fresh salt film, light dust, and ordinary weekly grime. It's a poor fit for hardened residue, extensive dye transfer, patchy sheen, odour trapped in upholstery, or a seat that has been neglected through multiple seasons.
Professional deep cleaning adds controlled tools, more consistent coverage, and attention to seams and crevices. It also reduces the temptation to keep scrubbing one stubborn mark until the finish itself changes. For a practical reference on application, absorption, and avoiding excess conditioner, these Grainmark Leather conditioning tips provide useful general guidance, though automotive materials still require vehicle-specific care.
For GTA drivers who'd rather hand off the difficult stage, Nanak Car Wash offers interior and exterior detailing that can include leather deep cleaning, salt and stain removal, vent and crevice cleaning, and conditioning for leather and vinyl seats. Appointment-based detailing typically takes one to four hours, depending on the vehicle and service scope, according to the publisher's service information. That's the sensible option when the seat needs more than a quick wipe and you don't want to gamble with a strong household cleaner.
A GTA Seasonal Schedule That Keeps Leather Soft Year Round
A February commute can leave a driver's seat coated in salt, while heated leather dries under your coat before the cabin cools. GTA leather care needs a calendar, not a vague promise to “condition regularly.” Clean and protect on a regular cycle, then shorten the interval during weeks of heavy salt, slush, low humidity, and heated-seat use. The practical guidance is to increase attention in winter rather than wait for cracking.
Use thin applications more often. Heavy conditioner coats leave residue, attract grime, and create an uneven sheen. Ontario dealership guidance recommends a mildly damp cloth with neutral soap, avoiding soaking, and reapplying a care agent at least every six months, while Canadian conservation guidance emphasizes controlling relative-humidity fluctuations (Ontario Volkswagen interior-care guidance). For GTA vehicles, that supports a responsive routine instead of one large annual application.

Your practical seasonal calendar
Winter: Inspect the driver's seat, bolsters, and floor-side edges often. Remove salt promptly, control liquid, and condition lightly only after the surface is clean and dry. Heated seats call for restraint. Do not apply a thick coat and immediately bake it under heat.
Spring: Reset the interior after salt season. Clean seams, stitching, seatbelt edges, and door panels, then check for colour transfer or hardened patches. Spring is the right time to decide whether the accumulated residue needs professional deep cleaning.
Summer: Manage UV exposure and heat. Test a leather-safe UV protectant on a discreet area before use, and add a sunshade when practical. Outdoor parking makes consistent protection more useful than occasional polishing.
Autumn: Prepare before the next slush cycle. Remove body oils and dust, apply a restrained protectant, and inspect perforations and seams while moisture control is still easy.
Tighten the schedule for high-mileage vehicles, frequent passenger turnover, outdoor parking, and family use. A lightly driven vehicle kept indoors can go longer if its leather stays clean, matte, flexible, and free of salt residue.
Our Top Recommendations by Driver and Budget
For a daily commuter, choose a pH-neutral leather cleaner and a light, low-residue protectant. Clean small areas as needed, then follow the GTA seasonal rhythm rather than waiting for visible cracking.
For a family SUV, prioritise moisture control and stain response. Keep microfiber cloths in the vehicle, remove spills quickly, and use a dedicated cleaner before conditioning. If children, pets, and winter boots have turned the perforations or bolsters into a salt museum, book a professional deep clean instead of escalating to harsher chemicals.
For a ride-hailing or delivery driver, speed and finish matter most. A spray applied to a cloth, followed by a proper buff, keeps the routine manageable without leaving passengers on a greasy seat. Frequent light care is more practical than occasional intensive treatment.
For a fleet manager, standardise the process. Use one approved material-compatible cleaner, document the treatment interval, and separate vehicles needing routine upkeep from those requiring restoration-level attention. Low-VOC selection and consistent application also make sense when multiple enclosed cabins are being serviced.
My budget recommendation is blunt: spend on correct technique and consistency before premium branding. A modest leather-specific cleaner used at the right interval will outperform an expensive conditioner applied over salt and grime. Put professional money into the problems DIY can't safely solve, especially embedded contamination, uneven finish, and neglected perforated seats.
Nanak Car Wash offers GTA interior detailing with leather deep cleaning, salt and stain removal, and conditioning for leather and vinyl seats. Visit Nanak Car Wash to arrange the right level of interior care, then keep the finish in shape with thin, climate-appropriate treatments between visits.



 6600 Finch Ave W, Etobicoke, ON M9V 3Z6
 647-703-8515
 MON – SUN 8 AM to 7 PM