
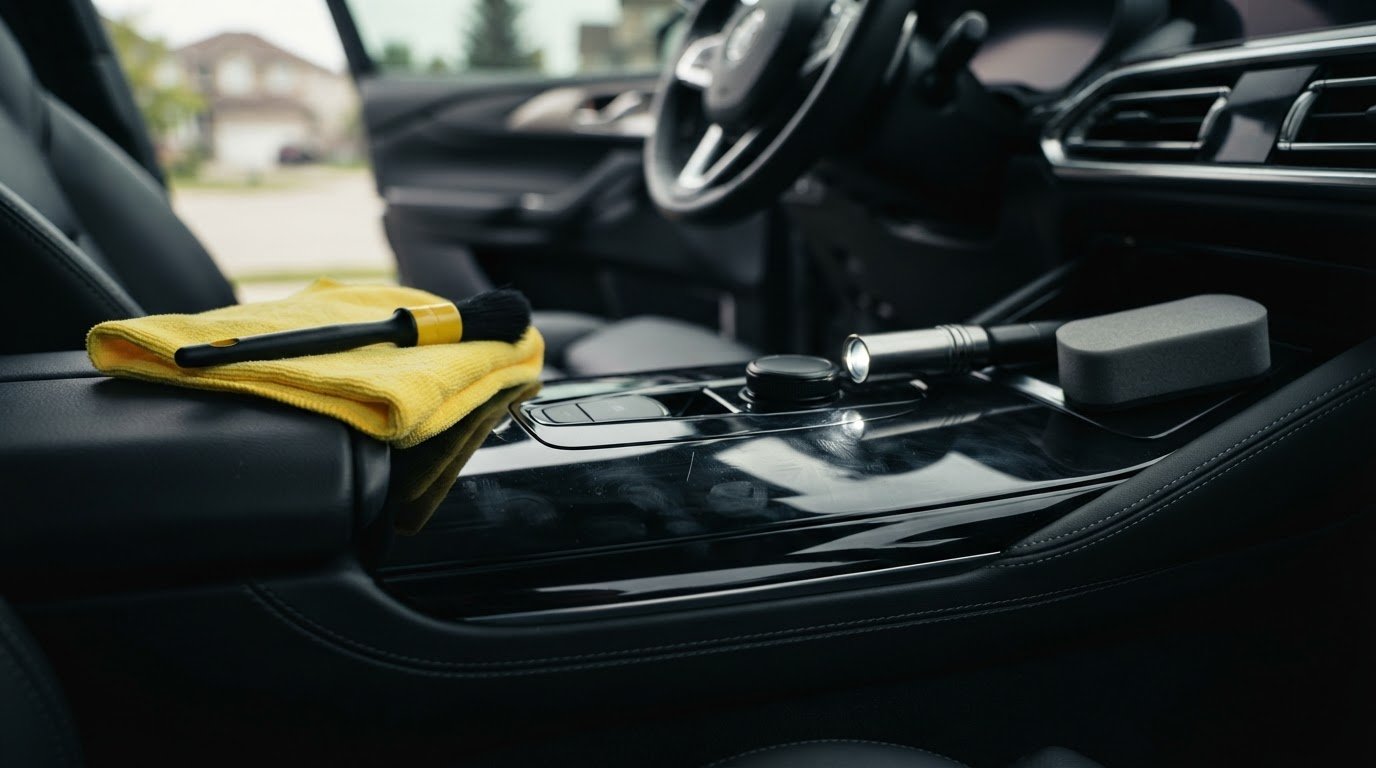
The polish that seems like an obvious fix could make piano-black trim look worse. Before trying how to remove scratches from piano black interior trim, check whether you’re seeing surface haze, loose dust or a deeper groove. This glossy finish shows fingerprints and fine marks easily, but rubbing it harder can add damage.
First identify the mark, then choose the least aggressive next step. A mark may lift with gentle cleaning, while a deep groove or damaged coating is unlikely to respond predictably to DIY polishing. In this guide, you’ll learn how to inspect the trim, clean it gently, test a cautious hand-polishing method where appropriate, and decide when to stop.
Prevention matters, too. Simple habits can reduce avoidable contact and help keep the cabin looking cared for. Nanak Car Wash’s detailing packages include interior cleaning, a practical option for maintaining a clean, well-kept interior.
Key Takeaways
- Learn how to distinguish fingerprints, residue and surface haze from a true scratch before choosing an approach.
- For how to remove scratches from piano black interior trim, begin with gentle cleaning and a small, hidden-area test.
- Use only products compatible with the trim and your vehicle-care instructions. Stop if the mark worsens or the finish changes.
- Compare cautious hand polishing with leaving the mark alone. Stronger polish or a machine isn’t automatically safer.
- Reduce future marks with clean cloths, light pressure and careful removal of loose dust and debris.
How to Tell What Kind of Piano-Black Trim Scratch You Have
Piano-black trim has a glossy, reflective finish, so even small changes on the surface can stand out. Dust, fingerprints, dried cleaner, haze and genuine scratches can all look like fine lines or cloudy patches, especially in direct sunlight or under a bright cabin light.
Before deciding how to remove scratches from piano black interior trim, inspect the mark without rubbing or scraping it. Start with clean hands, soft, diffuse lighting and a clean, dry surface. Strong glare can exaggerate marks and make them harder to identify.
Are the marks scratches, dust, or surface haze?
Loose dust and fingerprints may shift or disappear after gentle cleaning with a clean, soft cloth and a compatible method. Haze may appear as cloudy patches or swirled reflections, but its appearance alone doesn’t show what caused it. Look at the area from more than one angle. If the mark changes or disappears after cleaning, it may have been residue on the surface rather than a scratch in the finish.
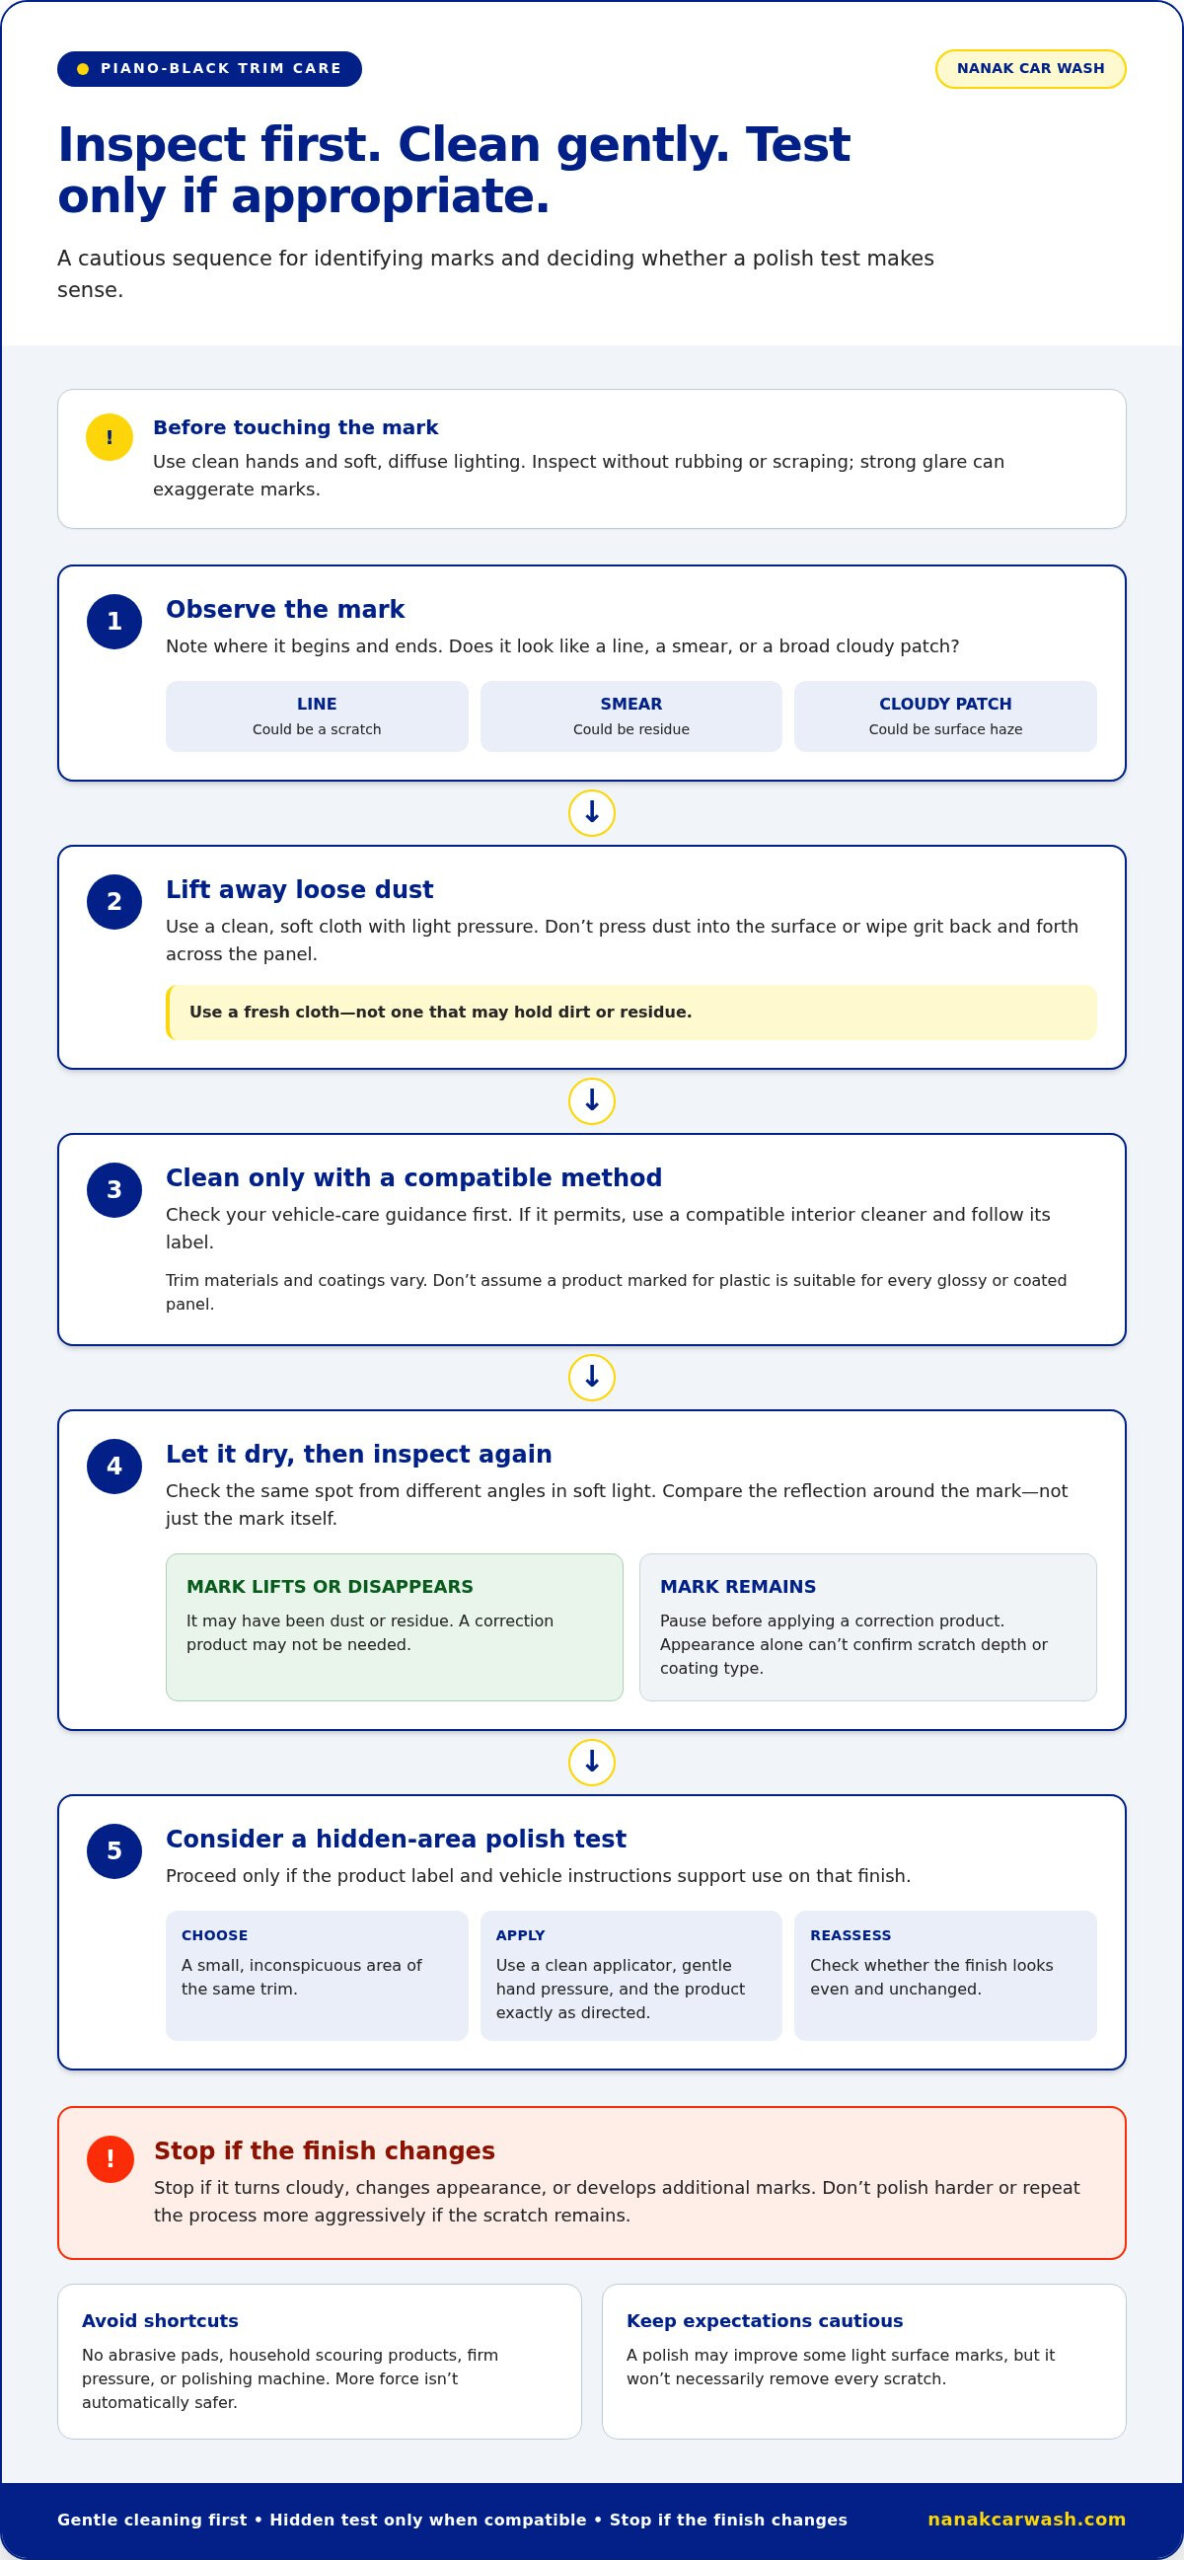
Use this inspection sequence:
- Look over the area before touching it. Note where the mark begins and ends, and whether it looks like a line, a smear or a broad cloudy patch.
- Gently remove loose debris with a clean, soft cloth. Don’t press dust into the surface or wipe with a cloth that may hold grit.
- If your vehicle-care guidance permits, clean the area using a compatible method, then let it dry fully.
- Inspect the same spot again from different angles in soft light. Compare the reflection around the mark, not just the mark itself.
A fingerprint or residue may lift during cleaning, while a scratch usually remains visible in the finish. The difference isn’t always obvious, though. A mark can also look less noticeable from one angle, so don’t rely on a quick glance to diagnose it.
What makes piano-black trim easy to mark?
The highly reflective surface makes small marks easy to notice. Direct sun or a bright beam can make them appear more pronounced. Trim materials and coatings vary between vehicles, even when the finish looks similar. If you’re unsure what the panel is made of or how it’s coated, consult your vehicle-care guidance before using a cleaner or polish.
Keep your assessment cautious. Appearance alone can’t confirm the trim’s material, coating type or scratch depth. A line that seems minor from one angle may be more visible from another, while a cloudy reflection may not be a scratch at all. Don’t use a fingernail, sharp object or aggressive rubbing to test it. These checks can add marks or worsen the finish.
If gentle cleaning doesn’t remove the mark, note what you see and pause before applying a correction product. Identifying the mark is useful, but it doesn’t prove that a particular polishing method is safe for that panel. Let the vehicle’s care instructions and the result of a careful inspection guide your next step.
How to Remove Light Scratches from Piano-Black Trim Carefully
Start with the least aggressive option. A mark that looks like a scratch may be dust or residue, and polishing before cleaning can drag particles across the glossy surface. Cleaning and correction are separate steps: removing a film may improve the appearance, but it doesn’t mean the scratch itself has been removed.
If you’re considering how to remove scratches from piano black interior trim, first read the vehicle-care guidance and the cleaner or polish label. A plastic polish is an option only if it’s suitable for that specific finish. Don’t assume a product marked for plastic is safe for every coated or glossy interior panel.
How should you clean the trim before polishing?
Remove loose dust with a clean, soft microfiber cloth and light pressure. If you see grit, don’t wipe it back and forth across the panel. Lift it away carefully, then use a compatible interior cleaner only if the vehicle guidance permits it. Follow the cleaner’s label, and use a fresh cloth rather than one that may hold dirt or residue.
Let the surface dry fully before inspecting it again. This makes it easier to distinguish the mark from dampness or cleaner residue. Keep cleaning separate from polishing. If the mark disappears after cleaning, there may be no reason to apply a correction product.
How do you test a trim-safe polish?
Proceed only if the product label and vehicle instructions support its use on the finish. Choose a small, inconspicuous area of the same trim, apply the product exactly as directed, and use a clean applicator with gentle hand pressure. Don’t add extra product, extend the test or polish harder to force a visible change.
- Clean: Remove loose dust and surface residue using compatible materials.
- Dry: Let the panel dry completely before judging the mark.
- Inspect: Check whether the mark remains and whether the finish looks even.
- Test: If the guidance allows, test the polish on a hidden spot and follow its label precisely.
- Reassess: Stop if the finish turns cloudy, changes appearance or develops additional marks.
Don’t use abrasive pads, household scouring products, firm pressure or a polishing machine as a shortcut. More force isn’t automatically more effective. It can leave a delicate surface hazy or uneven, making the result harder to address than the original mark. If the test causes an unwanted change, don’t continue across the visible area.
If the finish stays unchanged but the scratch remains, don’t repeat the process more aggressively. A polish may improve the appearance of some light surface marks, but it won’t necessarily remove every scratch. For help keeping the rest of the cabin clean, Nanak Car Wash offers interior cleaning through car detailing.
DIY Polishing vs. Professional Help for Piano-Black Scratches
Choose your next step based on the mark, the finish and how much risk you’re willing to accept. A cautious hand test may be reasonable for an apparently superficial mark, but it can’t guarantee a repair. A professional assessment may help clarify whether the issue is residue, a surface mark or damage. Leaving a minor mark alone is also a valid choice if polishing could make the panel look worse.
A stronger polish or machine isn’t automatically safer or more effective. Piano-black finishes can be delicate, and aggressive correction may change the surface or create visible haze. Deep, sharp marks, peeling or damaged coating are unlikely to respond predictably to surface polishing. Don’t keep escalating the method because an initial attempt didn’t make the mark disappear.
When is a small DIY test reasonable?
Consider a small hand test only if the mark appears superficial and the cleaner or polish is compatible with the specific finish according to its label and your vehicle-care guidance. Test an inconspicuous spot first. If the test area remains unchanged and the instructions allow it, decide whether to proceed cautiously. Stop if the result is unclear or the surface changes.
Use this comparison to weigh your options:
- Mark appears superficial, product compatibility is clear, and you accept some risk: A cautious hand test may be reasonable if the hidden-area test is successful.
- Depth or finish is uncertain, or the test result is hard to judge: Pause before attempting broader correction.
- The mark is minor and you’d rather avoid changing the finish: Leave it alone after cleaning. A visible mark isn’t always worth the risk of polishing.
When should you avoid polishing and seek an assessment?
Stop if you see a deep groove, peeling, cracks or obvious coating damage. Also pause if you can’t identify the trim material or finish, or if even a gentle test changes its appearance. An assessment can help distinguish residue or cleaning needs from damage that might require correction. It can also help you decide whether to stop or leave the mark as it is.
Assess the whole area, not just the scratch. A mark crossing a panel edge, sitting beside a seam or appearing alongside peeling may call for a different approach from a faint line on an intact, even surface. Don’t try to flatten raised edges, fill a groove or mask damage with repeated polishing. These actions can affect more of the panel than the original mark.
If your main question is how to remove scratches from piano black interior trim, the safest answer may be to avoid DIY correction when you can’t identify the finish or judge the result. Clean the area gently, review the vehicle-care instructions, then choose between a limited test and leaving the mark alone. Stop at the first sign of a worse finish.
A Safer Step-by-Step Piano-Black Trim Scratch Repair Routine
Follow a set order, keeping each step conditional on your vehicle-care instructions and the product label. The goal isn’t to polish until every mark disappears. It’s to avoid unnecessary contact, assess the finish at each stage and stop before an uncertain result becomes a larger problem.
What should you prepare before starting?
Gather clean, soft microfiber cloths and only a cleaner or polish labelled as suitable for the surface. Work in a clean area with enough diffuse light to inspect reflections. Before touching the trim, read the vehicle-care guidance and product directions. If either rules out the product, or compatibility remains uncertain, don’t apply it.
- Prepare the area. Move nearby items that could brush against the trim. Clean your hands, set out fresh cloths and make sure the applicator hasn’t picked up grit from another surface.
- Remove loose debris. Gently lift away visible dust. Don’t rub over particles that could be dragged along the glossy panel. If the cloth picks up dirt, switch to a clean section or a fresh cloth.
- Clean only as directed. If vehicle guidance allows, use a compatible interior cleaner according to its label. Keep cleaning separate from scratch correction. A clean panel gives you a clearer view, but doesn’t prove a scratch has been removed.
- Let the trim dry and inspect it. Check the reflection from different angles. If the mark is gone, stop there. If it remains, don’t use polish unless its directions and your vehicle-care guidance support that use.
- Test before broader application. Apply the compatible product to a small, inconspicuous area with a clean applicator and light hand contact. Follow the label exactly, then recheck the test spot.
- Apply cautiously, then stop. If the test remains unchanged and the product instructions permit it, use only the directed amount and method. Avoid repeated, forceful passes. Inspect the surface afterward, and don’t add more product to chase an unclear result.
How can you reduce the chance of new scratches?
Good handling matters as much as product choice. Use a fresh part of the cloth for each wipe, keep dirty cloths away from the panel and use light contact rather than pressing hard. Keep keys and rough objects from rubbing against the trim. Don’t make repeated passes over the same spot without a clear reason to continue.
Stop immediately if the finish turns cloudy, develops new marks, changes appearance or feels uncertain to work on. Stop, too, if the product label doesn’t clearly support the intended use. Don’t switch to a stronger compound or machine to force progress. If the mark remains or the test result is hard to judge, don’t continue correcting it yourself.
For a clean, well-maintained cabin beyond this DIY routine, explore Nanak Car Wash’s car detailing packages, which include interior cleaning.
Keeping Piano-Black Interior Trim Clean After Scratch Treatment
After any scratch treatment, keep routine care simple. Gentle cleaning can lift dust, fingerprints and everyday smudges, but it can’t guarantee scratch prevention or repair damage to a glossy finish. If you’re thinking about how to remove scratches from piano black interior trim, remember that routine cleaning and scratch correction are separate tasks. Regular care removes surface dirt without adding unnecessary friction.
How do you clean piano-black trim during regular interior care?
Use a clean, soft microfiber cloth and an interior cleaner that’s compatible with the trim. Follow the cleaner’s label and your vehicle-care instructions. Apply product to the cloth rather than directly to the panel unless the label says direct application is suitable. Wipe gently, then inspect the surface before repeating. If dust remains, switch to a clean part of the cloth instead of wiping with a dirty section.
- Clear loose debris first. Don’t drag visible grit across the glossy panel. Gently lift it away before wiping.
- Use clean materials. Keep a separate cloth for interior trim, and replace it if it picks up dirt or debris.
- Keep pressure light. Let the cloth make contact without scrubbing or repeating forceful passes.
- Check before another wipe. A fingerprint may need a gentle pass, but repeating the same motion without inspecting can create unnecessary friction.
Small habits help reduce avoidable contact. Keep keys, rough objects and dirty cloths away from the glossy trim, especially when placing items near a console. If dust or a loose particle appears, remove it promptly using a clean method that follows the vehicle’s care guidance. These steps support routine cleanliness, but can’t prevent every mark from daily use.
When can professional interior detailing help?
Interior detailing can help with general cabin cleanliness, including dust and fingerprints on interior surfaces. That’s different from correcting a scratch or damaged coating. Whether a mark can be corrected depends on the trim’s finish and the damage, so don’t assume an interior cleaning service will remove it. If the surface looks worse after treatment, stop before trying another product.
Keep expectations clear: cleaning can remove surface contamination, while a persistent scratch may remain. Nanak Car Wash’s detailing packages include interior cleaning to help maintain a clean, well-kept cabin. The Deal From $120 package includes a Shine & Protect Wash, vacuuming, thorough door and panel cleaning, buff and polish by machine, leather deep-clean, and interior and trunk shampoo. That package’s machine polishing isn’t a promise of piano-black trim scratch removal. Explore this interior car detailing guide for more on keeping your vehicle’s interior in good condition. Handle glossy trim gently between detailing visits, and don’t treat routine cleaning as a promise of scratch protection.
Choose the Next Step That Protects Your Interior
Before deciding how to remove scratches from piano black interior trim, consider what matters most: improving the mark or keeping the finish as it is. If the surface or scratch is uncertain, pause rather than escalating to stronger products or tools. A careful choice can help you avoid turning a small blemish into a larger concern.
For broader cabin care, Nanak Car Wash detailing packages include interior cleaning. The Deal From $120 package also lists buff and polish by machine, but that shouldn’t be taken as a promise of piano-black trim scratch removal. Interior detailing supports a clean cabin; scratch correction depends on the particular finish and damage.
Give your interior the attention it needs without taking unnecessary risks with delicate glossy trim. Explore Nanak Car Wash detailing services for a practical next step toward a cleaner, well-maintained vehicle.
Frequently Asked Questions
Can you remove scratches from piano-black interior trim?
Some light surface marks may become less noticeable, but not every scratch can be safely removed at home. The result depends on the finish and the depth of the damage. A fine line that remains after cleaning may respond differently from a groove or chipped coating. For how to remove scratches from piano black interior trim, use a compatible product only as directed, and stop if the finish changes.
Is toothpaste safe for removing scratches from piano-black trim?
Toothpaste isn’t a reliable choice for piano-black trim. It’s made for teeth, not an unknown automotive finish, and its polishing ingredients may affect the surface unpredictably. A small test doesn’t make an unsuitable product appropriate. Check the vehicle-care instructions and use only a product whose label supports the trim’s finish. If you can’t establish compatibility, skip polishing rather than experimenting on a visible panel.
Can a microfiber cloth scratch piano-black trim?
Yes. A cloth can contribute to marks if it’s dirty, rough or holding grit. Even soft microfiber can carry particles picked up from another surface. For example, don’t use the same cloth on dusty trim after wiping a gritty door sill. Keep a clean cloth for delicate interior surfaces, and replace it if you feel debris or see dirt trapped in the fibres.
Should you use a machine polisher on piano-black interior trim?
Don’t assume a machine polisher is appropriate for piano-black trim. A machine adds speed and pressure, making it harder to judge how the finish is responding than with a cautious hand test. Unless both the vehicle-care guidance and product instructions clearly support machine use on that specific surface, avoid it. If the mark needs more correction than you can safely assess, stop rather than escalating the method.
How do you prevent scratches on piano-black interior trim?
You can reduce avoidable contact, but you can’t guarantee the trim will stay scratch-free. Keep keys, coins and other hard objects from rubbing against the panel, and clear loose debris before wiping. For example, remove dust with a clean cloth before cleaning away a fingerprint. Store cleaning cloths separately from items that may leave grit or rough fibres on them.
What should you do if polishing makes piano-black trim cloudy?
Stop polishing as soon as the finish looks cloudy. Don’t add a stronger compound, repeat the process or try another product to hide the change. If the polish label gives instructions for removing residue, follow them only if they’re compatible with the vehicle-care guidance. Otherwise, leave the area untouched. More rubbing may create additional haze or make the finish less even.





 6600 Finch Ave W, Etobicoke, ON M9V 3Z6

 647-703-8515
 MON – SUN 8 AM to 7 PM