
You've spent half an hour vacuuming your car, but it still looks “clean-ish.” Pet hair clings to the seats, crumbs are hiding under the rails, and the floor mats look as though they've barely met a vacuum. The problem probably isn't your effort or even the machine. Professional results come from process, coverage, tool choice, and quality control.
Drivers in Ontario spend long periods in their vehicles, while routine interior cleaning often lags behind daily use. A Canadian Tire survey from 2012 found that Canadians spent an average of five hours per week in their vehicles, yet 73% cleaned their car interiors less than once every few months, as summarized in this Canadian winter salt removal guide. That gap gives grit, crumbs, pet hair, and winter debris plenty of time to settle into carpet fibres and seat seams.
These eight vacuuming tips borrow the same disciplined approach used by detailing professionals, including the workflow at Nanak Car Wash. You won't need a complicated setup. You'll need deliberate movements, the right attachment for each surface, and a final inspection that catches what your first pass missed. For a fresher finish, pair a clean interior with non-toxic scent solutions, rather than using a heavy fragrance to mask odours.
Table of Contents
- 1. Vacuum in Multiple Passes with Overlapping Strokes
- 2. Pre-Vacuum with High-Powered Dry Cleaning Before Wet Cleaning
- 3. Use Appropriate Vacuum Attachments for Different Interior Zones
- 4. Maintain Consistent Vacuum Suction Power and Filter Cleanliness
- 5. Implement Slow, Deliberate Movements for Maximum Debris Extraction
- 6. Vacuum Floor Mats and Removable Carpet Sections Separately and Thoroughly
- 7. Target Crevices and Hidden Areas with Specialized Crevice Tool Technique
- 8. Establish Quality Control Checks and Visual Inspection Standards
- 8-Point Vacuuming Tips Comparison
- Your Car's Interior Has Never Looked Better
1. Vacuum in Multiple Passes with Overlapping Strokes
A single pass often moves debris without fully lifting it. Carpet fibres bend in different directions, and grit can sit below the surface, especially on the driver's side, around pedals, and beside seat rails. Professional detailers solve this with overlapping strokes, moving across the same area more than once while changing direction as needed.
Start by dividing the vehicle into zones. Work through the front passenger area, driver's area, rear seating area, cargo space, and mats instead of sweeping the nozzle randomly around the cabin. On carpet, make one pass lengthwise, then another across the first direction. Each stroke should overlap the previous one by roughly half the nozzle's width. That coverage prevents narrow strips of untouched carpet from remaining between passes.
Practical rule: If you can still see a line of debris beside the nozzle path, your strokes aren't overlapping enough.
Use moderate pressure. Pressing too hard can restrict airflow around the nozzle and make the tool harder to control, while barely touching the carpet can leave embedded grit behind. Slow down on visible salt, sand, pet hair, and high-wear areas. A lightly soiled seat may need only a couple of controlled passes, but a family vehicle or rideshare car may need several.
Nanak Car Wash's full-service packages start from $29.99 plus tax, and careful interior vacuuming helps make that service feel complete rather than rushed. The same principle works at home. If you're cleaning between delivery or rideshare shifts, a consistent overlapping pattern produces a better reset than repeatedly circling the same obvious crumbs.
2. Pre-Vacuum with High-Powered Dry Cleaning Before Wet Cleaning
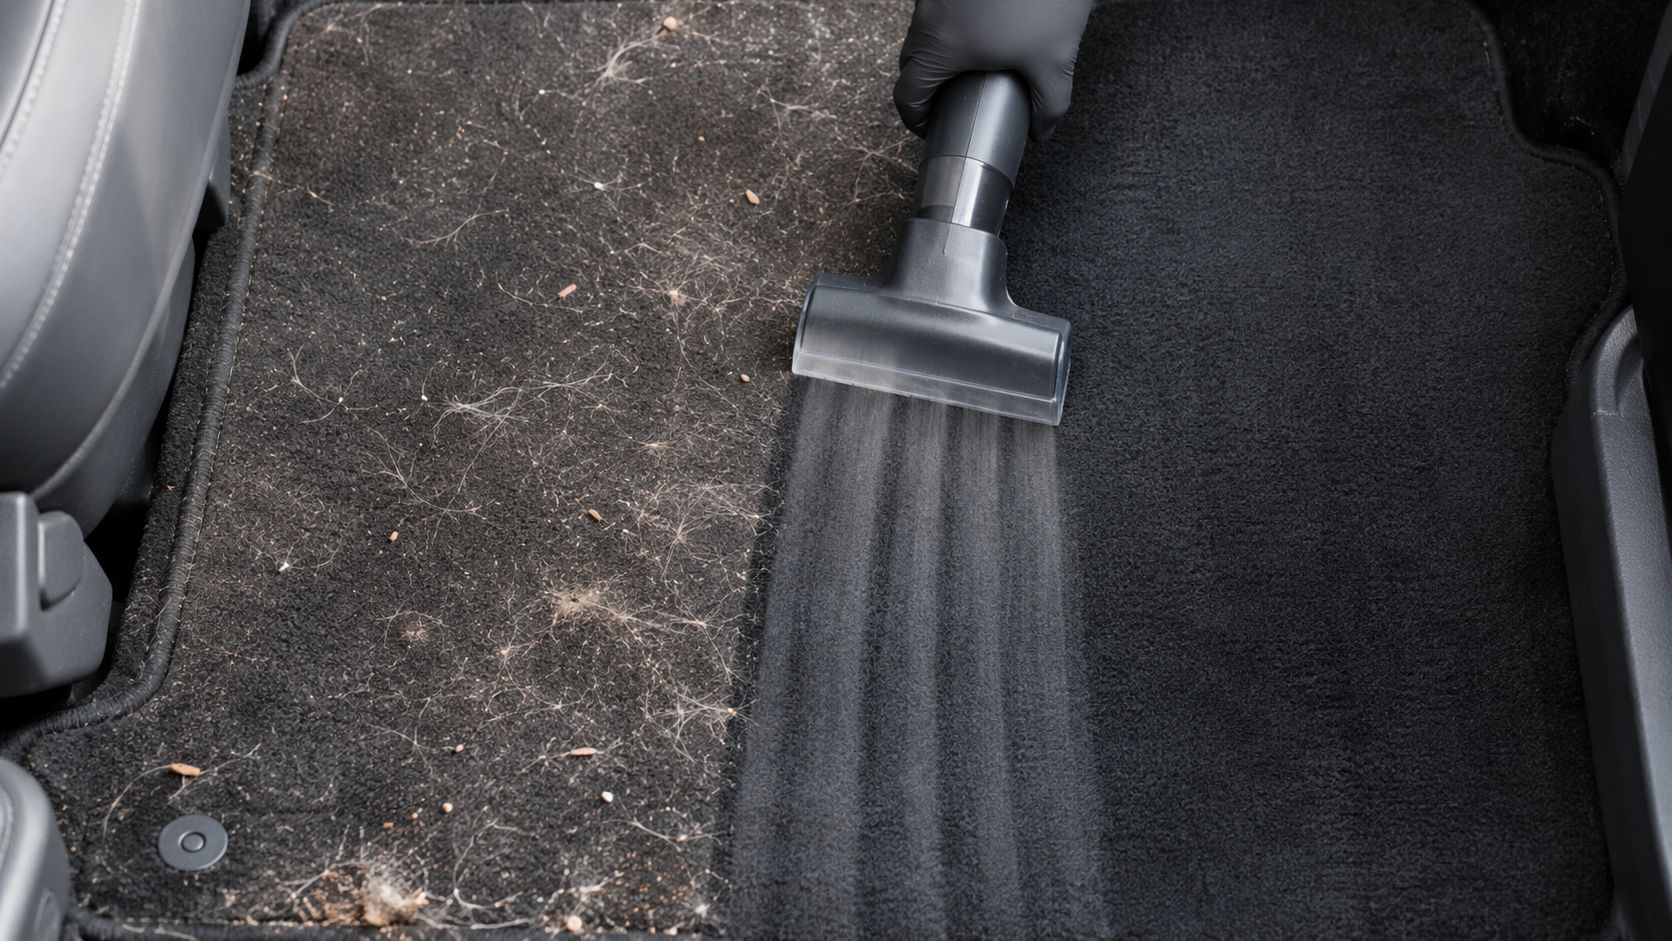
Wet cleaning should never be the first response to a heavily soiled interior. If you shampoo carpet before removing loose dirt, you can turn dust, sand, salt, and crumbs into a damp residue that spreads through the fibres. Dry vacuuming first keeps the cleaning solution focused on stains and embedded soil instead of creating a muddy layer.
Remove loose objects, open the doors, and take out the mats. Start with the seats and upper surfaces, then move down to the carpet and footwells. Give special attention to cup holders, door pockets, console edges, seat seams, and the spaces beside the centre console. These areas often hold dry debris that can fall onto freshly cleaned carpet if you leave them until the end.
A professional interior package may include shampooing, salt and stain removal, and leather care. The sequence matters just as much as the products. Nanak Car Wash's appointment-based interior and exterior detailing packages typically take one to four hours, depending on the vehicle and service required. That time includes preparation, extraction, drying, and finishing work, not merely spraying cleaner and vacuuming once.
Dry first, wet second
Use a vacuum with strong airflow and clean filtration. A sealed HEPA setup can be especially useful when fine dust is a concern. Canadian allergy guidance highlights that HEPA filtration captures 99.97% of particles as small as 0.3 microns, while British Columbia health guidance also points to HEPA or double-thickness bags as ways to reduce the escape of dust-mite particles and pollen, as described in this Canadian allergy vacuum guide.
After dry vacuuming, pause before applying shampoo. This gives disturbed dust time to settle and lets you inspect the carpet under better light. Don't rush directly from a weak dry pass into wet cleaning. If pet hair remains visibly attached, deal with it before adding moisture.
3. Use Appropriate Vacuum Attachments for Different Interior Zones
A car interior isn't one surface, so one nozzle shouldn't do every job. A wide floor head can cover carpet efficiently, but it won't reach a console gap. A narrow crevice tool can reach beneath a seat, yet it may scratch trim or pull aggressively at delicate upholstery if you force it into the wrong place.
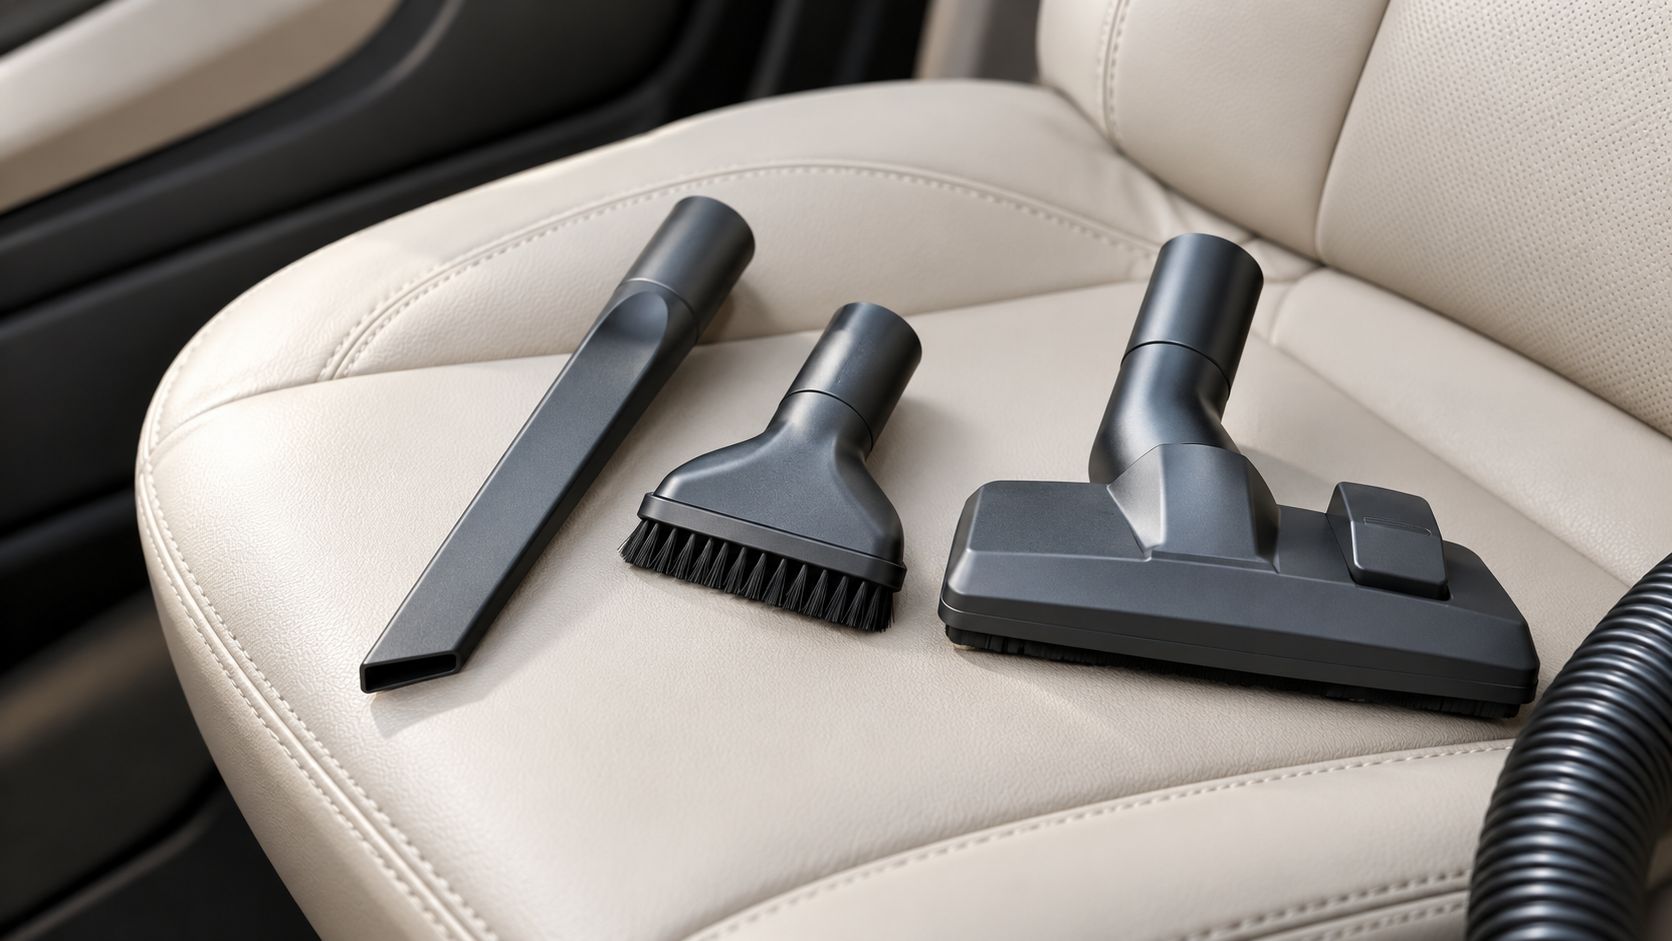
Use the attachment as a way to control both coverage and pressure. A floor nozzle suits broad carpeted areas and removable mats. An upholstery brush works well on fabric seats, door inserts, and softer trim because its bristles loosen hair and dust while keeping the hard plastic edge away from the surface. A crevice tool handles seat tracks, console seams, cup holders, and narrow door pockets.
Professional-grade systems from brands such as Bissell or Dyson often include several heads, but the brand matters less than the design and condition of the attachment. A cracked nozzle can snag fabric. A brush packed with pet hair can transfer that hair from one zone to another. Clean the tool before moving from a heavily soiled mat to a light-coloured seat.
Match the tool to the zone
- Broad carpet: Use a floor head and make overlapping passes without grinding the nozzle into the fibres.
- Fabric seats: Choose an upholstery brush, then work along seams and stitching with light pressure.
- Hard trim: Use a soft brush or controlled crevice tool. Keep the nozzle edge from dragging across glossy surfaces.
- Console gaps: Use a narrow crevice attachment, but don't wedge it tightly into a seam.
- Pet hair: Combine brush agitation with suction. Suction alone may glide over hair that has wrapped around fabric fibres.
Large SUVs, vans, and pickups demand more reach and capacity than a quick sedan reset. Canadian vacuum market data identifies canister vacuums as the largest segment in 2025, while drum vacuums are projected as the fastest-growing segment through 2033, according to this Canada vacuum cleaner market outlook. For a quick clean, a cordless stick can be convenient. For a large, sandy, or hair-heavy interior, a higher-capacity canister or wet/dry unit is usually the better trade-off.
4. Maintain Consistent Vacuum Suction Power and Filter Cleanliness
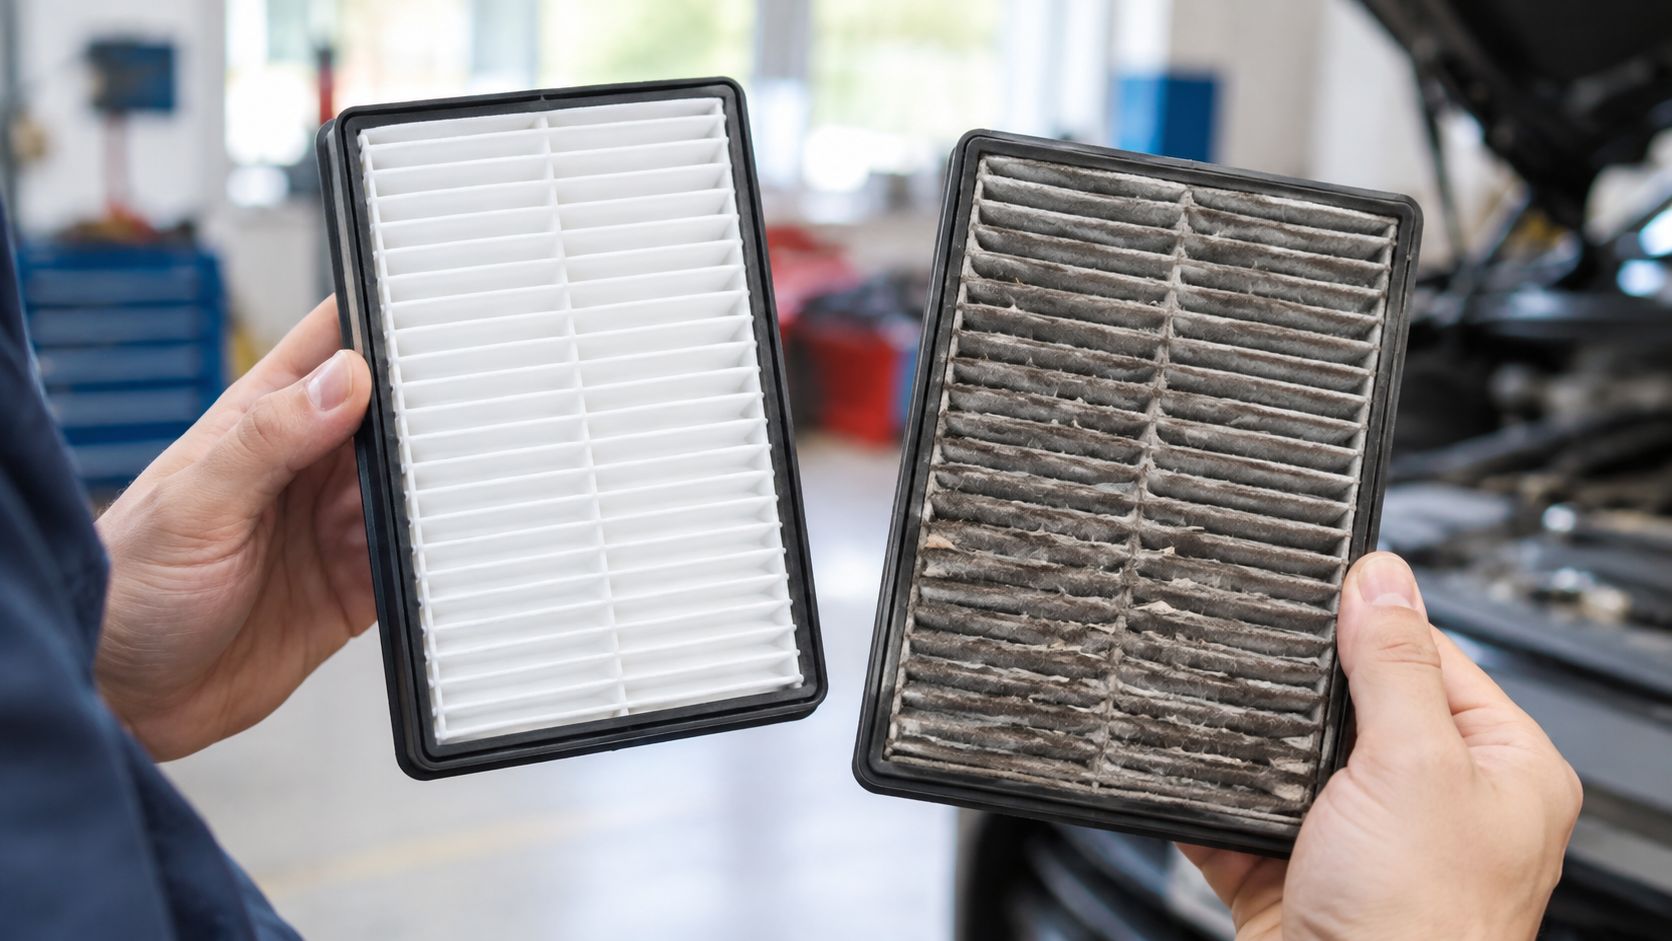
A powerful vacuum with a clogged filter becomes a slow, frustrating machine. You'll hear the motor working, but the nozzle won't lift debris as effectively. The operator then compensates by making extra passes, pressing harder, or moving faster, and all three responses can reduce the final quality.
Check the filter, bag, canister, hose, and brush head before cleaning begins. Fine dust can restrict airflow, while pet hair and threads can block the hose or wrap around a rotating brush. Empty the canister before it becomes overloaded, and follow the manufacturer's instructions for washing or replacing filters. Never reinstall a washable filter while it's still damp.
For allergy-sensitive households, filtration deserves more attention than a marketing label alone. The machine should keep collected dust contained, and disposal should happen carefully. Emptying a dusty canister inside the cabin puts the material back into the air you've just cleaned.
A vacuum can't compensate for neglected maintenance. Clean equipment is part of the detailing process, not an optional extra.
Operators also need consistency. Nanak Car Wash offers free vacuums at participating locations, and express wash packages start from $9.99 plus tax. A quick service depends on equipment that delivers dependable suction every time. The same applies to a home machine. If you notice a drop in airflow, stop and inspect it instead of accepting a weaker result.
Keep a simple maintenance record if you clean several vehicles. Note filter checks, hose blockages, brush cleaning, and repairs. This is particularly useful for small fleets, dealerships, rental vehicles, or anyone cleaning multiple family and work vehicles. A cordless model can be useful for rapid resets, but Canadian market analysis places standard cordless stick run times at 40 to 60 minutes on standard mode, as noted in this Canadian vacuum cleaner market analysis. Match the machine to the job rather than expecting a compact unit to handle every deep clean.
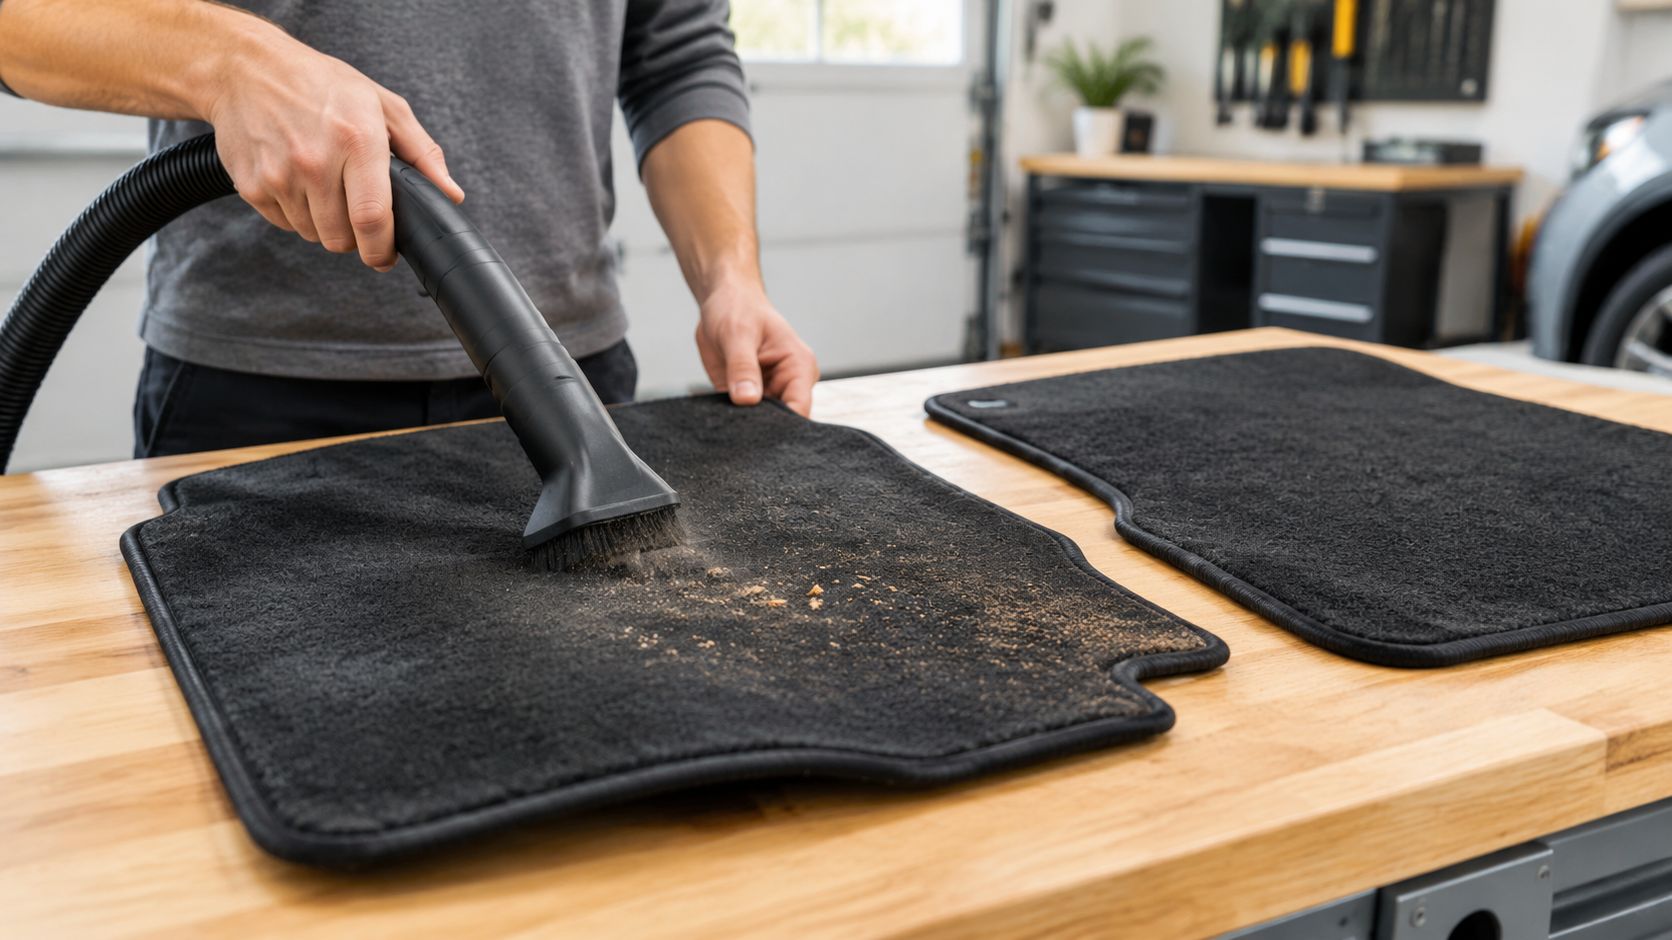
5. Implement Slow, Deliberate Movements for Maximum Debris Extraction
Fast vacuuming feels productive because you cover more ground. It also gives suction less time to pull material from carpet fibres, seat seams, and textured mats. Professional work looks unhurried because the operator controls the nozzle instead of letting the nozzle skim over the surface.
Hold the hose comfortably and keep the head flat where the surface allows it. Move in steady strokes, then pause briefly over visible grit or hair. On dense carpet, use slower passes than you would on a smooth seat. On delicate upholstery, reduce pressure and let the brush do the agitation.
This pace matters most in vehicles exposed to road salt, sand, moisture, and constant foot traffic. CAA North & East Ontario recommends vacuuming the entire interior and using attachments for seat crevices and cup holders in its ultimate car interior cleaning guide. Those areas often need more than a quick sweep because debris collects where passengers repeatedly place shoes, bags, and hands.
Spend time where the vehicle works hardest
Prioritize the driver's footwell, pedal area, mat edges, rear seat footwells, cargo space, and any place where pet hair is visible. A lightly used passenger seat doesn't need the same number of passes as a work truck's floor. Adjusting your pace by contamination level is more efficient than cleaning every zone with identical intensity.
For rideshare and delivery drivers, a slow pass during a scheduled break can prevent a full interior recovery later. If the vehicle already has embedded salt or staining, deliberate dry vacuuming prepares the surface for professional shampooing and extraction. Nanak's detailing services include salt and stain removal, but extraction works better when loose soil has already been removed.
Don't confuse careful technique with wasted time. A rushed pass often creates rework. A controlled pass removes more debris in the first cycle and makes the inspection easier.
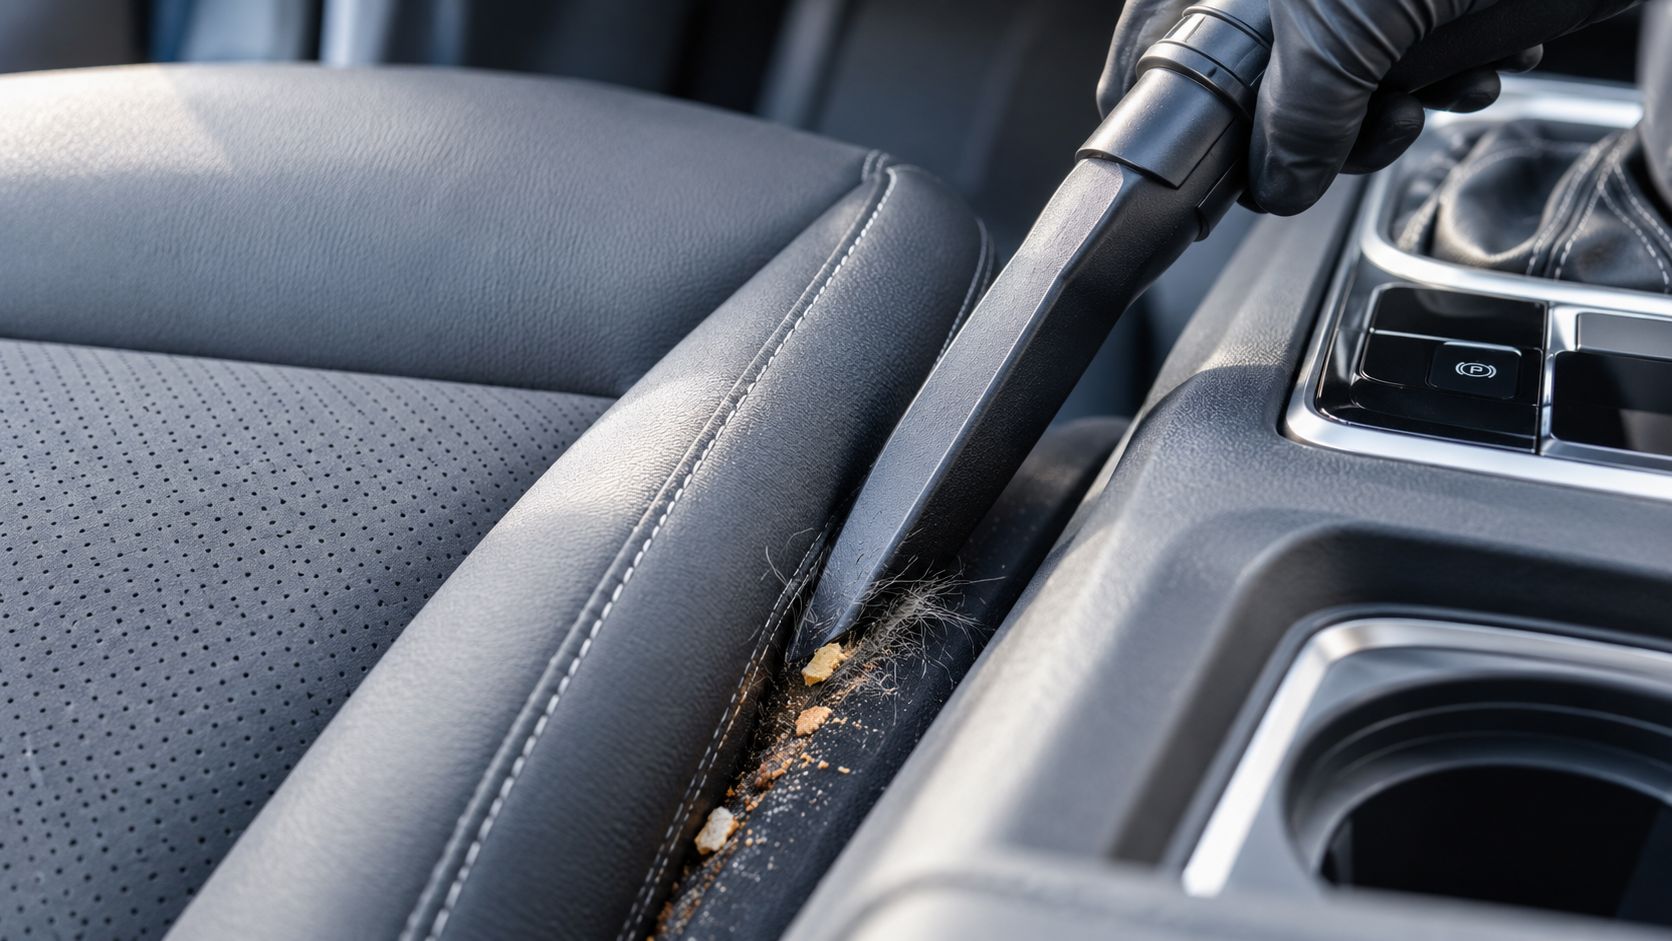
6. Vacuum Floor Mats and Removable Carpet Sections Separately and Thoroughly
Floor mats are the dirtiest removable part of many interiors, yet people often vacuum them while they're still installed. That approach leaves debris underneath, limits the angle of the nozzle, and forces you to work around seat rails and pedals. Remove the mats early, and you can clean both the mats and the floor beneath them properly.
Take out each mat carefully and keep track of its original position. Shake loose sand and dry debris outdoors or over a surface that can be cleaned. Then vacuum the top, edges, underside, and attachment points. Rubber mats may release salt and grit more easily, while carpet mats usually need slow overlapping passes to lift debris from the pile.
Clean the floor beneath the mat
With the mats out, inspect the exposed footwell. Vacuum along the mat's outline, beside the seat rails, under the front edge of the seat, and around the pedals. Dirt often forms a border where the mat stops, and that line can remain visible even after the centre of the footwell looks clean.
Ontario vehicles face a constant mix of road salt, sand, moisture, and winter grit. Loose debris can also stay damp beneath a mat, so check for moisture before reinstalling anything. Dry the mats fully using airflow or a suitable drying area. Don't trap moisture against carpet or underlay.
The professional difference: Removing the mat turns a restricted floor clean into a full-access clean. You can reach the edges, inspect the hidden floor, and treat the mat as its own surface.
For deep detailing, mat removal also improves the wet-cleaning sequence. Nanak's interior and exterior detailing packages can include carpet and seat shampooing, salt and stain removal, and vent and crevice blowout. Separate mat treatment supports that broader process because the cabin floor and the removable sections can be cleaned, dried, and checked independently.
If a mat is worn, curled, or damaged, aggressive brushing may make the problem worse. Use sensible pressure, particularly around stitched edges and anchor openings. A clean mat should sit flat and secure when returned to the vehicle.
7. Target Crevices and Hidden Areas with Specialized Crevice Tool Technique
Most “almost clean” interiors fail in the same places. Dust sits around air vents, crumbs lodge between seats, and hair collects in seat tracks. Cup holders develop a ring of grit, while door pockets hide the debris passengers have dropped over repeated trips.
Use a crevice tool with purpose, not as a final decorative sweep. Start at the highest hidden areas, such as vents and dashboard edges, then work down through the console, seat seams, rails, door pockets, and cup holders. If you clean lower areas first, falling dust can force you to repeat the work.
Build a repeatable route:
- Vents and dashboard edges: Use a soft brush or controlled airflow to loosen dust before suction.
- Console gaps: Guide the crevice tool along the opening without forcing the tip into trim joints.
- Seat tracks: Move the seat forward and back when safe, then vacuum both exposed positions.
- Cup holders: Remove inserts where possible and clean the insert separately.
- Door pockets: Empty them first, then reach the bottom corners and hinge-side edges.
Nanak's detailing lineup specifically includes vent and crevice blowout, along with attention to door panels and cup holders in higher-tier interior work. That combination matters because blowing debris loose without capturing it can redistribute the mess. Use airflow to free trapped material, then vacuum the surrounding area immediately.
Pet hair deserves extra patience. A narrow nozzle can remove loose hair, but hair wrapped into fabric may need a soft upholstery brush or rubberized tool to pull it up before suction. Keep suction lower on delicate surfaces and watch for loose stitching, ageing foam, or fragile trim.
Rideshare and delivery vehicles need this treatment more often because passengers repeatedly use the same door pockets, cup holders, and seat areas. CAA North & East Ontario's guidance also emphasizes the entire interior, including crevices and cup holders. A clean-looking seat doesn't compensate for a dirty seat rail or sticky console gap.
8. Establish Quality Control Checks and Visual Inspection Standards
The final vacuum pass isn't the end of the job. It's the point where you verify the job. Change your viewing angle, open the doors fully, and inspect the cabin as a customer would, not as the person who has been staring at it for half an hour.
Use bright, indirect light whenever possible. Look across the carpet rather than straight down, because shadows reveal uneven coverage and flattened debris. Check the driver's footwell, seat seams, mat borders, console gaps, door pockets, cup holders, and cargo area. Run a clean hand lightly over fabric only when the material allows it, then vacuum any loosened particles.
Inspect by zone, not by impression
A professional checklist can be simple:
- Flooring: No visible sand, crumbs, hair, or salt residue.
- Seats: Seams, piping, and gaps are free of loose debris.
- Console: Storage edges, cup holders, and gear selector areas are clean.
- Doors: Pockets, lower panels, and speaker grilles receive attention.
- Vents: Dust is removed without blowing it deeper into the cabin.
- Mats: Both the mat and the floor beneath it have been checked.
Take occasional before-and-after photos when training staff or comparing results. The purpose isn't to create a dramatic claim. It's to teach the difference between a quick surface pass and consistent coverage. Multi-location operators need the same standard whether the vehicle arrives at Etobicoke, Brampton, Concord, Oshawa, or another GTA location.
Membership customers also notice consistency. Nanak Car Wash's Unlimited Wash Club is designed for repeat visits, and regular customers expect the interior experience to remain dependable. A final inspection protects that expectation by catching the missed crumb, hair cluster, or muddy edge before the vehicle leaves.
Set a clear release standard: no visible loose debris in the inspected zones, mats properly replaced, and no tools or cleaning materials left behind. If the vehicle needs shampooing, extraction, leather deep cleaning, or odour treatment, explain that vacuuming has removed dry debris but won't erase every stain or source of odour. Good quality control includes honest scope, not just a polished appearance.
8-Point Vacuuming Tips Comparison
| Technique | Implementation Complexity 🔄 | Resource Requirements ⚡ | Expected Outcomes ⭐📊 | Ideal Use Cases 📊 | Key Advantages 💡 |
|---|---|---|---|---|---|
| Vacuum in Multiple Passes with Overlapping Strokes | Moderate, requires training and consistent pattern | Low, standard vacuums, more operator time | High ⭐, better embedded dirt & pet hair removal | Full-service/detailing, pet owners, high-traffic vehicles | Systematic coverage; fewer missed spots; visible results |
| Pre-Vacuum with High-Powered Dry Cleaning Before Wet Cleaning | Moderate, sequencing dry→wet and coordination | Medium‑High, HEPA/high-power vacuums + wet equipment | Very High ⭐, reduces residue, improves shampoo effectiveness, faster drying | Detailing packages, fleets, heavily soiled SUVs/vans | Prevents contamination of solutions; saves water; faster drying |
| Use Appropriate Vacuum Attachments for Different Interior Zones | Moderate, requires attachment selection training | Medium, multiple quality attachments and storage | High ⭐, targeted cleaning, reduced surface damage | Luxury/interior-complex vehicles, cup holders, vents, upholstery | Improves access and protection; speeds targeted cleaning |
| Maintain Consistent Vacuum Suction Power and Filter Cleanliness | Moderate, routine checks, logs, scheduled maintenance | Medium, replacement filters, monitoring time and budget | High ⭐, consistent suction, longer equipment life, reliable results | All locations, free-vacuum stations, membership programs | Ensures consistent service quality; reduces downtime and complaints |
| Implement Slow, Deliberate Movements for Maximum Debris Extraction | Low‑Moderate, operator pacing discipline and training | Low, no extra gear but increased operator time per area | High ⭐, deeper extraction, fewer repeat passes | Heavily soiled cars, salt/stain removal, ride-hailing/delivery vehicles | Improves deep-clean results; can reduce overall repeat work |
| Vacuum Floor Mats and Removable Carpet Sections Separately | Moderate, removal, separate cleaning and drying steps | Medium, space, drying equipment, more time per job | Very High ⭐, reveals and removes trapped debris and salt | Ontario climate, seasonal deep cleans, detailing packages | More complete cleaning; higher perceived value and hygiene |
| Target Crevices and Hidden Areas with Specialized Crevice Tools | Moderate‑High, time-consuming; requires careful technique | Medium, variety of narrow tools and staff training | High ⭐, removes hidden debris, allergens, odor sources | Detailing tiers, pet-hair surcharge customers, rideshare vehicles | Dramatically improves perceived detail; addresses health concerns |
| Establish Quality Control Checks and Visual Inspection Standards | Moderate, checklists, audits, documentation processes | Medium, staff inspection time, photo tools, audit scheduling | High ⭐, consistent quality across locations; fewer returns | Multi-location operations, franchises, unlimited-membership models | Standardizes quality; provides feedback loop for training and improvement |
Your Car's Interior Has Never Looked Better
A professional-looking interior doesn't come from waving a vacuum around until the carpet appears darker. It comes from doing the small things in the right order: remove the mats, dry vacuum before wet cleaning, match attachments to surfaces, move slowly, overlap your strokes, reach the hidden zones, and inspect the result from more than one angle.
The biggest improvement usually comes from changing your technique rather than buying another machine. A cordless stick can handle a quick interior reset, especially when reach and convenience matter. Canadian vacuum market analysis reports battery run times of 40 to 60 minutes on standard mode, so larger vehicles and heavier jobs may call for a canister or wet/dry unit with greater capacity and more sustained airflow. Choose based on the vehicle, the soil load, and the time available.
Filtration also deserves attention. Vacuuming can improve the cabin, but poor containment or careless canister emptying can redistribute fine dust. Allergy-focused Canadian guidance centres on sealed HEPA systems, HEPA filters, or double-thickness bags, particularly when pollen and dust-mite particles are a concern. A clean nozzle with a dirty filter isn't a professional setup.
For Ontario drivers, seasonal debris makes regular upkeep especially valuable. Salt, sand, moisture, pet hair, and tracked-in grit become harder to remove after they settle into carpet and seams. A repeatable routine keeps quick cleans manageable and gives deeper services a better starting point.
You can do this work yourself, particularly if you have time and the right tools. But some interiors need more than dry vacuuming. Nanak Car Wash offers express exterior washes, full-service washes with interior vacuuming, appointment-based interior and exterior detailing, leather deep cleaning, carpet and seat shampooing, salt and stain removal, and vent and crevice blowout. Full-service packages start from $29.99 plus tax, while express exterior packages start from $9.99 plus tax.
For drivers who clean frequently, free vacuums are available at participating locations, and the Unlimited Wash Club provides a repeat-visit option with member benefits shown on the company site. Prepaid wash tickets and combo deals can also simplify regular maintenance. The practical choice depends on whether you need a fast reset, a complete wash, or a deeper interior recovery.
Give your cabin one careful inspection today. If the mats are holding winter grit, the seats are covered in pet hair, or the crevices need more attention than your home vacuum can provide, book the job instead of settling for “clean-ish.”
Visit Nanak Car Wash for express and full-service washes, free vacuums at participating locations, and professional interior detailing across the GTA. Bring these vacuuming tips with you, or let Nanak's trained team handle the mats, seams, carpets, cup holders, vents, and hard-to-reach areas for a cleaner finish that lasts.


 6600 Finch Ave W, Etobicoke, ON M9V 3Z6
 647-703-8515
 MON – SUN 8 AM to 7 PM